Popular

Jack's Gender Neutral Nursery

Boho Gender Neutral nursery

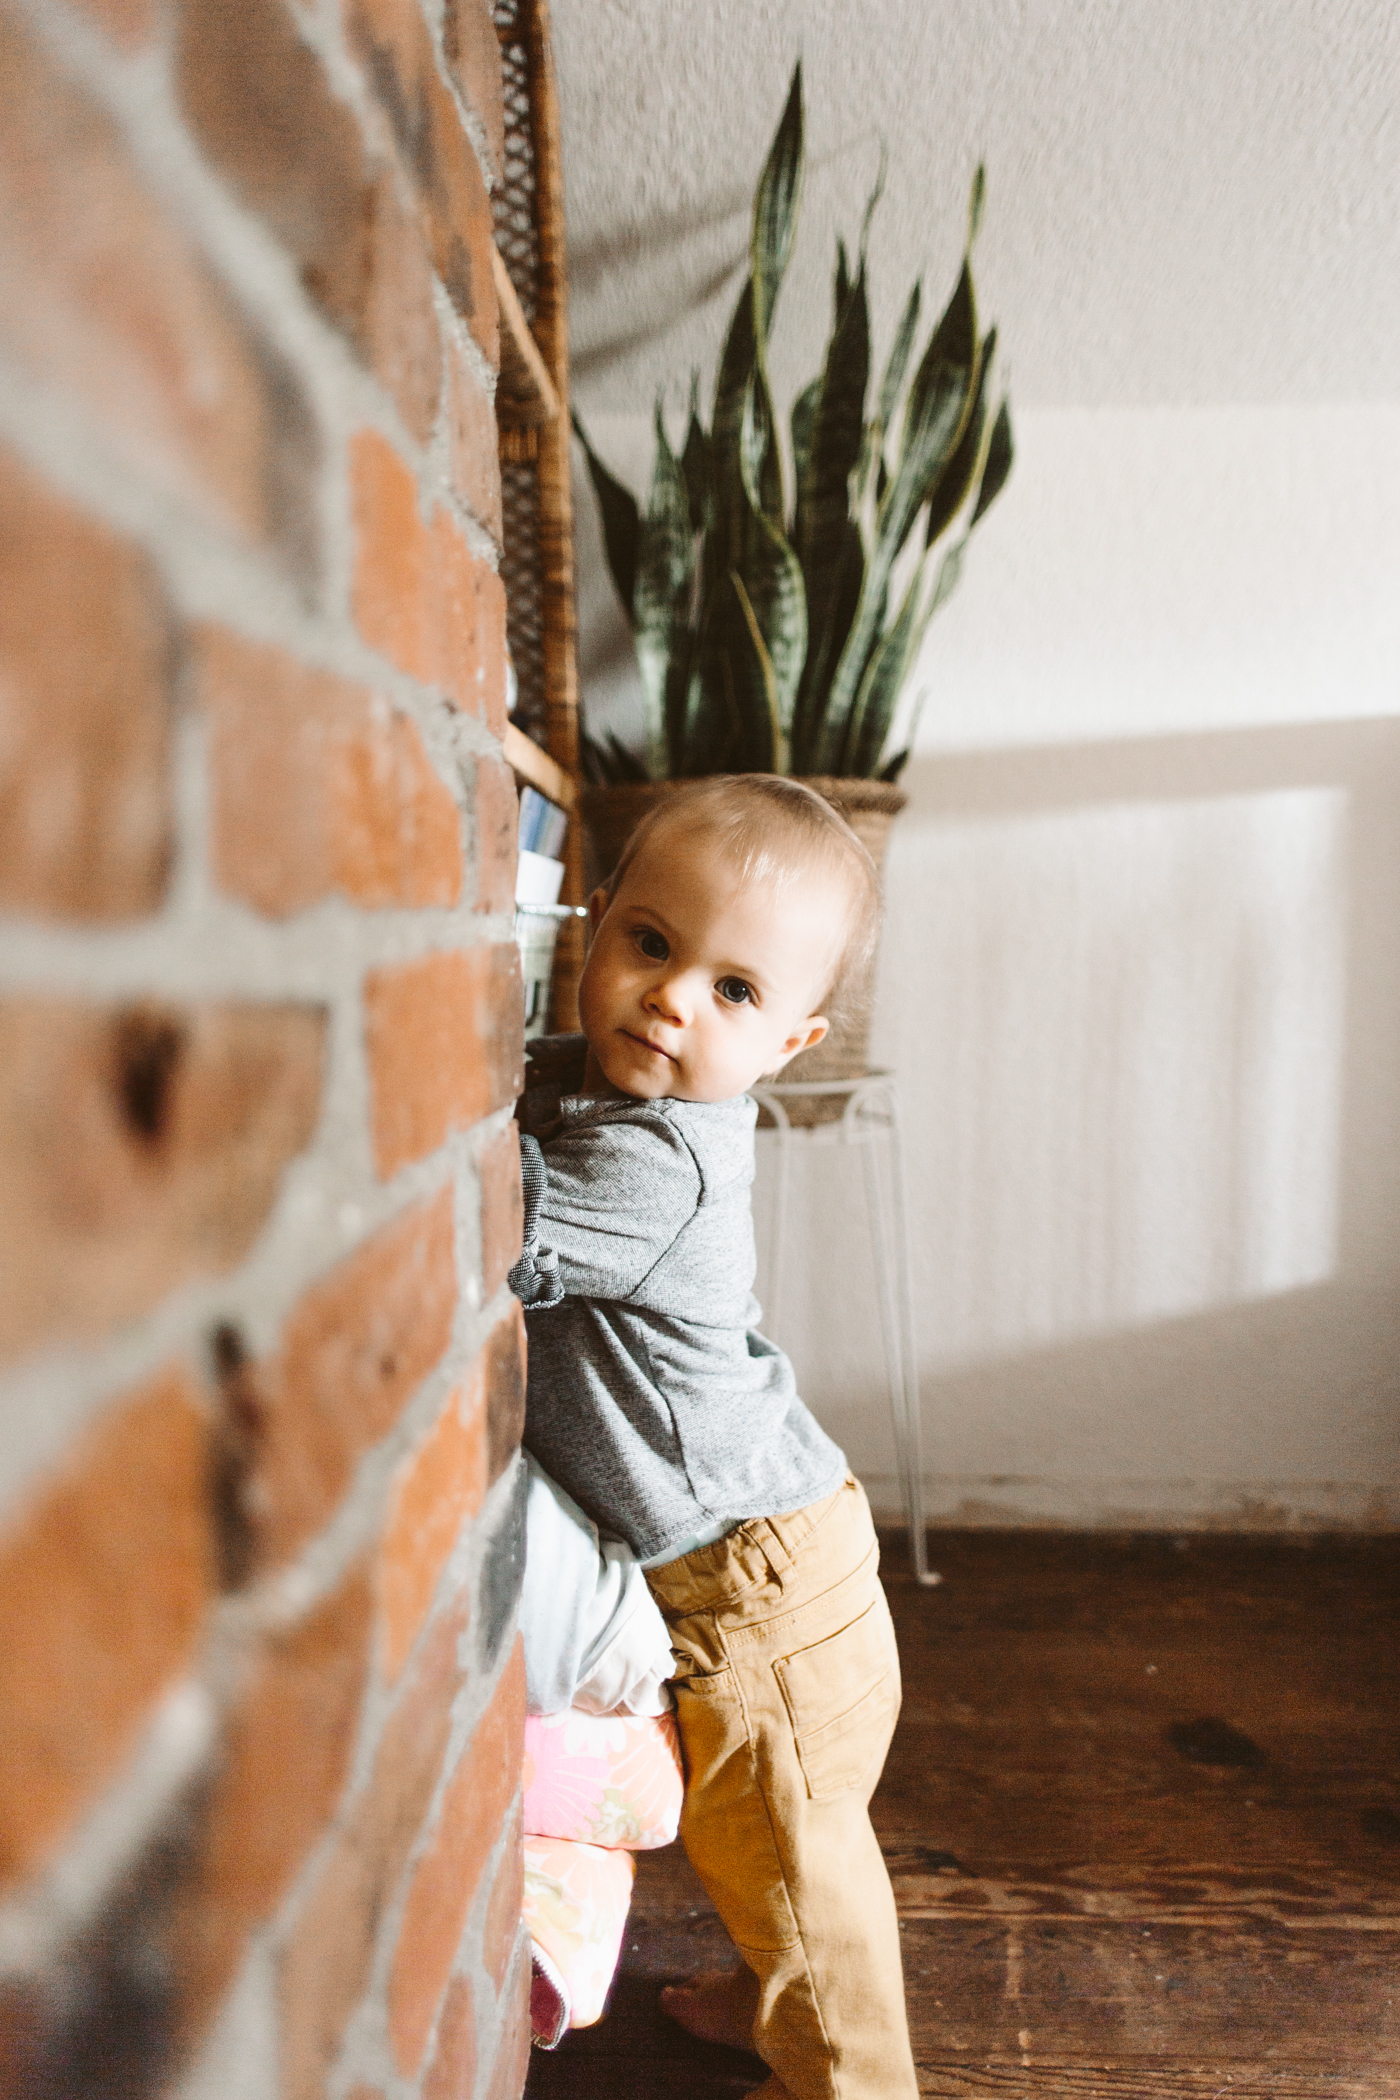
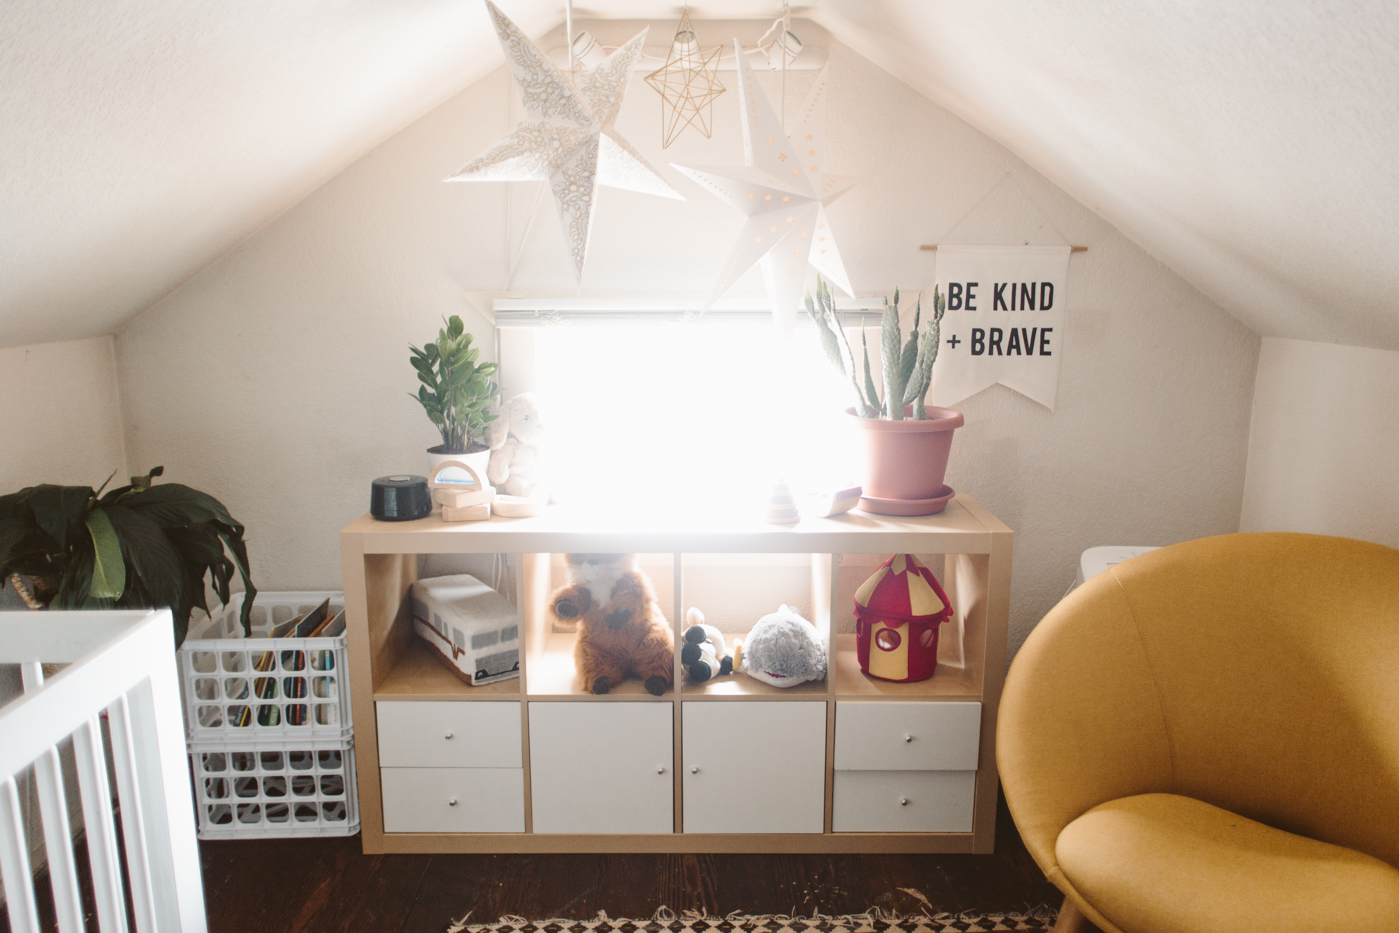
I've been doing some rearranging of Jack's room, and I'm finally liking how his little space has come together.  It can be challenging to place furniture with the angled ceilings, and so one thing I moved out of this room into the adjacent space (which is where our closet is) is his changing table.  Having that out of this space made it a little easier to work with furniture.

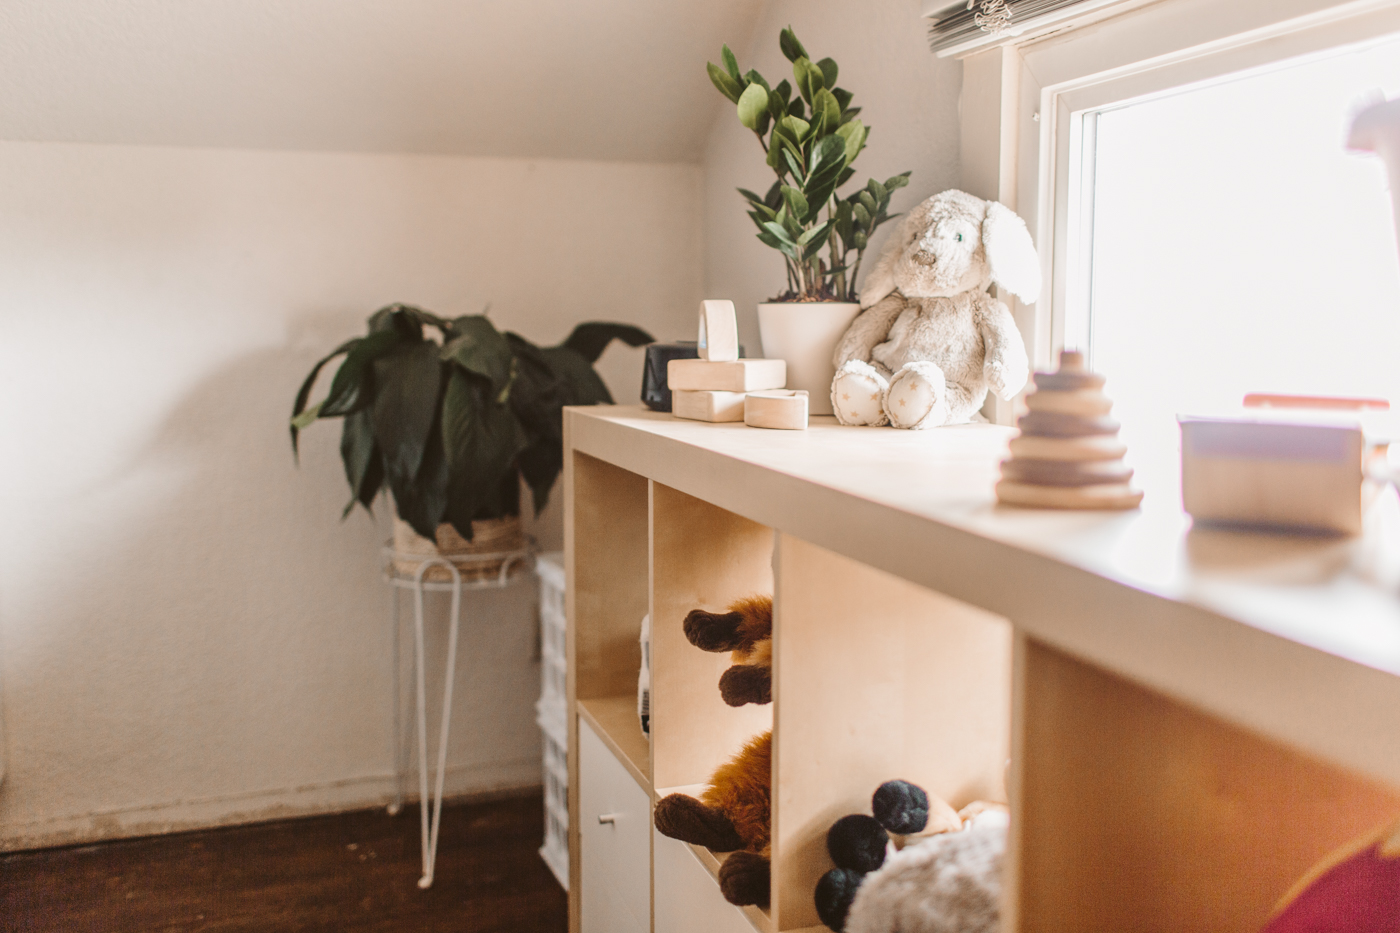
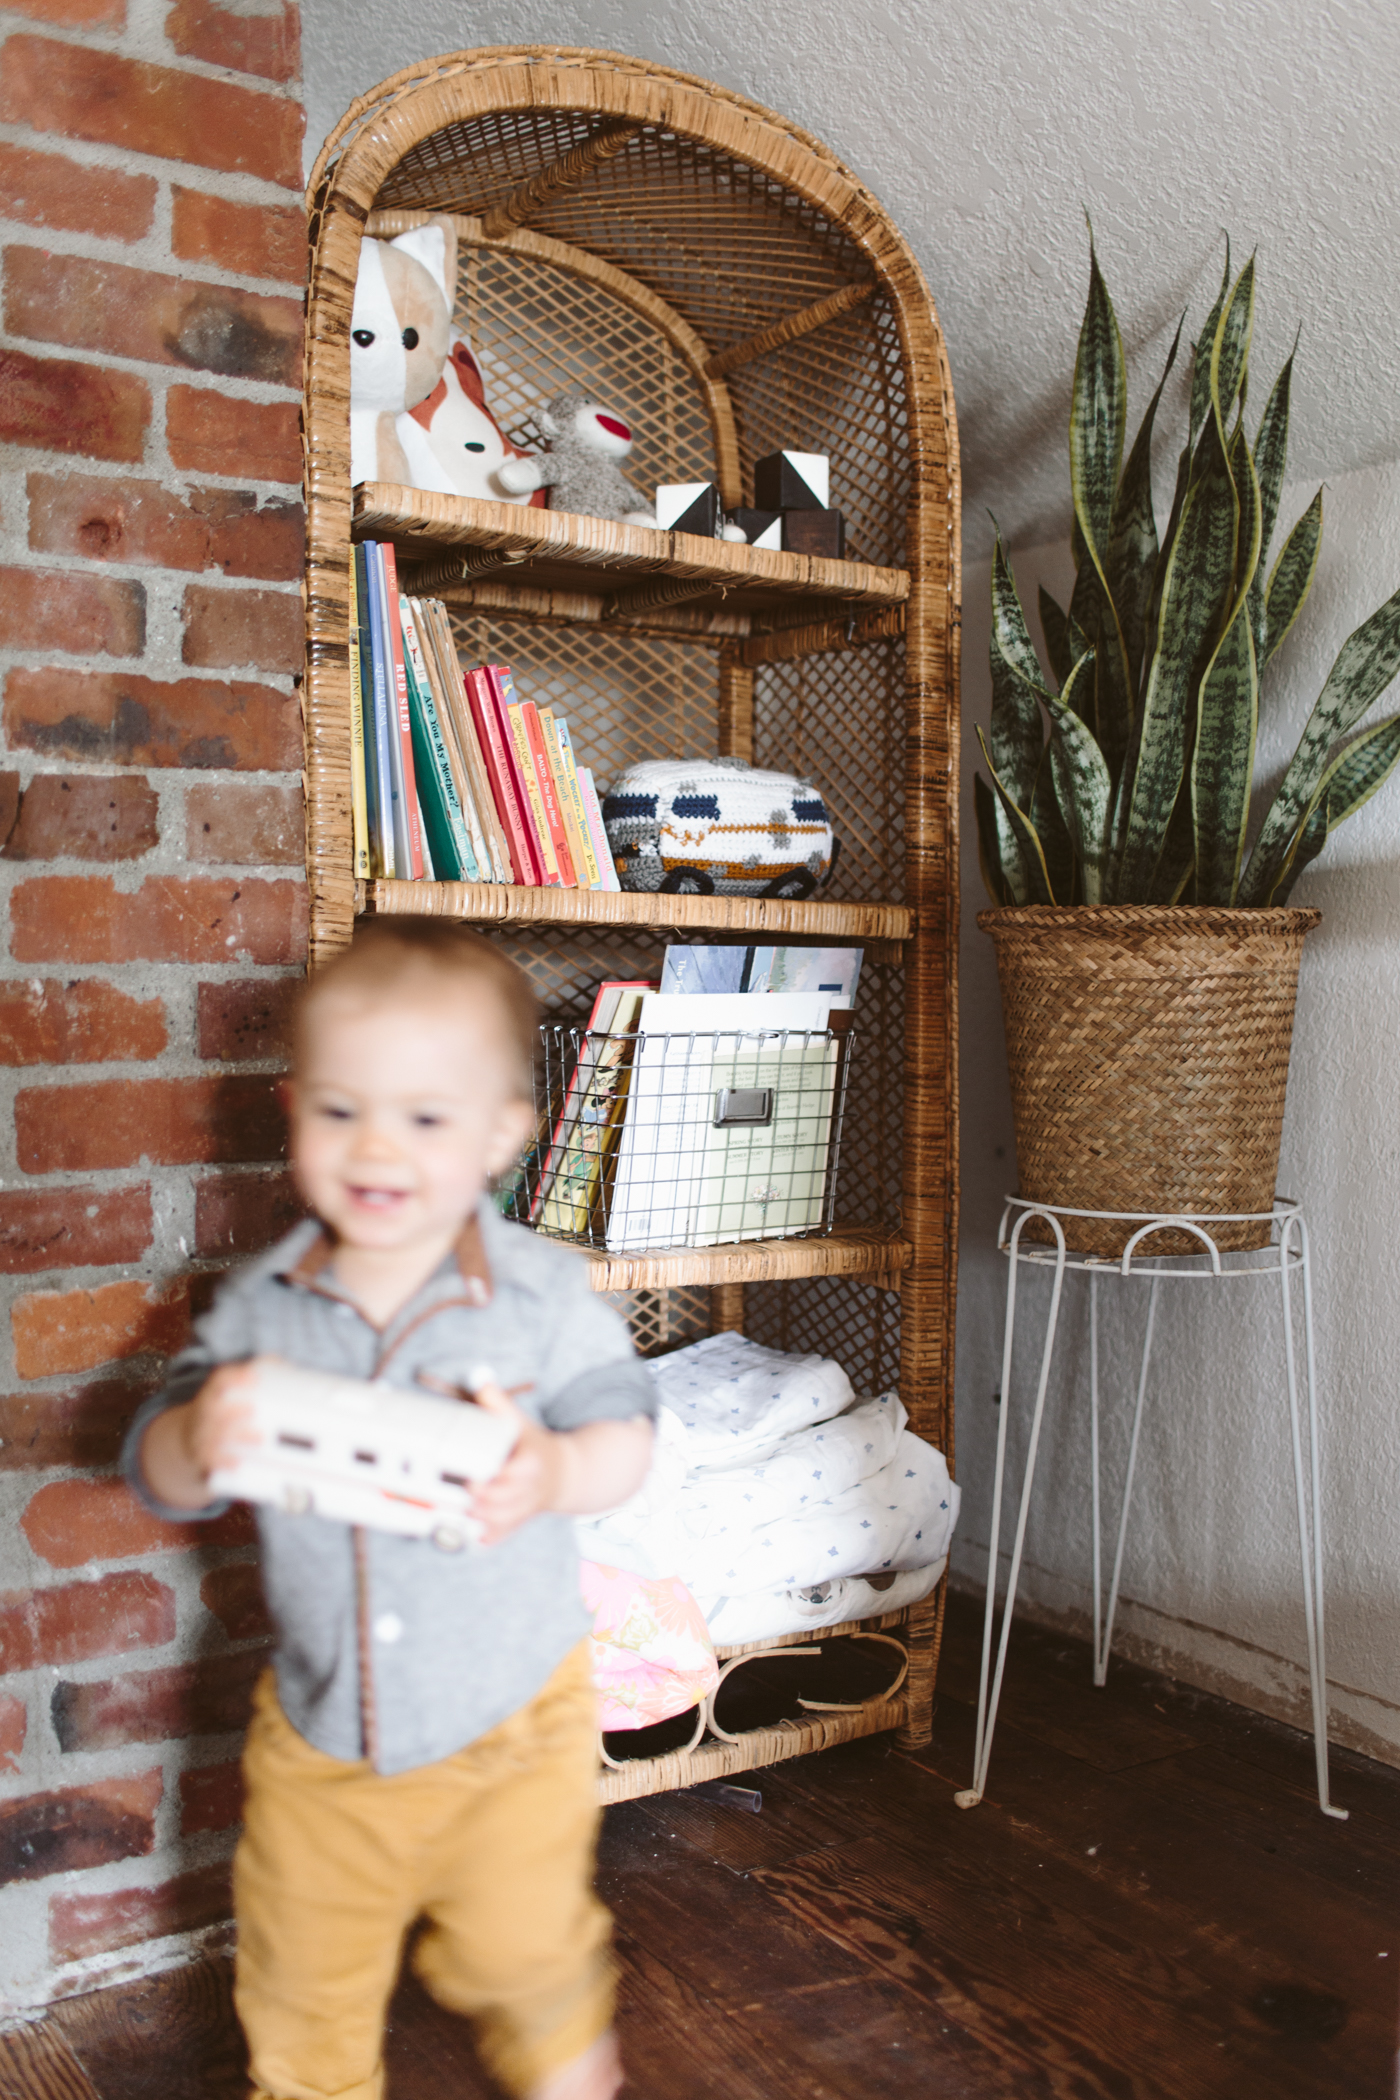
The rug, cube shelf (Ikea), rattan shelf, and crib (Babyletto) were all Craigslist finds!  And his little dresser was a cheap Target dresser which I fancied up with some Pretty Pegs legs to give it a little mid-mod flair.

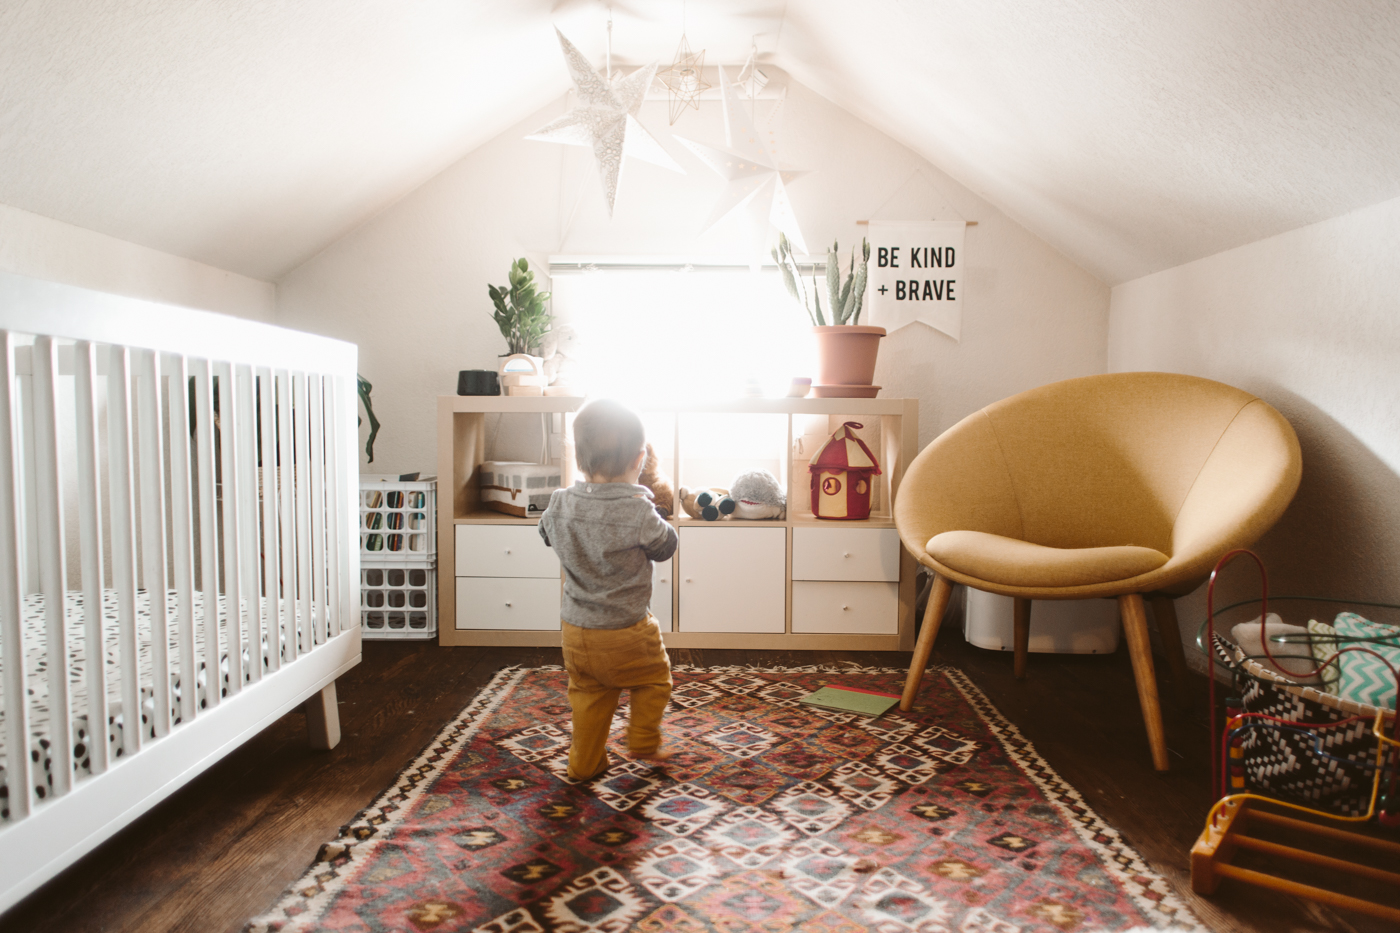
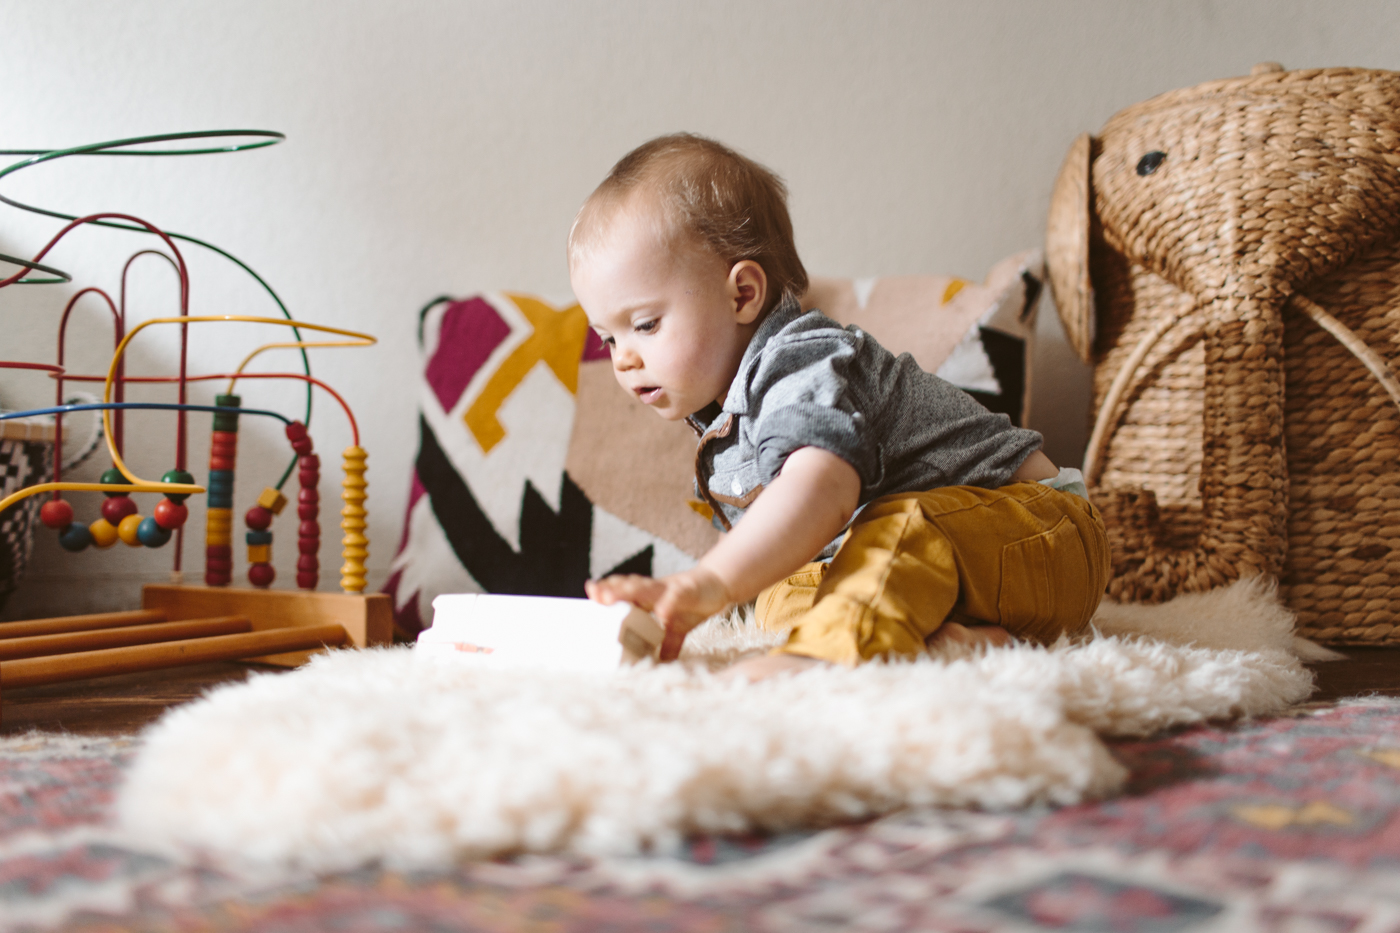
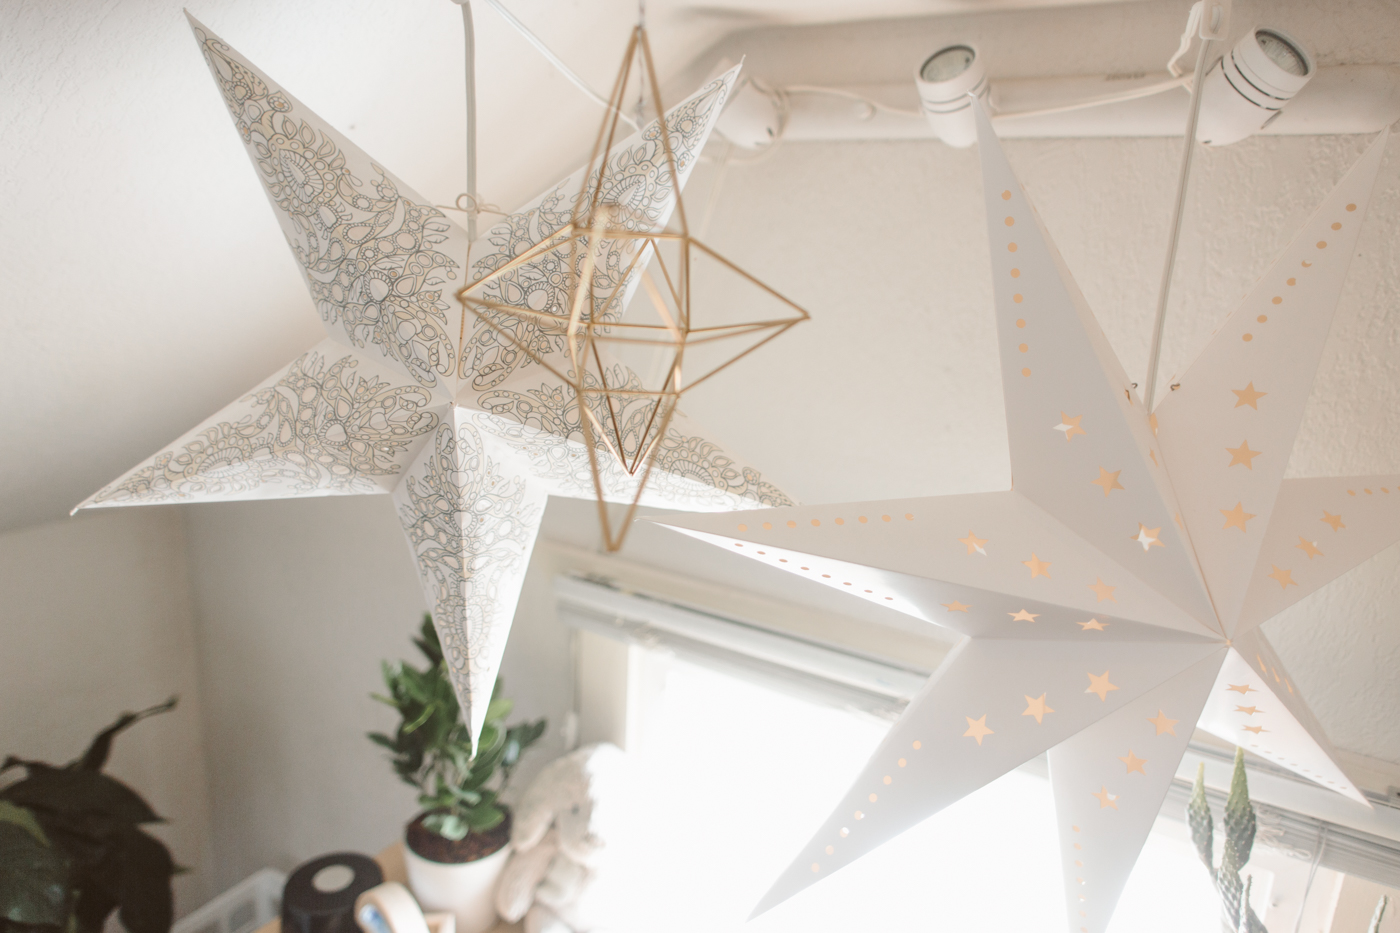
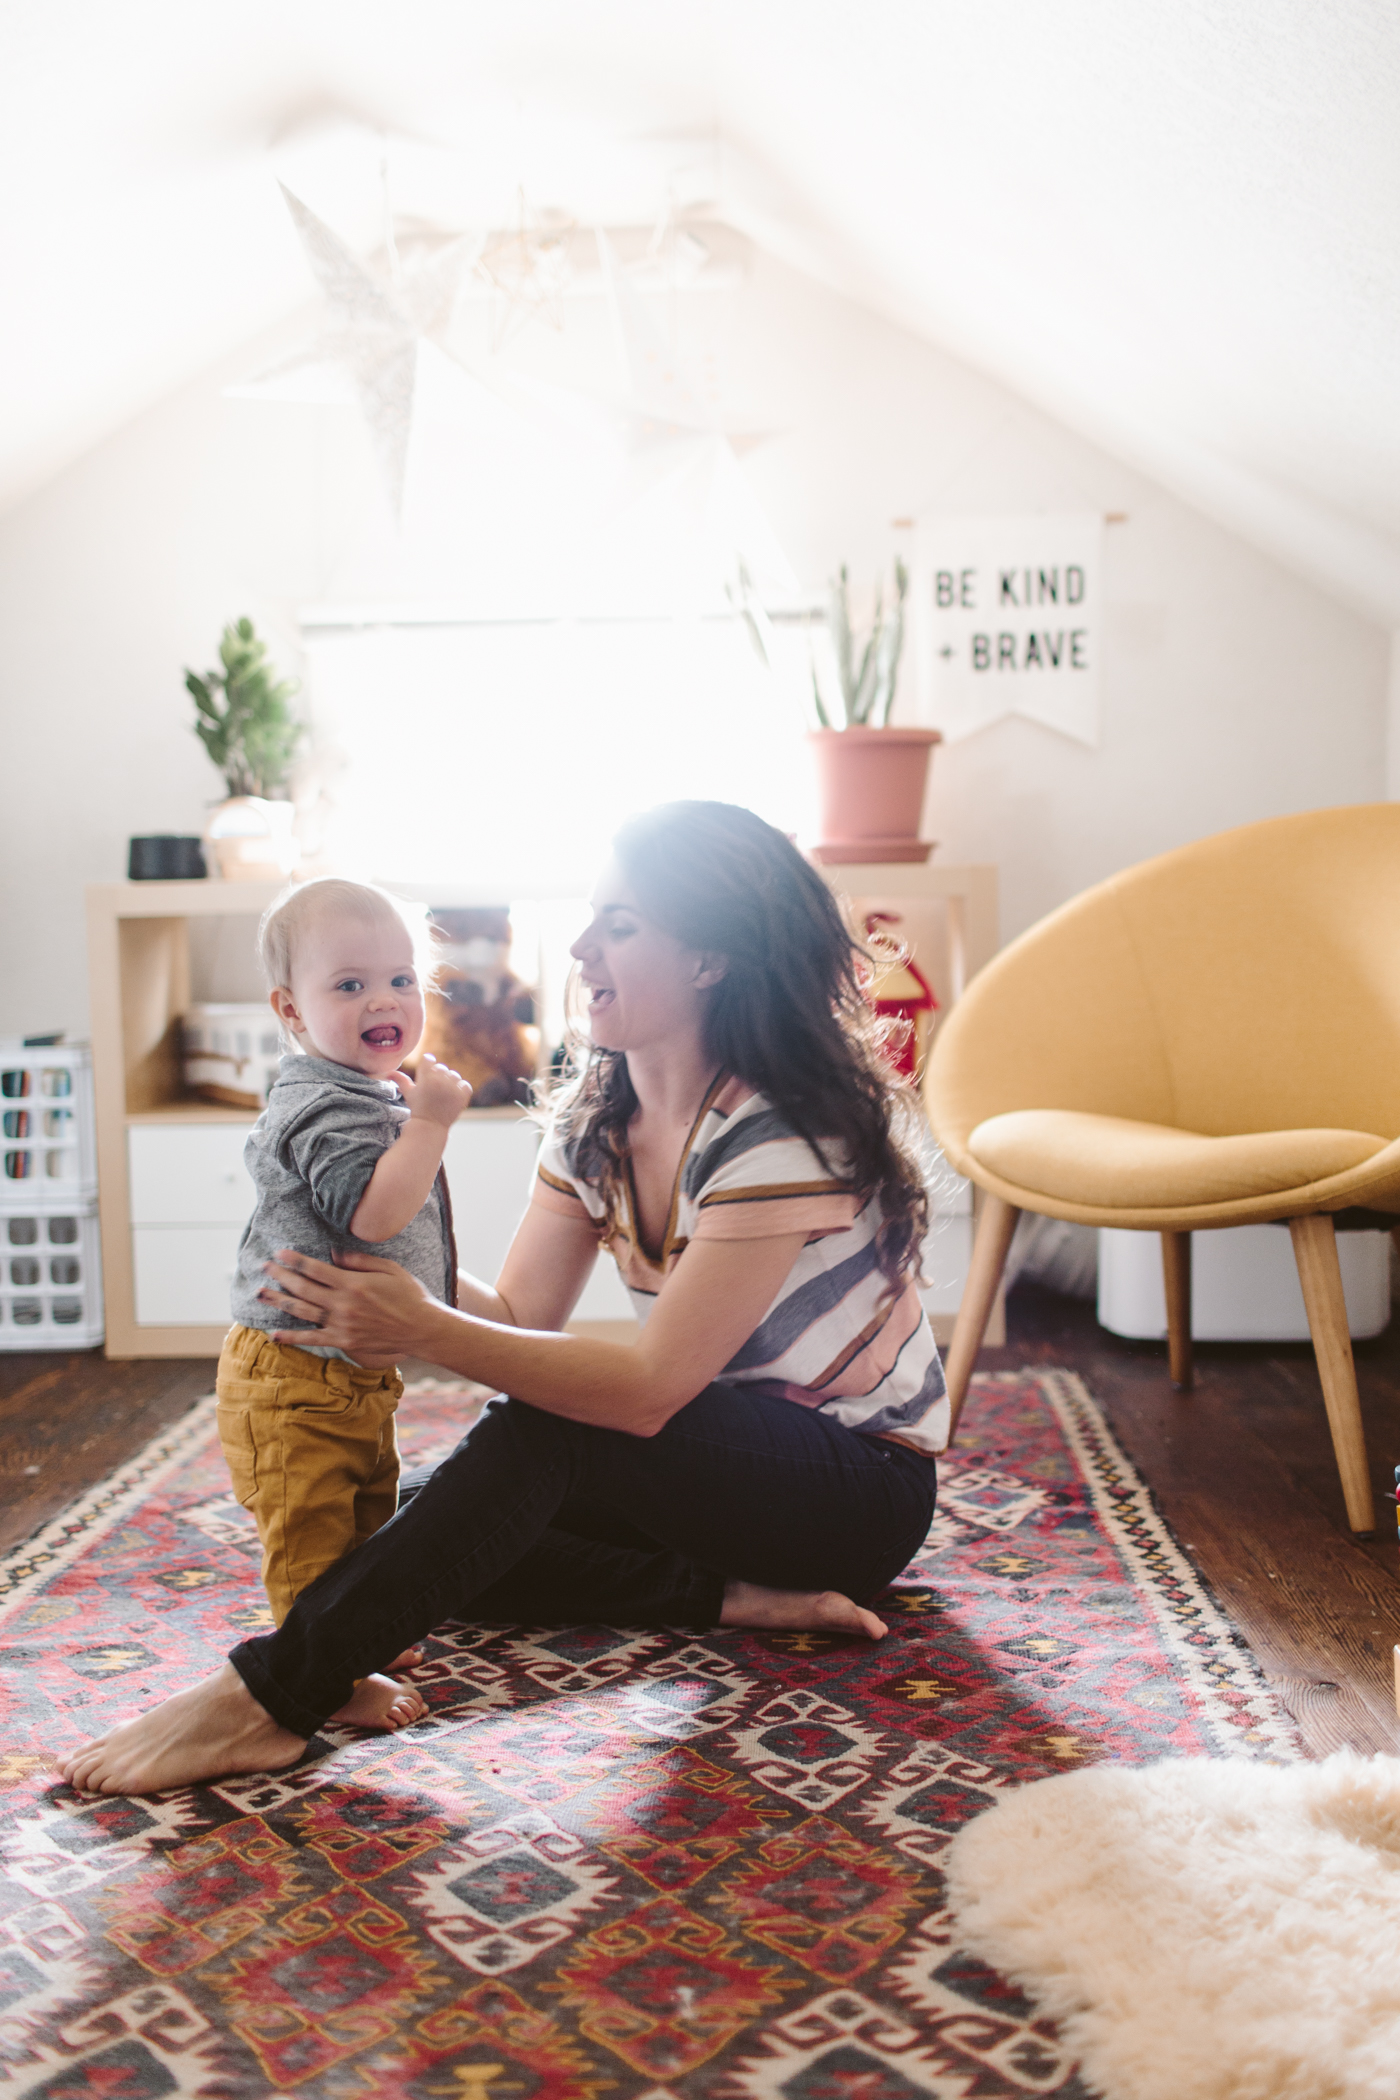
This room is a converted attic space, so the stairs to get up here are very small. Any furniture has to be less than 25 inches wide to fit up there, or able to be built in the space like most Ikea furniture.  Luckily I found that round chartreuse chair at World Market and because of it's weird shape and removable legs, I was able to fit it upstairs!  It's the perfect little chair for bedtime stories.

The floors are actually just the subfloor.  There used to be ugly brown carpet up here and we ripped it out and I liked the wood floors.  But we never put trim back on, so if you're wondering why we have no floor trim in here, that's why!  We're probably going to eventually put *real* flooring in whenever we end up putting this house on the market.

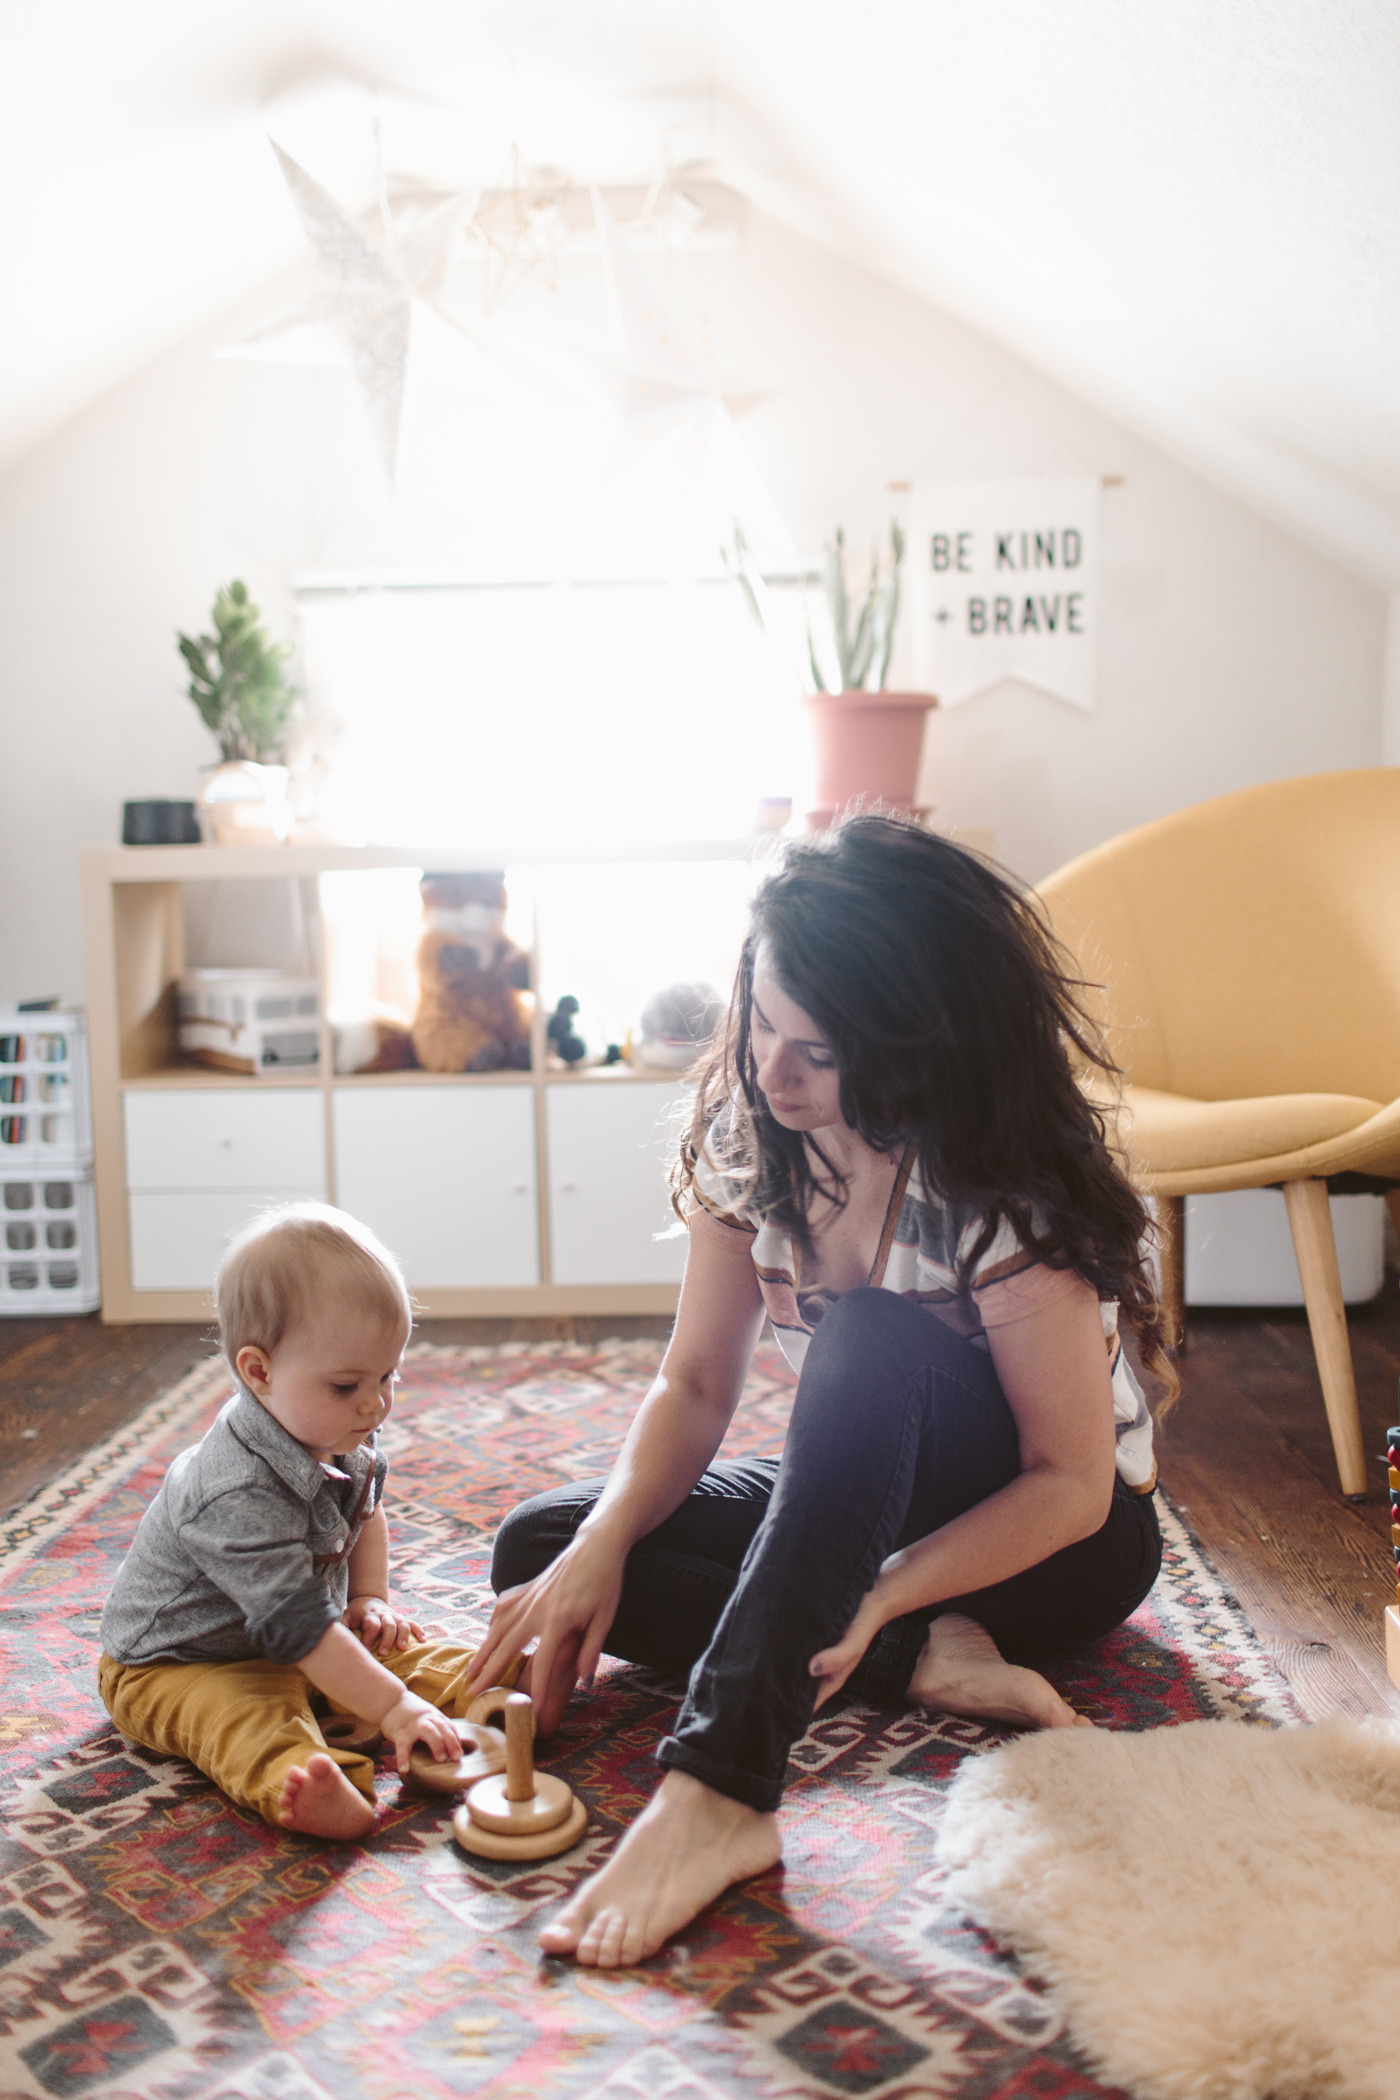
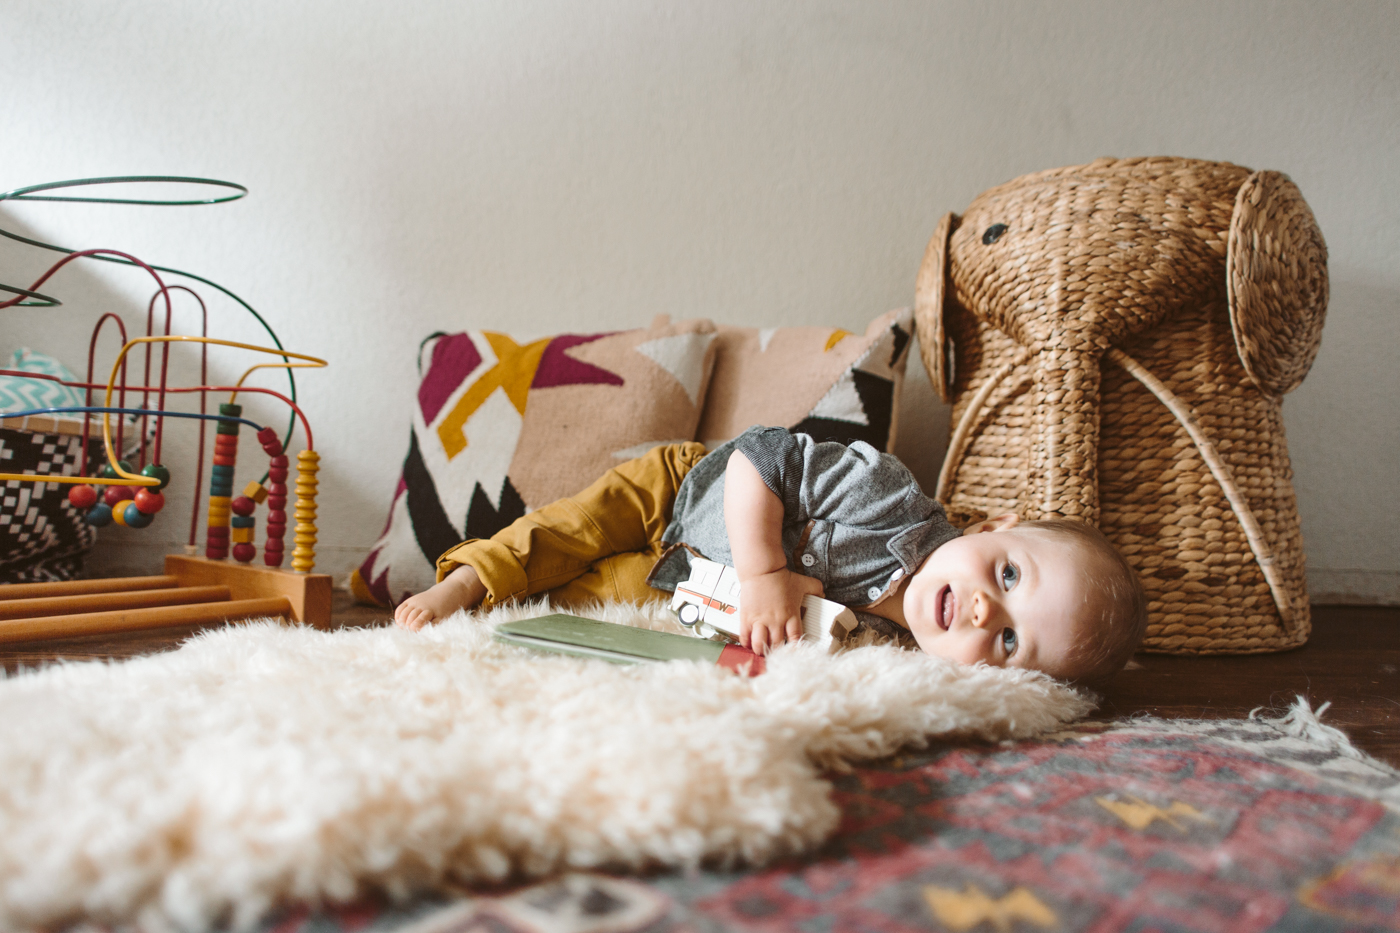
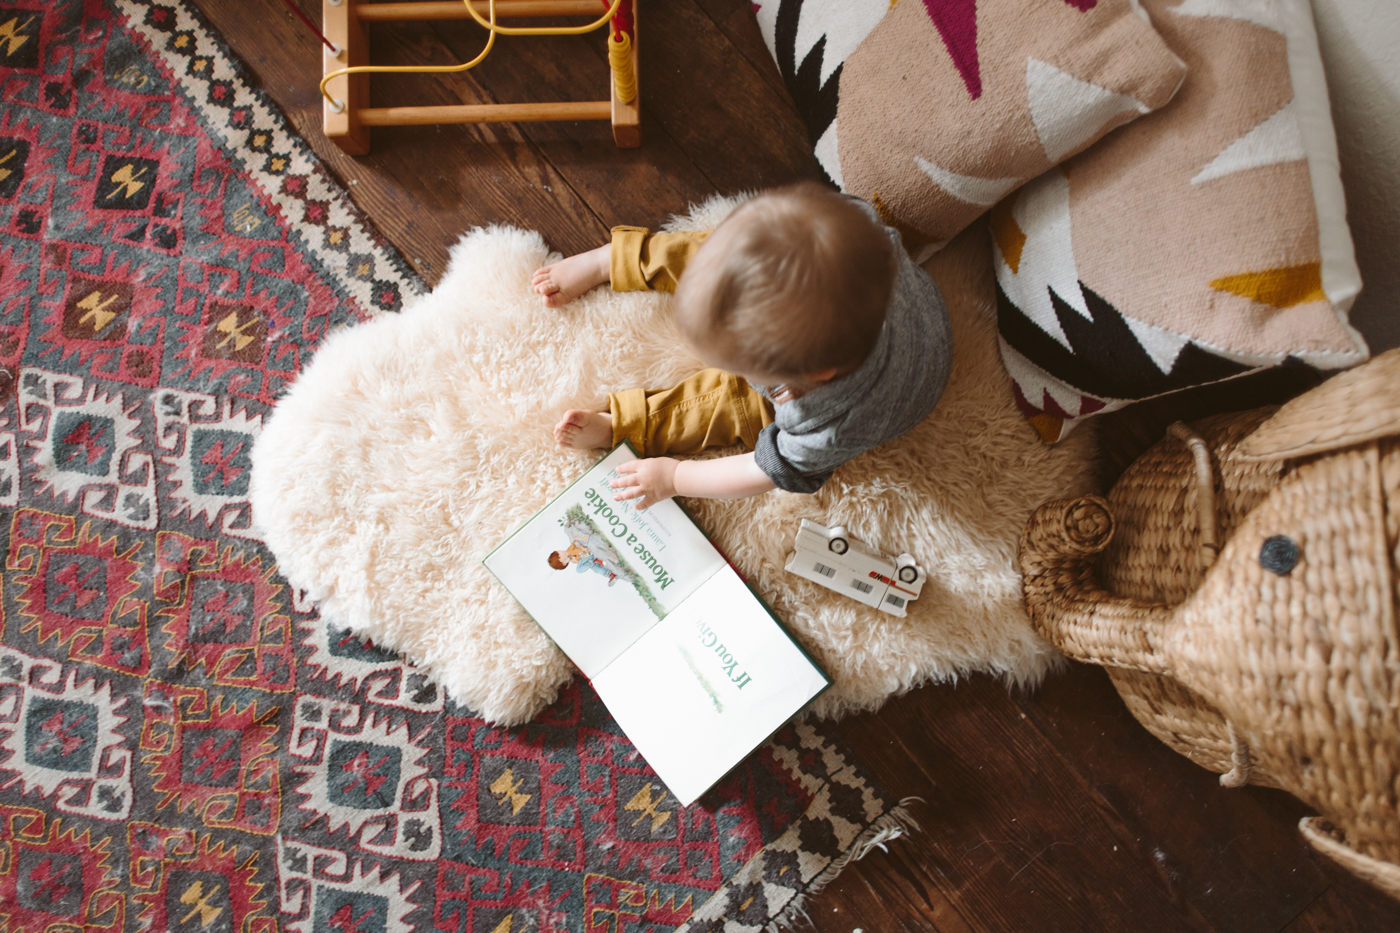
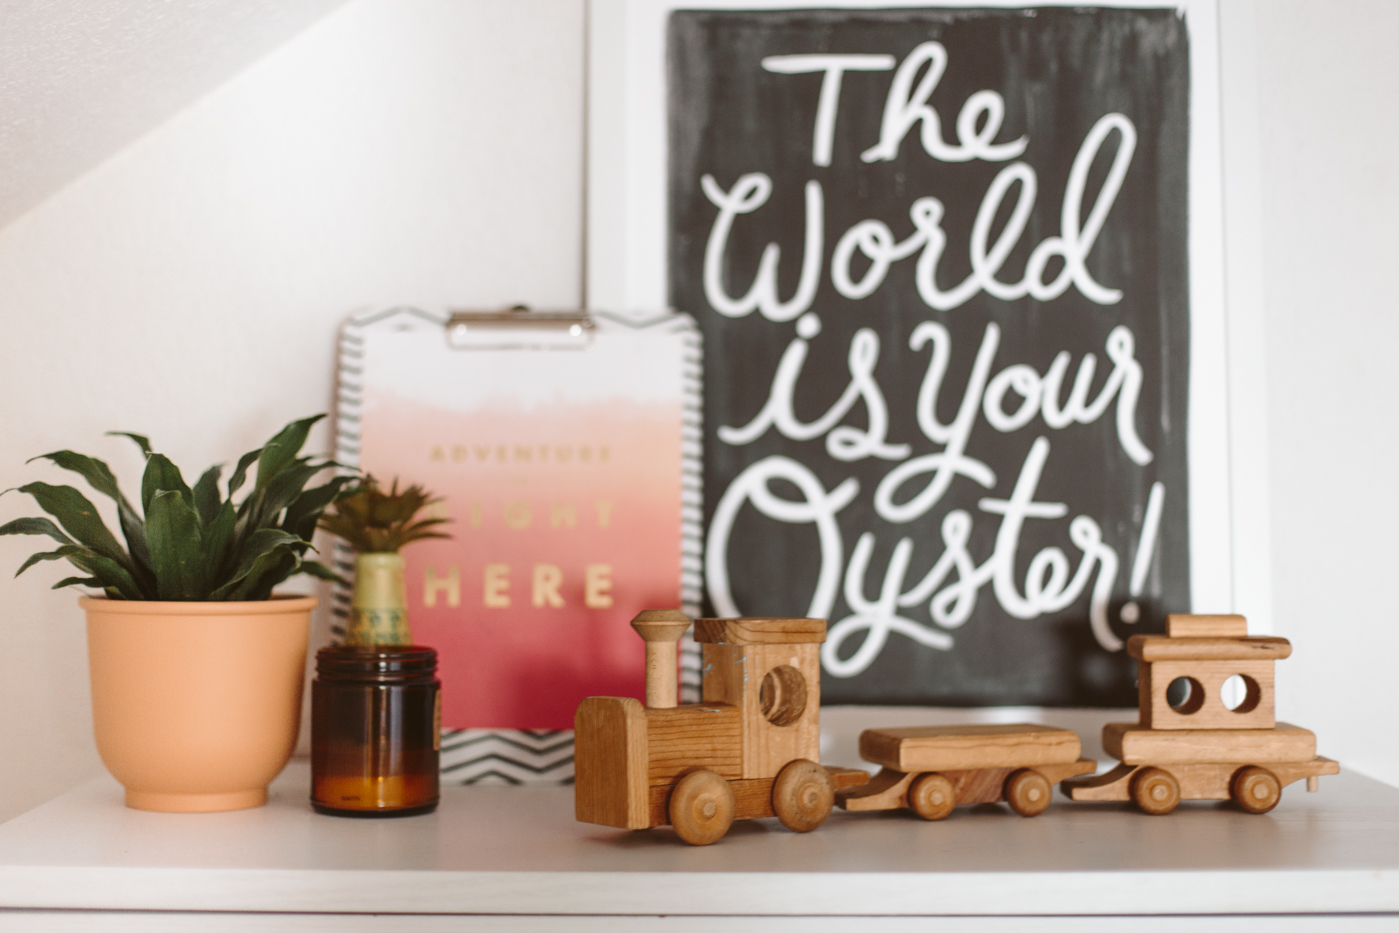
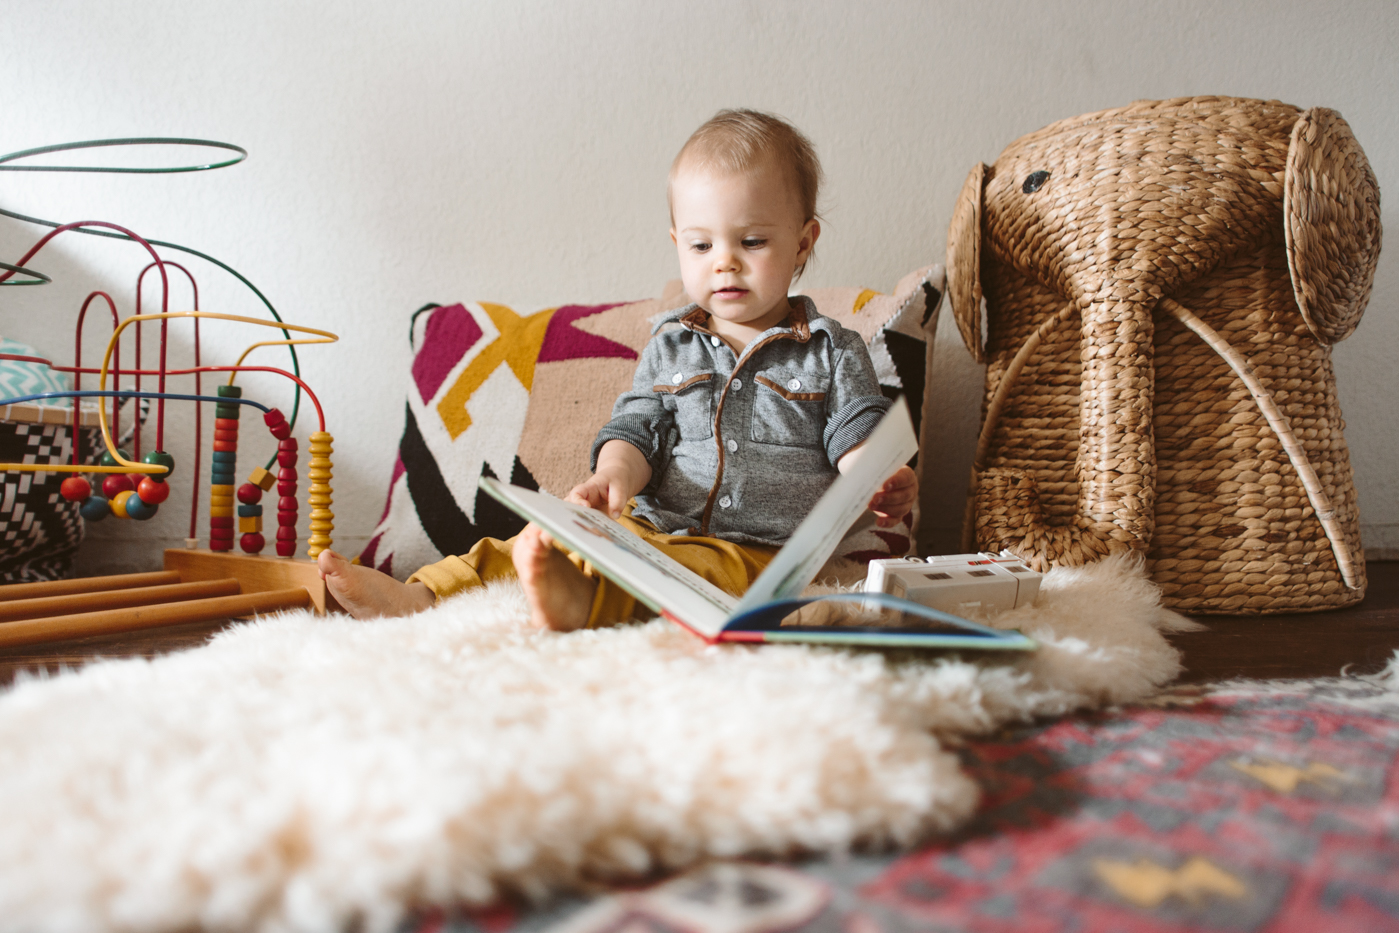
I love having a space that feels uncluttered and natural.  I'm not a fan of bright plastic toys, so I prefer classic wood toys that look nice and are also more eco friendly.  I've found a lot of cool wooden toys on etsy and at thrift stores!

*for those wondering about the plants, Jack is never alone in this room because we're unable to fence off the stairs, so I'm always with him when he's playing in here.  Peace Lilies are toxic to humans and pets, and Snake plants are mildly toxic, so make sure you watch your kids and pets around those plants!*

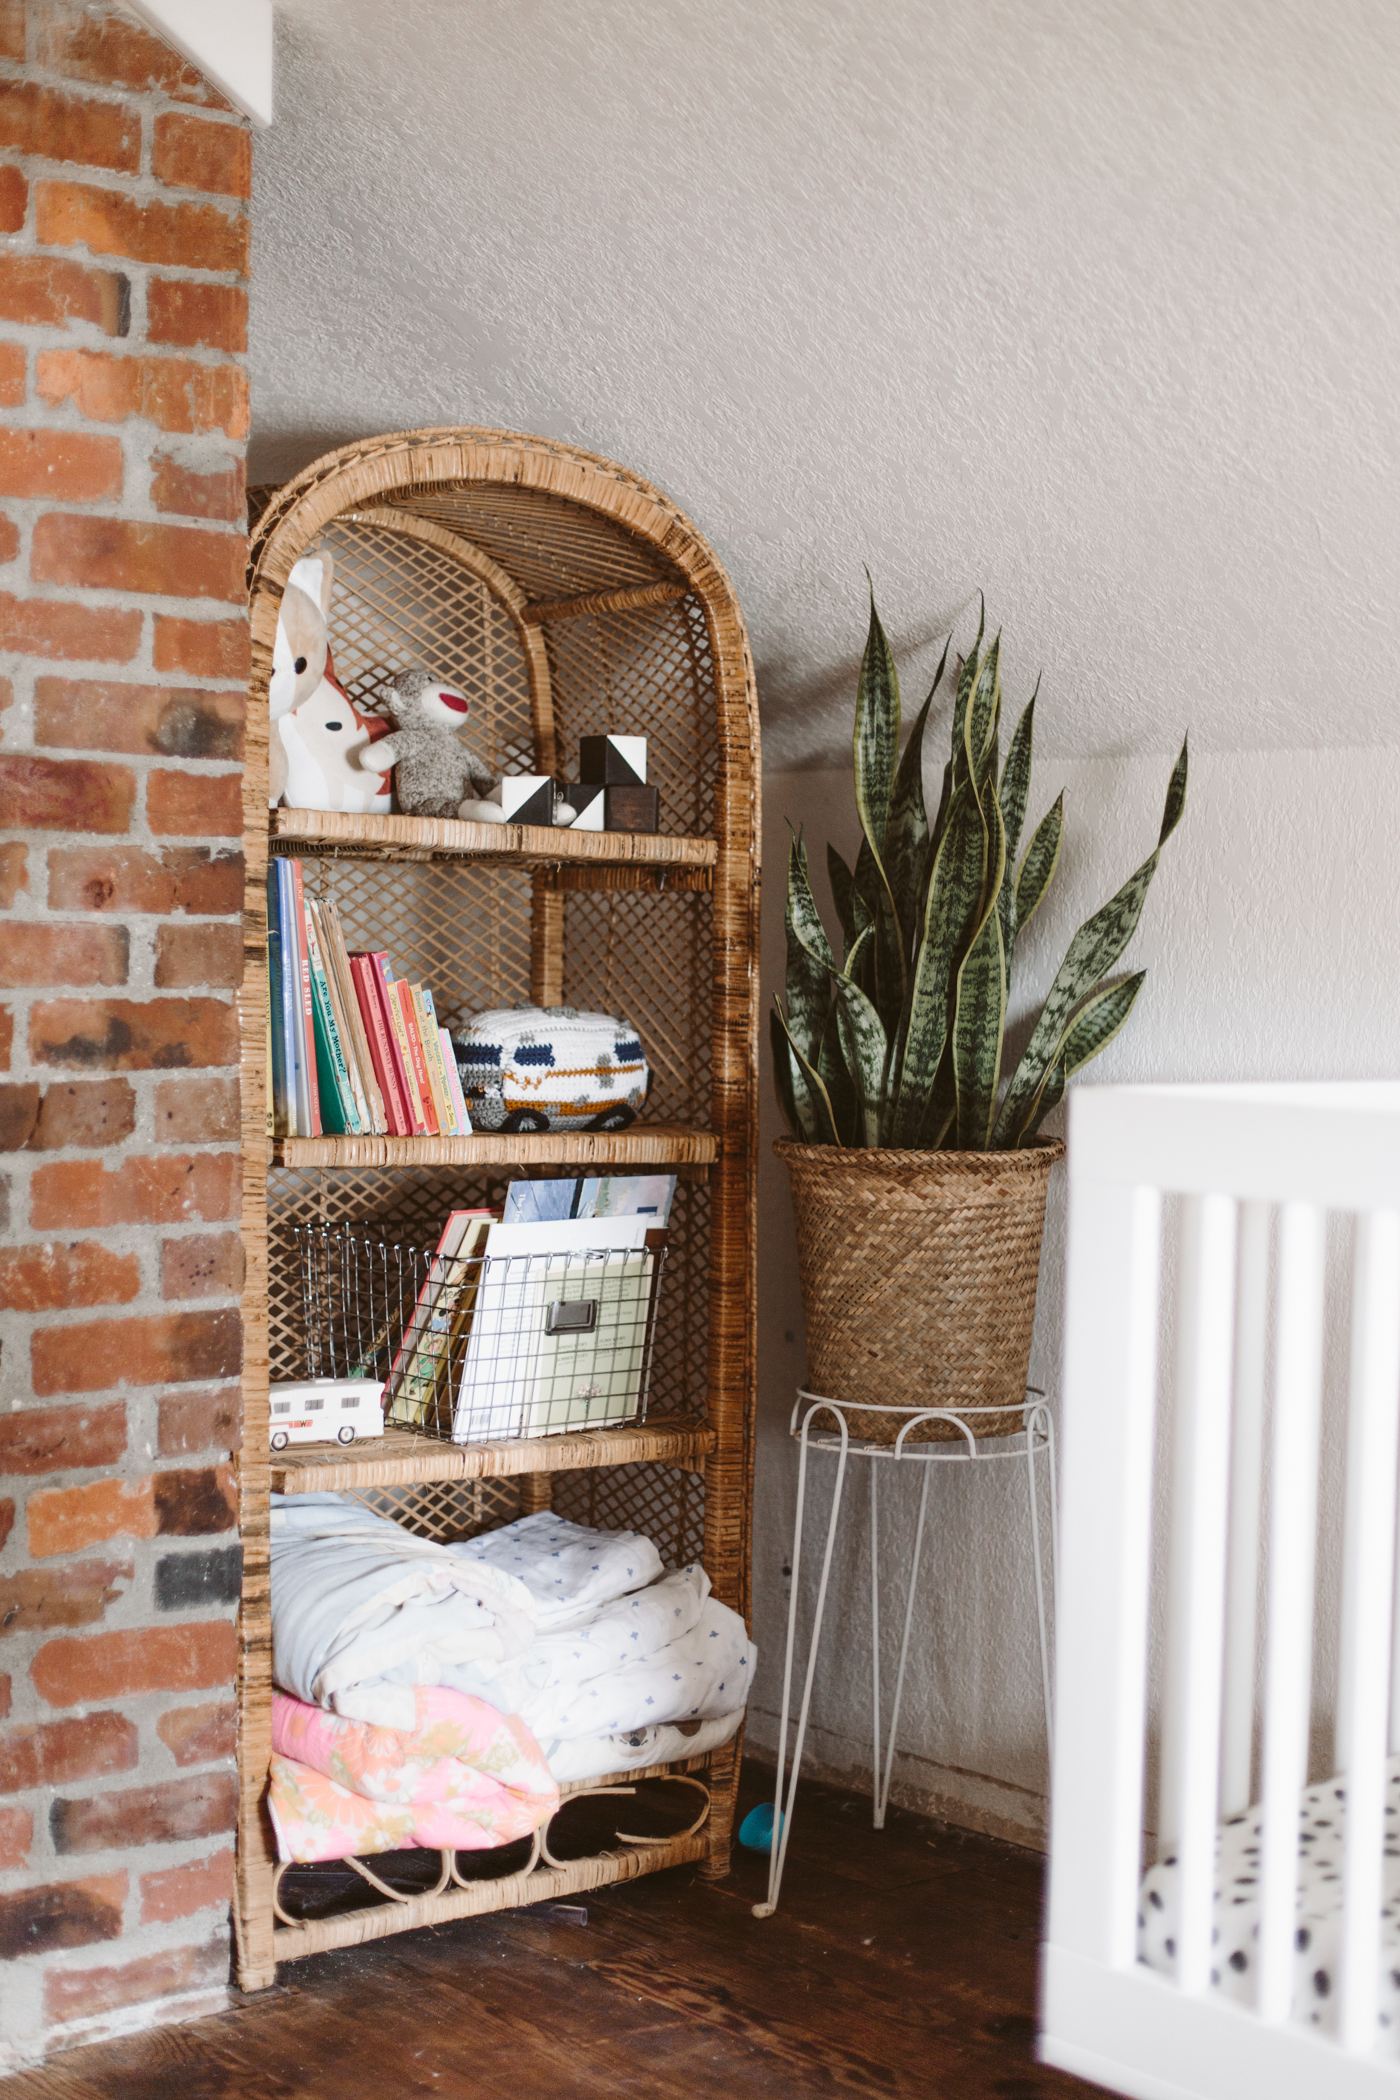
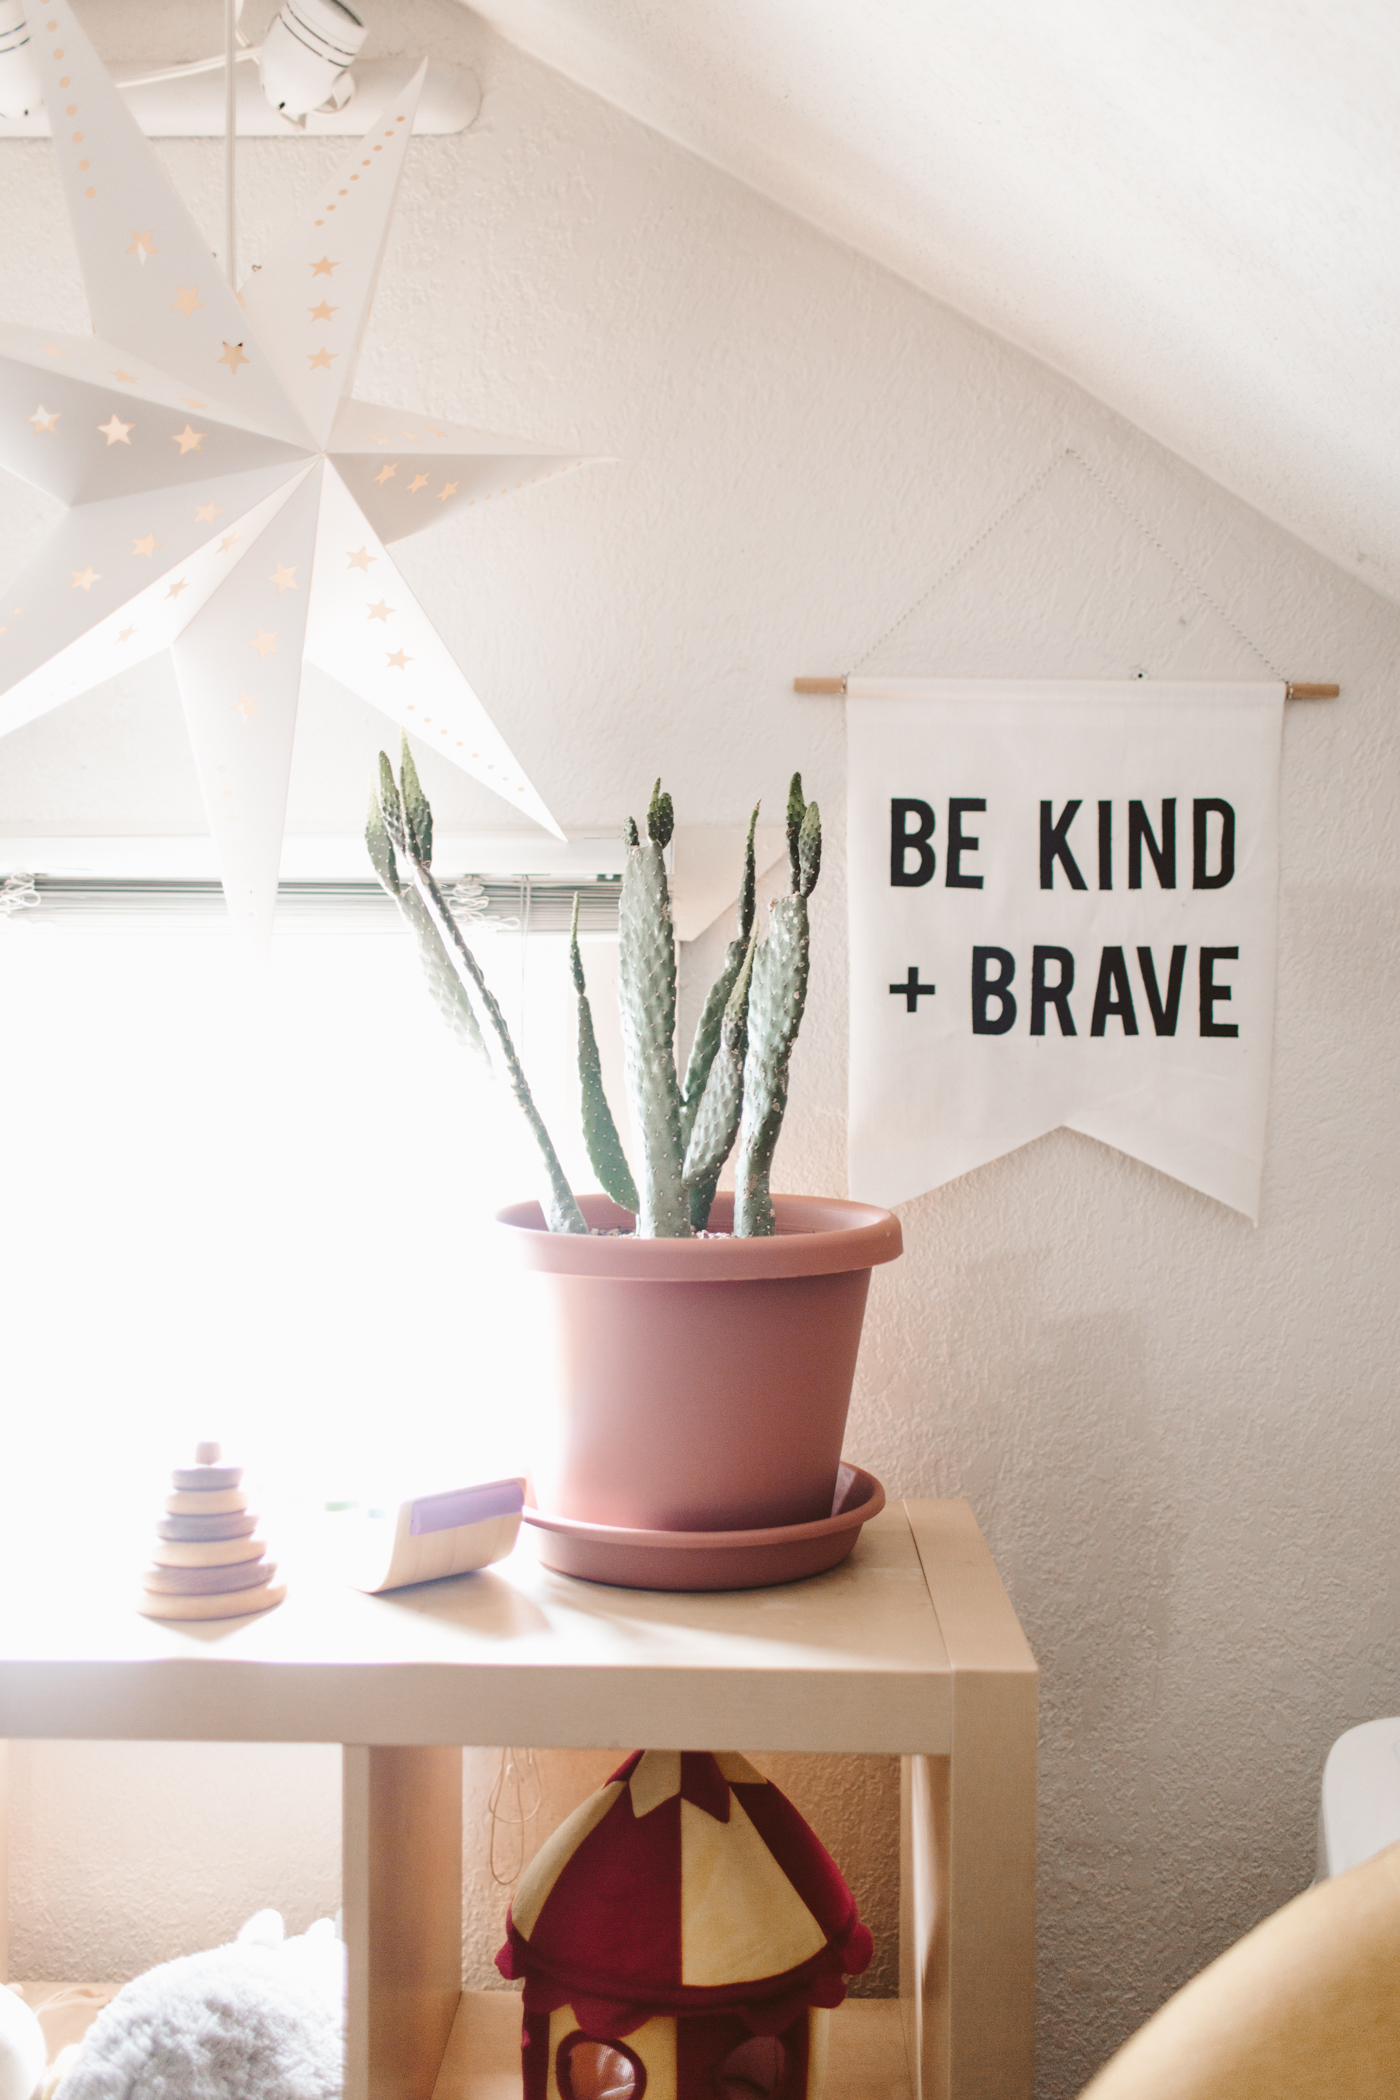
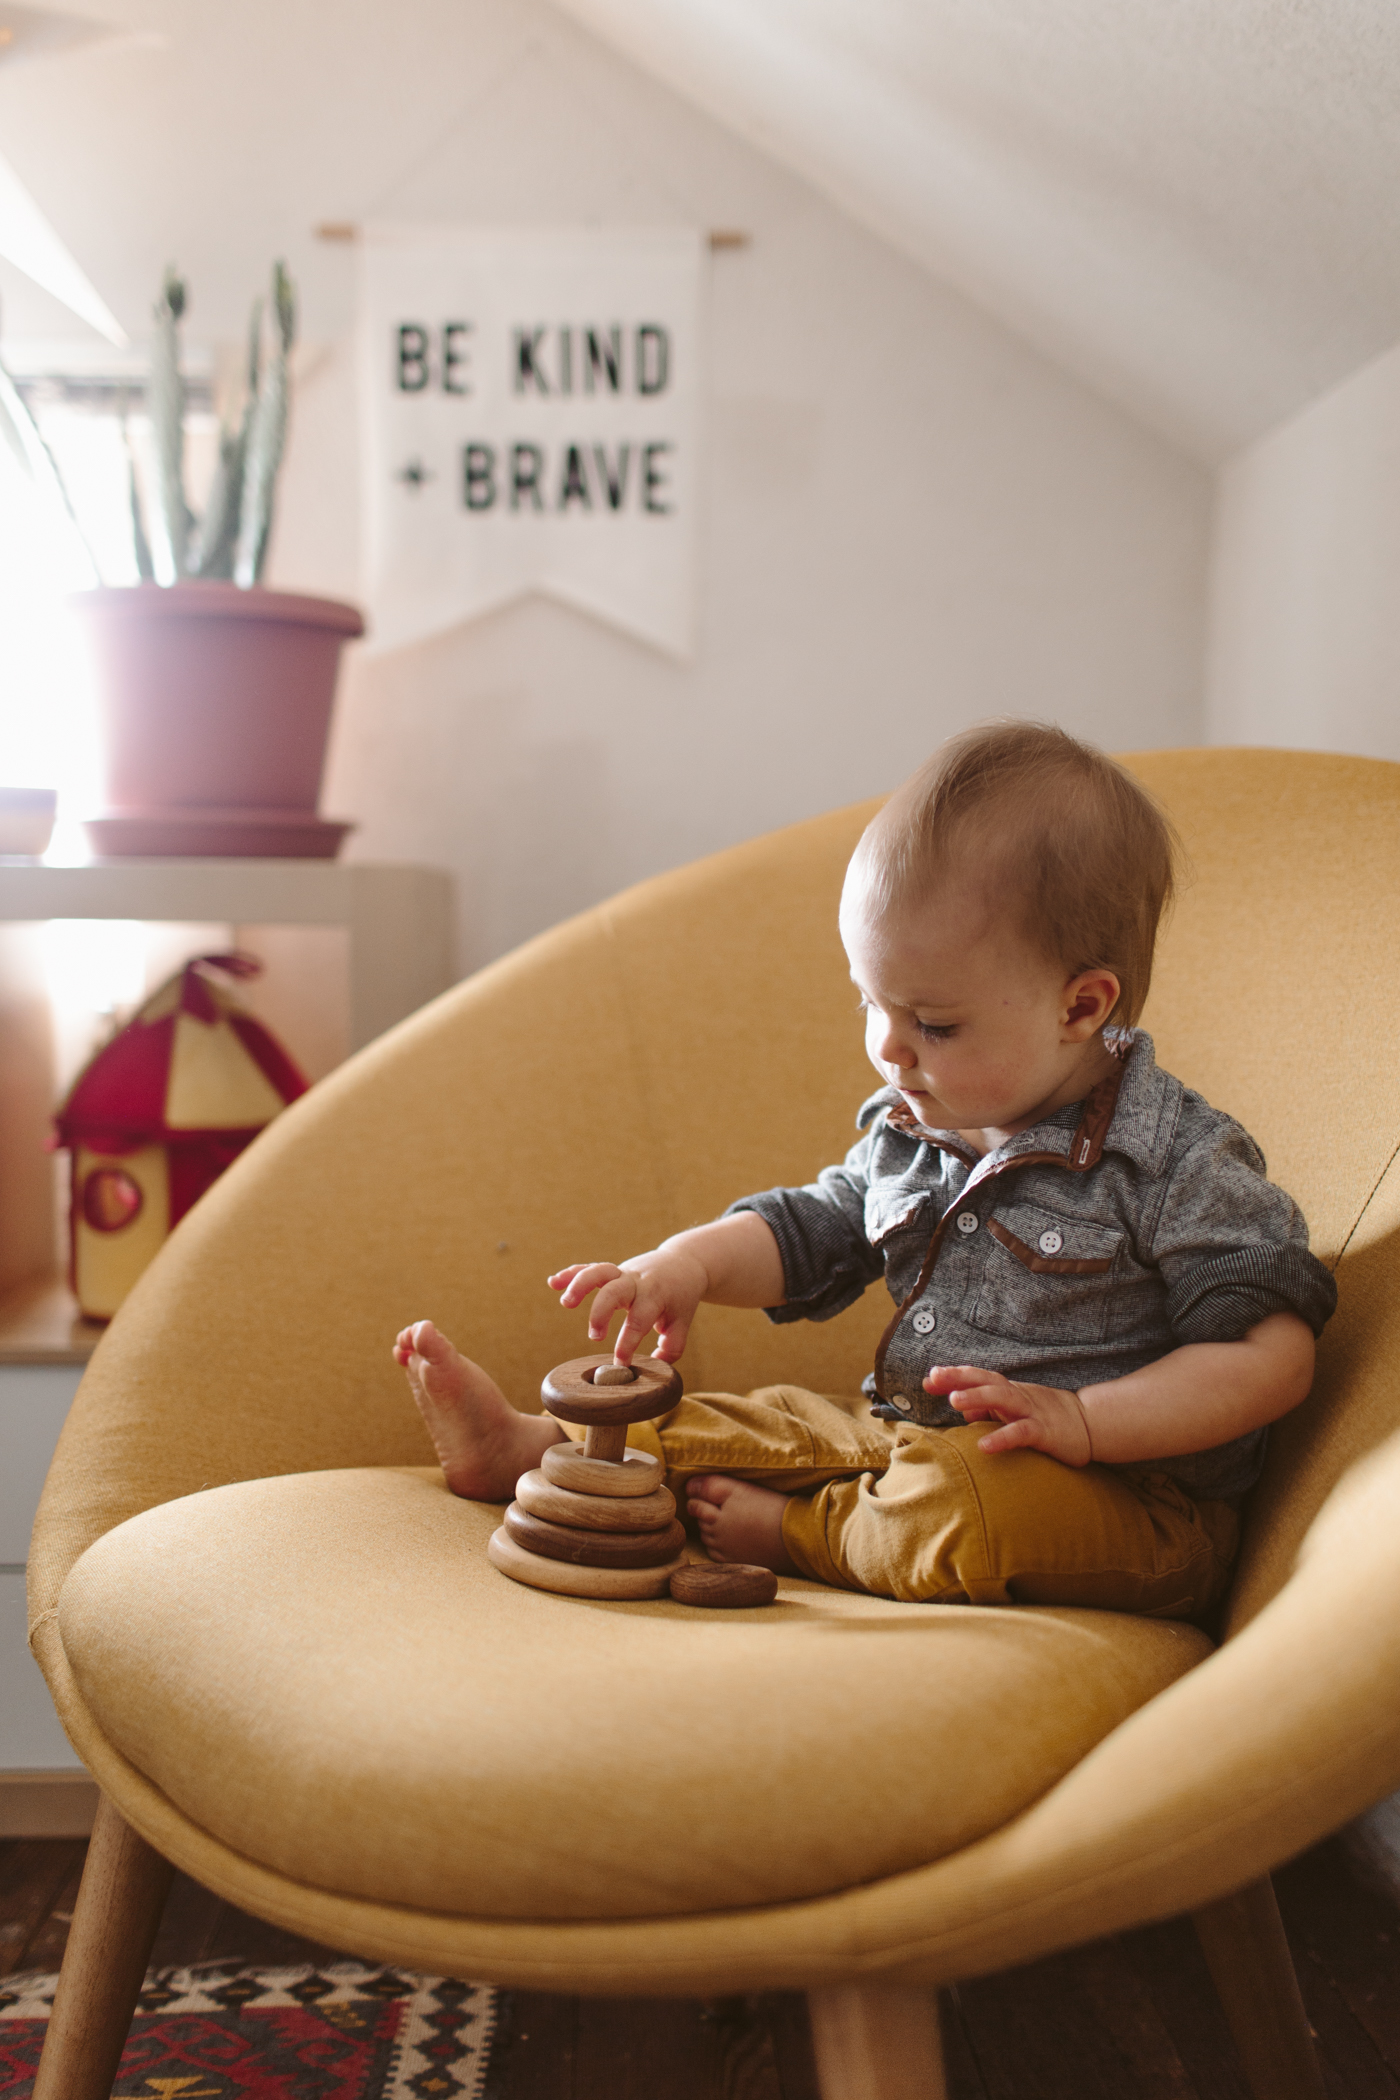
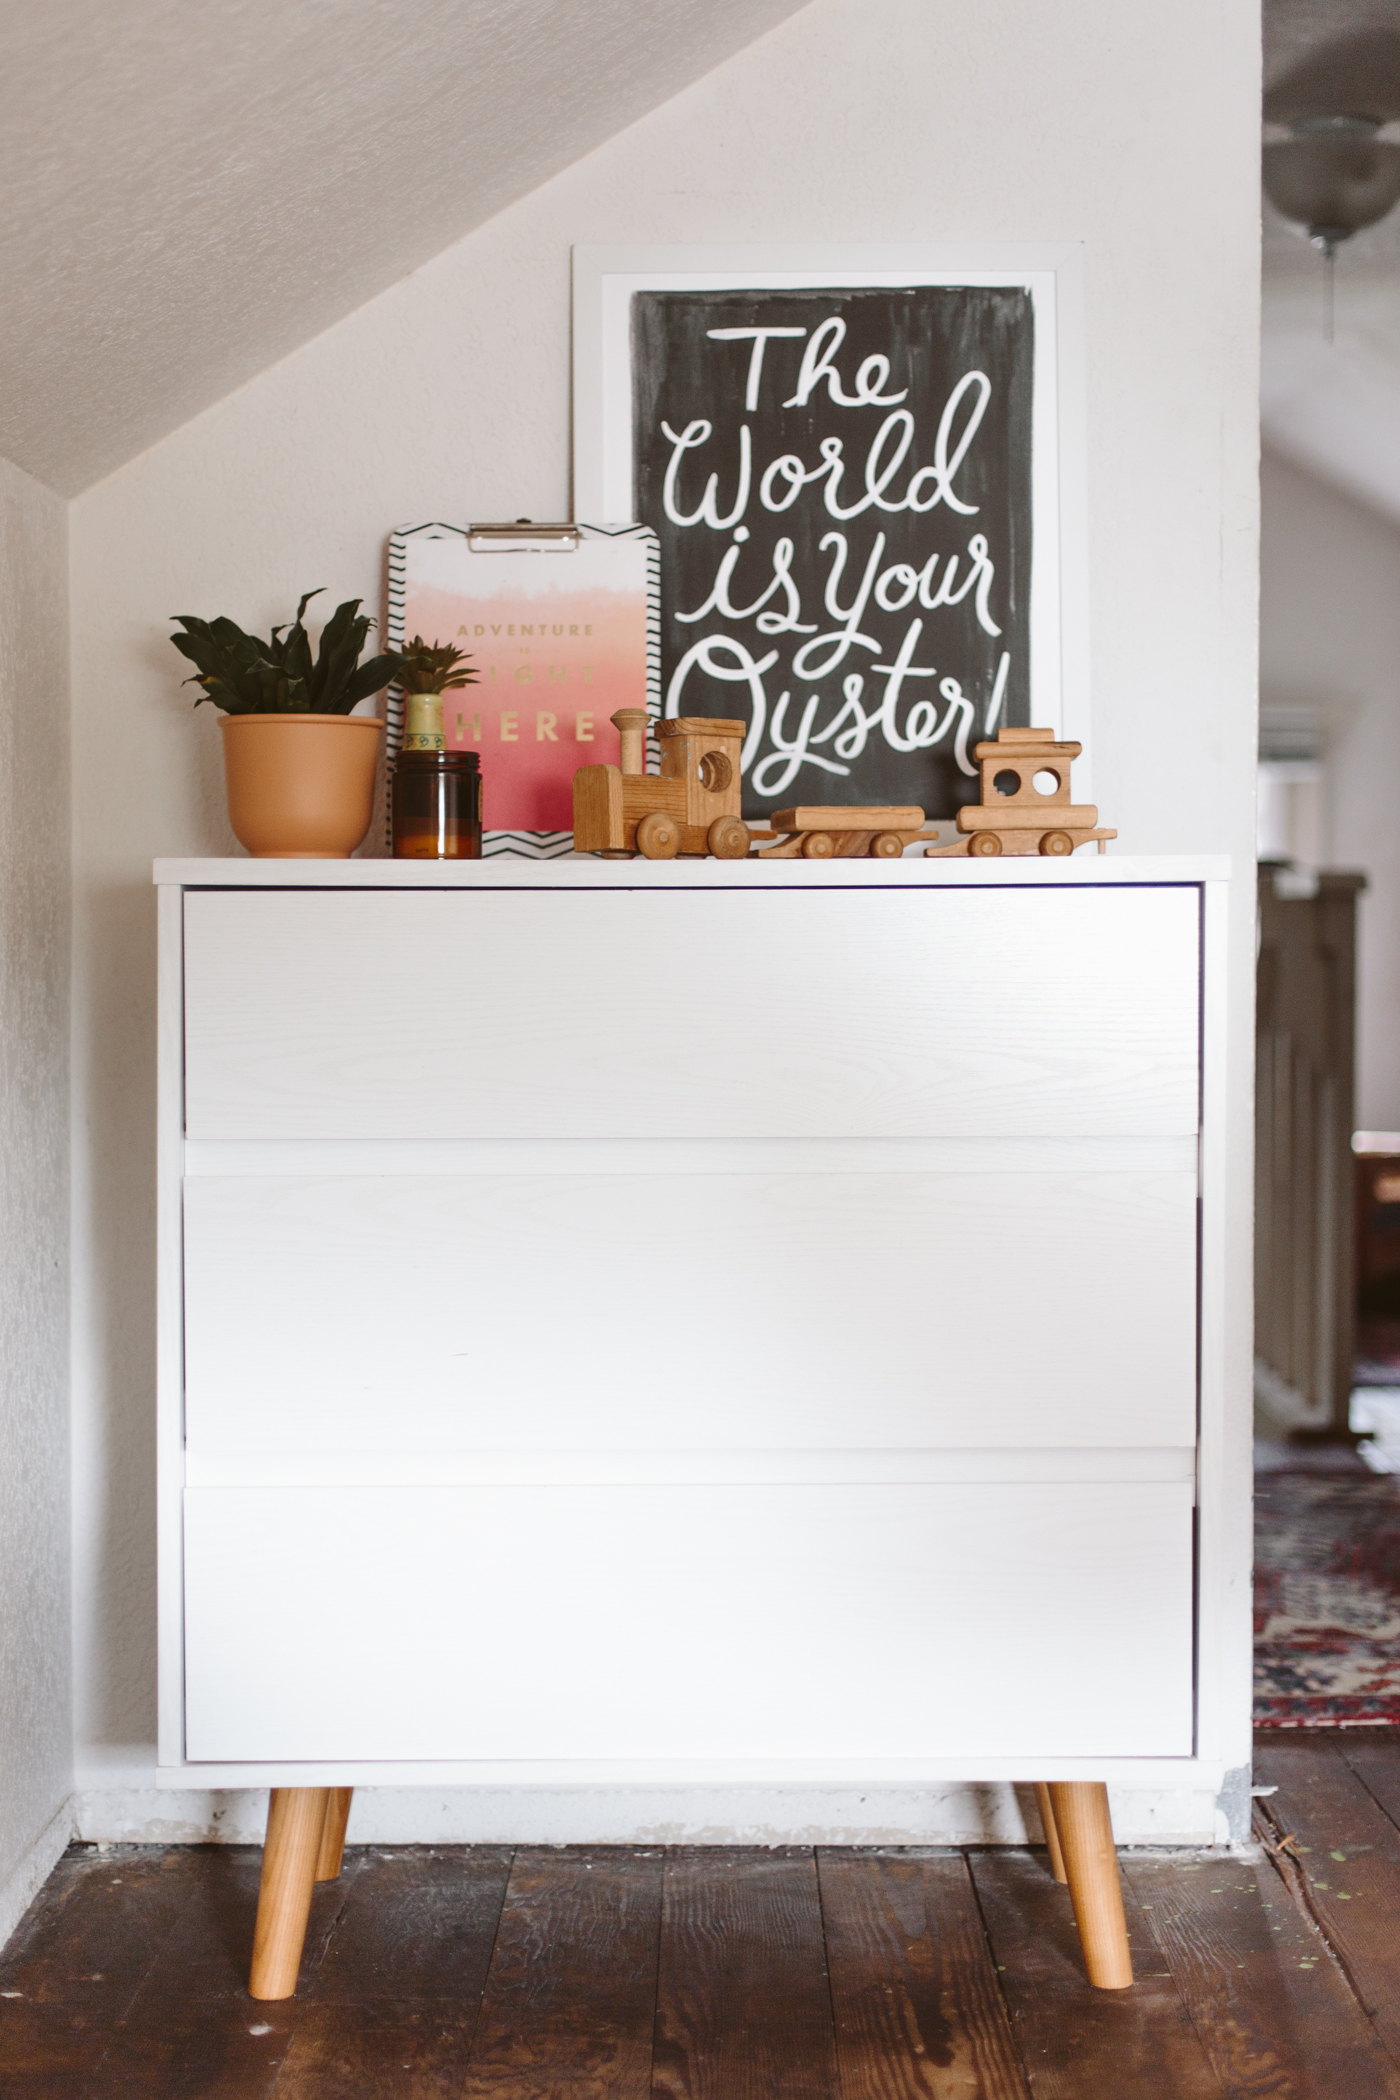
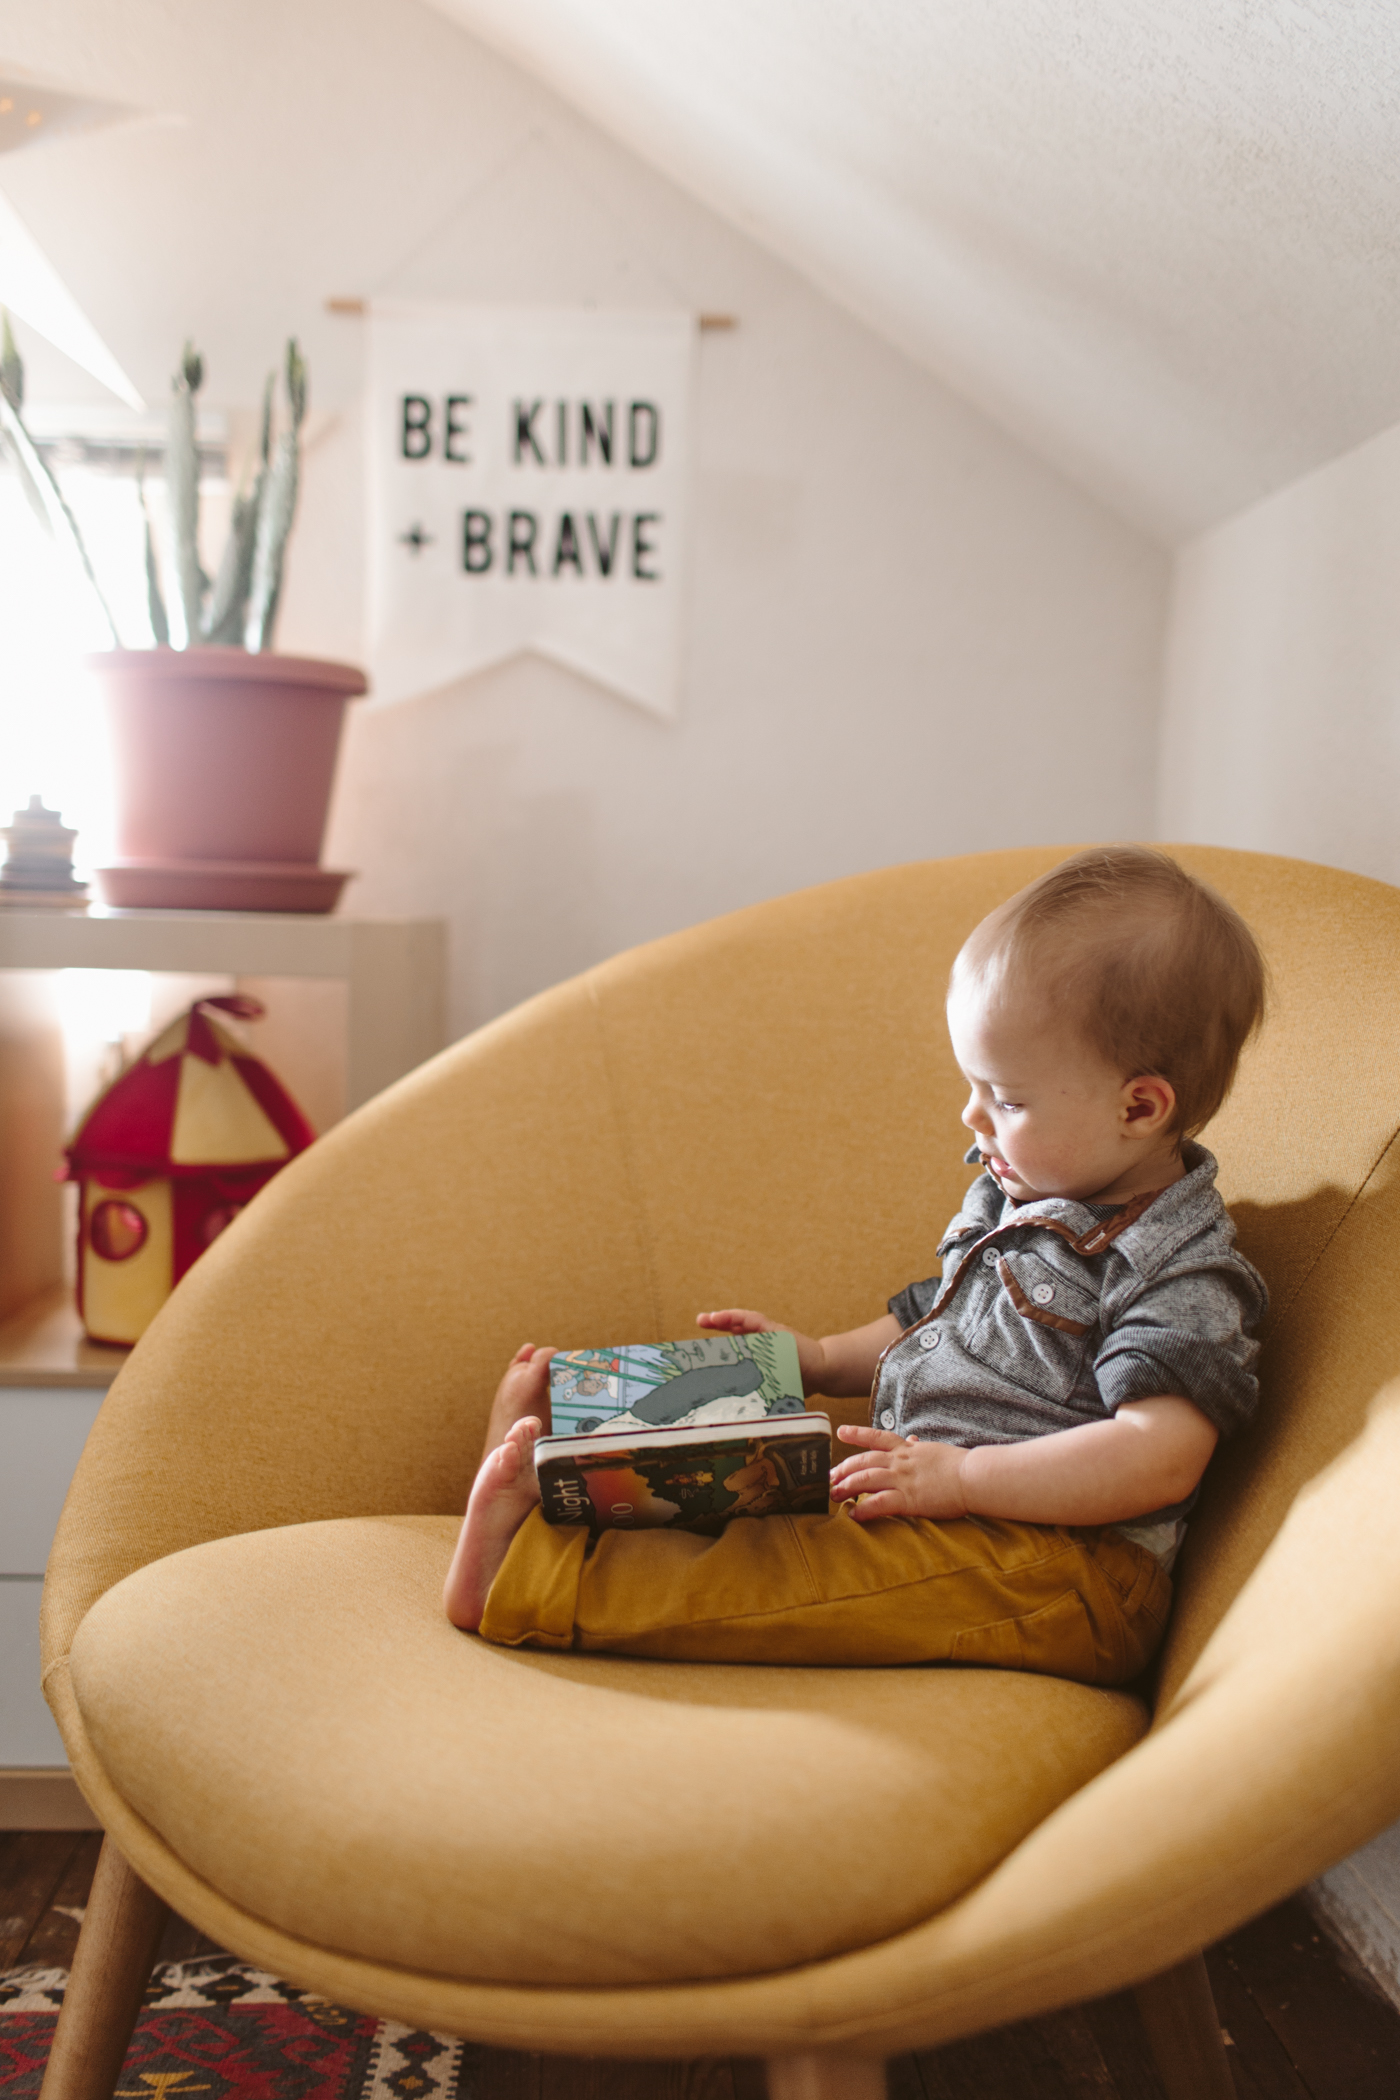
Kilim rug, rattan shelf, hamper : thrifted/Craigslisted | Cube shelf : Ikea via Craigslist |  Yellow Chair : World Market | Crib : Babyletto via Craigslist | Dresser : Target | Dresser legs : Pretty pegs | Kind + Brave banner : handmade | World is your Oyster Print : Rifle Paper Co. via Moorea Seal |  Floor Pillows : Target via Goodwill


You Might Also Like

DIY Triangle Hanging Shelves

DIY Triangle Hanging Shelves

I knew I wanted more plants in my bedroom, but with not a lot of floor space, I'd have to get creative with how I was going to incorporate them.  I already had a board that I'd bought months ago to make a different shelf that I never got around to making so all I had to do was buy some cord and whip these up!  They probably only took 10- 15 minutes to put together, so they're a quick and easy way to add some great shelving to any room!

WHAT YOU'LL NEED

1x8 common board
Rope or Cord
Screw with anchor (anchor optional)
Saw
Drill

 
DIY Triangle Hanging Shelves

/ STEP 01

Take your 1x8 board and chop it into the lengths you want your shelves to be.  I made mine 26 inches.  I used a skillsaw to cut mine but if powertools freak you out or you don't have access you can have them cut the board for you at most hardware stores!  Or just use a regular saw!

 
DIY Triangle Hanging Shelf

/ STEP 02

Use a drill to make 4 holes at the corners where your rope/cord will go through.  How big your holes are will depend on how thick your rope is, but I used a 1/4in bit for mine. Make sure you don't make the holes bigger than your knot will be, otherwise it will slip through when weight is put on the shelf. 

DIY triangle hanging shelf

/ STEP 03

Take your first rope (cut to 57 inches long) and push the ends through the front two holes.  If the rope is frayed you may have to singe the rope ends to make it easier to push through the holes. Tie a knot at the ends of the ropes after you've pushed them through.

DIY Triangle Hanging Shelf

/ STEP 04

Once you've done the front rope, repeat the same process with the back rope. Cut the back rope to 55 inches (the back rope is slightly shorter because it's flush to the wall, whereas the front one has to angle back to the wall).

DIY Triangle Hanging Shelf

/ STEP 05

Screw a hole in your wall where you want to hang your shelf!  I used an anchor to help secure my shelf because I knew I'd be putting plants on in and didn't want the weight to be an issue.  If you aren't putting anything heavy you might be able to get away with a nail, but I'd recommend a screw. Voila, you're done!

DIY Triangle Hanging Shelves
 

You Might Also Like

eleven hairstyle ideas for curly girls

I'm a pretty low maintenance girl when it comes to hair and beauty, so I usually end up just wearing my hair down, but I do like doing fun things with my hair on occasion.  I'm not very skilled in the hair styling department, I'm still a total newb when it comes to attempting french braids, so most of my hair styles are relatively simple and straightforward.  Most of these looks don't require much more than a hair tie and some bobby pins.

Sometimes it can be frustrating as a curly girl trying to navigate the waters of hair cuts and hair styles.  I'm not a fan of straightening my hair, so I like to find styles that work with my natural texture.  Luckily, many curly girls have a lot of natural volume that accompanies their curls, which can make it easier to achieve some styles.  

There are lots of ways to wear a scarf, but one of the easiest is just tied around your head like a headband.  You can do this with a long scarf and have the tails just hang down, or if you want to tie the scarf up top, you can either tie it in a bow for a bit of whimsy, or tuck the tails underneath to hide them.  Try this with a bandana instead of a scarf for a more rockabilly version!

Eleven Hairstyles for Curly Girls

My hair isn't quite long enough for a good side braid yet, but in the past I really enjoyed side braids as a quick and easy way to change up my hair.  I think that curly hair lends itself really well to a messier version of a braid.  I like to braid my hair tightly, secure it with an elastic, and then give it a few tugs from bottom to top to loosen up the braid and give it a bit more of an undone look.  I prefer a fishtail braid, but you can do this with any braid version!

Eleven Hairstyles for Curly Girls

I went through an Amy Winehouse phase back during my junior year in college, which is what started my love affair with beehive hair.  My philosophy is the bigger=better, but the beehive is easy to make as big or as small as you want.  When my hair was super long I was able to make really huge beehives without needing any sort of filling, but if you don't have big hair and still want a giant 'hive, you can use hair extensions bound up in a hairnet, or even a sock that matches your hair color to increase the size of your beehive.  Tease and hairspray like crazy, pin it up, and then smooth the top to get rid of frizz and fly aways and then spray like crazy again!

Eleven Hairstyles for Curly Girls

Flower crowns aren't really a "hairstyle" but they are one of my favorite hair accessories and I feel like they do give you hair a unique style.  Feel free to go for a big statement flower crown!  Since curly hair is big, it can hold it's own and balance out a larger flower crown. 

Eleven Hairstyles for Curly Girls

This is a 'do I had done for a photoshoot, but I loved it!  The stylist made a single "cornrow" braid on the side of my head to create a faux undercut look.  You don't have to use a braid to create this look, though,

Julie does this look

without the use of a braid and it also looks awesome!

Eleven Hairstyles for Curly Girls

This is a really easy style that only needs an elastic headband.  I did a tutorial for this style

here

.  You can play around with different elastic headbands, or add flowers or bows to jazz it up a bit.

Eleven Hairstyles for Curly Girls

Truth be told I didn't really know what I was doing when I made this updo, but it's basically a french twist.  I just tucked vertically up the back and bobby pinned.  I left out a few curls up front to soften it up a bit.

Eleven Hairstyles for Curly Girls

This updo was one of my favorite styles over the summer.  I often wore it as a way to get my hair off my neck and also as a way to dry my hair instead of diffusing.  It has a vintage look to it and is a pretty easy style to throw up in a pinch.

Eleven Hairstyles for Curly Girls

The messy bun is a classic and I personally think messy buns are best with curly hair.  Curls really lend themselves to the messiness of a messy bun.  Messy buns are a great starting point for other styles, like the scarf updo.

Eleven Hairstyle Ideas for Curly Girls

I found

this tutorial

on Pinterest and thought it'd work perfectly with my curly hair.  Another variation on a fancy low pony is

this look

, which was created by doing a large messy french braid down the side, pulled into a low side pony.

Usually victory rolls are more polished, but I think they're pretty even if you keep the messiness of the curly hair intact.  If you want to get a more polished victory roll, you can definitely straighten your hair to smooth out the bumps.  Keeping them more casual, though, makes for a more easygoing look that's still cute and fun.

top photo by

willow's photography


You Might Also Like

diy chalk bag

So, this DIY probably won't appeal to most of you, but I wanted to share this project for my climbing readers out there!  Back when we first started climbing we were renting gear, but as we realized that we were wanting to start climbing consistently, renting all the time didn't make financial sense.  We invested in our own climbing shoes, but chalk bags seemed like an easy DIY, especially since they range from $15- $35... and I'm cheap.  I went to Joanne's Fabric, got everything I needed to make one for Dan and one for me and then I whipped one up.  And then I didn't make the second one until last Thursday. Since the first one was made without thinking about doing a DIY post I didn't have any photos or anything, but this time I made sure to grab some images while I was working.  

This DIY does require a sewing machine, but it's pretty simple sewing.  You'll need:

Fabric for the exterior (I used leftover canvas from some of Dan's old pants for his bag and the sturdier fabric stands up better than my regular fabric, but my bag has lasted 2 years just fine, so any fabric should do.  You probably don't want fabric that is

too

thick, though, because it might get hard to sew.)

Fabric for the interior.  I used polar fleece.

Thread

Cord, for the cinch (this is optional)

Large Eyelets, for the cinch (also, optional)

You can use a pre-made belt, or make your own with nylon tape and a snap

1. Cut a circle for the bottom of the bag lining.  Mine was about 5 inches in diameter.  Cut a rectangle for the sides of the lining.  Make sure it is a bit longer than the circumference of the circle you cut, and about 10 inches tall.

2. Fold over about 1.5-2 inches and sew two stitches to create a tunnel for the cinch cord.

3. Sew the bottom on to the sides to create a cylinder, making sure that the inside of the cylinder is the finished side (this is the side you'll see).

4. Repeat step 1, this time with the exterior fabric.

5. Sew the sides of your cylinder on to the bottom, like you did for the lining.  Make sure that your finished side has the right side of your fabric showing.  Turn the cylinder inside out.

6. If you're putting a cinch cord in, cut two small holes by the seam in both your lining (in the path you made for the cord) and your exterior, on either side of the seam.  Place your eyelets in the holes in the exterior.

7. Put the cord in the lining, through the path you sewed, and then put the lining inside the exterior, making sure they're both fit together tightly in the bottom.  Pull the cinch cords out of the eyelets in the exterior.  

8.  To make the loops for your belt to go through, cut two long rectangles and then fold the edges over and stitch the edges down to make them look finished and nice. The length depends on how wide your belt is, but make it a bit longer than you need, to allow for them to be sewed in.

9. Almost done! To finish everything up fold the top edge of the exterior fabric in between the lining and exterior and pin down.  Make sure to place your belt loops on either side of the vertical seam.  Sew the top seam and you're done!


You Might Also Like

tips for taking great self portraits with a tripod + self timer

This weekend I'm in Austin teaching a workshop at Texas Style Council about how to take your own self portraits with a tripod and self-timer!  For those of you who weren't able to make it out to Austin, I thought I'd repost (and update) this article I wrote over a year ago with some tips on how to take better self-portraits with just a tripod and self-timer.  I take almost all of my own photos here on the blog, and anytime someone else takes my photos it's always noted right after the outfit details.  You don't need a professional photographer to take great photos of yourself, and I want to empower you to stop making excuses as to why you aren't creating the best photos you possibly can!  Remove the excuses and get out there and start learning to become your own professional photographer! 

Some bloggers are lucky enough to have a friend, significant other, or husband/wife who takes their daily outfit photos, but the rest of us are stuck doing it ourselves with the help of a tripod, self-timer, and maybe a remote. I personally have never used a remote.  Since the beginning, I've always just used the self-timer, so I can't give any advice on using a remote. I've never liked the idea of having to hide the remote and it's already hard enough to "act natural" in front of a tripod, so I felt like adding in the hiding-the-remote factor would just complicate things further. I've been taking outfit photos with a tripod & self-timer for over 5 years now, so I'll let you guys in on some tips and tricks I've learned over the years.

USE THE AUTO AND MANUAL FOCUS TO SET YOUR FOCUS POINT

I get a lot of questions about how I get myself in focus when I'm using a self timer. Here's what I do: I autofocus on something at the distance I'll be standing (sometimes this is a tree, a garbage can, etc), and then once that focus is set, I switch the focus to manual, so the focus

won't change

when I click the shutter. If you don't put your focus on manual, the camera will autofocus to something in the distance and you'll be all blurry and out of focus because the camera focused way behind you when you clicked the shutter/autofocus. If you can't find something to focus on where you're taking photos, use a purse or something to set where you'll stand and focus on that.

For the photo above, I focused on the grass right in front of the back wheel of my bike.  Then, I set focus to manual so it wouldn't change, made sure my camera was on the 10 second self-timer setting and clicked the shutter.  Then I went and sat right where the focus was set: in front of my back wheel.  Voila, in focus!  I really like taking photos with my bike because it's something I can place in the frame to set the focus.  Then, I can either remove the bike and take photos without it, or I can just leave it in the photo, depending on how I want the photos to look.

For the photo below, I focused on the trunk of the tree, just out of frame to the right.  For the photo next to the turquoise wall, I focused directly on the wall, and then moved my camera and tripod back about two feet, so then the focus would be set two feet in front of the wall, which is where I wanted to stand.  The top photo in this post had the focus set on the little blade of straw/grass to the right of me.

FIND RELATIVELY UNPOPULATED LOCATIONS

I don't know about you guys, but taking photos of yourself with a tripod & self-timer is kind of, well, weird sometimes. Especially if you're trying to do it in a public place. I personally have found I have a hard time taking photos that look natural if there are people watching me, or walking by. I get stiff and the photos just don't look as good as when I'm alone without strangers staring at me.  I'm better at taking photos in public now, but I still find the photos I like best are taken in more private locations. Try to find places that are vacant so you can feel free to be silly and do whatever photos you want, without feeling awkward. I do a lot of jumping and spinning photos, and those are even weirder to try doing with people around!

I find that an alley is a good place to take photos.  People don't walk down alleyways as much as they do sidewalks.  Finding a park with some wooded areas are great, not only because they are more private, but because you have lots of things to set your focus on!  Other places I've found are relatively vacant: Parking garages, sidewalks in quiet neighborhoods, behind buildings,  and if you really want super privacy: your backyard or your living room.  I find those can be difficult to make look good depending on the lighting you get inside your house, and how picturesque your backyard is.  

EMBRACE ROUGH TERRAIN

I've found that my favorite place to take outfit photos is the woods. Unfortunately, oftentimes the forest doesn't have a flat floor, but lucky for us, tripods have adjustable legs! If you find a great place to take photos in the woods, but the ground is uneven, just adjust the legs to make the camera level. I've taken lots of photos on some pretty steep hills, but because the legs adjust on my tripod, I can make it work!

HAVE AN EXPLANATION FOR WHAT YOU'RE DOING

I always have a phrase to use if someone comes up and asks me what the heck I'm doing. Mine is that I'm working on an assignment for a photography class (a self portrait assignment, maybe?). I find that it's easier than trying to explain the whole, "well, I'm a style blogger and I take photos of what I wear every day" thing. That usually just perplexes most people and then they ask me more questions when what I really want is for them to move along and let me finish taking photos. Kind of silly, but it's nice to have an answer ready so you don't panic and start rambling on to a stranger about your odd behavior.  Don't let them make you feel like you're doing something wrong, because you're not (unless you're like trespassing or something). 

TAKE LOTS OF PHOTOS

The more photos you take, the more likely you are to have a few good ones to choose from for your post!  If you take five photos and you post five photos, then you have to post even the ones you don't like very much.  If you take 50 photos, you're likely going to be able to pick five photos that you

really

like.  I've done self timer photo shoots where I took 100-200 photos.  I think my standard is usually 30-70, though.  Once you have a groove down, you can set things up pretty quickly and take quite a few photos in a relatively short amount of time.  

HAVE YOUR GO-TO POSES

It's nice to know which poses usually yield good photos. Sure, sometimes it can get repetitive and you don't want to take 30 photos of you in the exact same pose.  Outfit photos in general can be relatively repetitive and it's nice to have poses you know well that result in photos you like.  Even professional models have go-to poses that they know look awesome every time.  I like to always do some shots with my go-to outfit poses, but then also try out some different things that may not result in good photos, but can be fun if they happen to turn out.

GET DETAIL SHOTS + VARIETY

Remember to get shots of the details of your outfits, like your shoes, some cute buttons on your dress, or fun jewelry you're wearing.  Shots like this add variety to the images in my blog posts and are visually interesting.  Change angles at your location, don't take all your photos with the tripod in one place.  Move around, find different backgrounds, take photos at different distances.  Maybe get a full length shot or two, a couple mid-distance shots from the thighs/hips up, and then a close up detail shot.  

USE MOVEMENT

I love getting photos that capture movement because they show more of how your outfit reacts to motion. I like to see how fabric looks when it's in motion, as well as seeing how an outfit looks when a person is stationary. I think it's interesting that almost all fashion shows are done with the models walking, in motion. Seeing clothing move can be a lot more interesting than seeing it just sitting there motionless. Plus, clothes are designed to move with us, so it's nice to see it actually doing that!

DON'T ALWAYS LOOK DIRECTLY AT THE CAMERA

And not just in the pigeon-toed-look-at-my-feet blogger pose way. While I definitely take plenty of those kinds of photos, I also like to look off in the distance (corny, I know!), or turn my back to the camera.  It adds variety to your photos, and also gives you a chance to show of different angles of your outfit.  Not looking directly at the camera gives photos a more candid feel as well, as if you're unaware of the camera.  It can make you look more natural, rather than posed and rigidly looking into a camera lens.  Obviously

you know

the camera is there, but acting like it isn't can result in photos that are much more natural and relaxed.

USE DIFFERENT ANGLES + POINTS OF VIEW

I'm not a big fan of seeing 10 outfit photos of someone standing in the same place with slight variations on the same pose. Granted, I'm guilty of it at times when I'm not feeling very creative or am being more lazy, but I love outfit photos that are visually interesting in addition to showing my outfit. One way to help your photos be more interesting is to use some different angles. This can be a bit more difficult if you're using a tripod, but the more you get comfortable using a tripod & self-timer, the better you get at making it work to get the angles and compositions you want!

Sometimes using a self-timer and tripod and be really frustrating, but don't give up! True story, I've gotten so mad trying to take photos that I've thrown my bike and screamed after trying to get shots of myself riding it (I think PMS may have contributed to that incident...). It can be hard to take outfit shots with just a tripod & self-timer, and there will for sure be times you wish you could just have a professional photographer boyfriend to take your outfit shots every day, but I love the independence that taking my own outfit photos has given me. I don't need to have someone around to do my photos, I can take my own! Whenever, wherever!  And taking your own photos helps you get better at photography in general.  You'll learn about composition, how your camera works, what lighting works best, and more, just from practicing it all the time.

Want some more tips for photography?