Thanks to LINX Pergola for sponsoring this post

The perfect DIY pergola system doesn’t exi— just kidding, I totally found it, y’all. The most important part of this build was finding the right bracket system. I knew I wanted something simple, modern, and DIY friendly and when I came across LINX Pergola, I was immediately intrigued. Not only did LINX have the brackets that fit my vision, they also had their STIX engineered hollow timbers. They work perfectly with the brackets, are lighter than standard lumber, and can be used to hide cords for lighting.
Using LINX took a ton of guesswork out of building a pergola, the instructions were easy to understand and follow, and it was also super easy to create something totally custom because of how versatile all their different brackets are.
Lets go through how I designed and built my pergola.
Materials + Tools:
4 LINX UNIFIT base brackets
4 LINX TRIFIT corner brackets
2 12ft STIX 6x6 timbers
6 8ft STIX 6x6 timbers
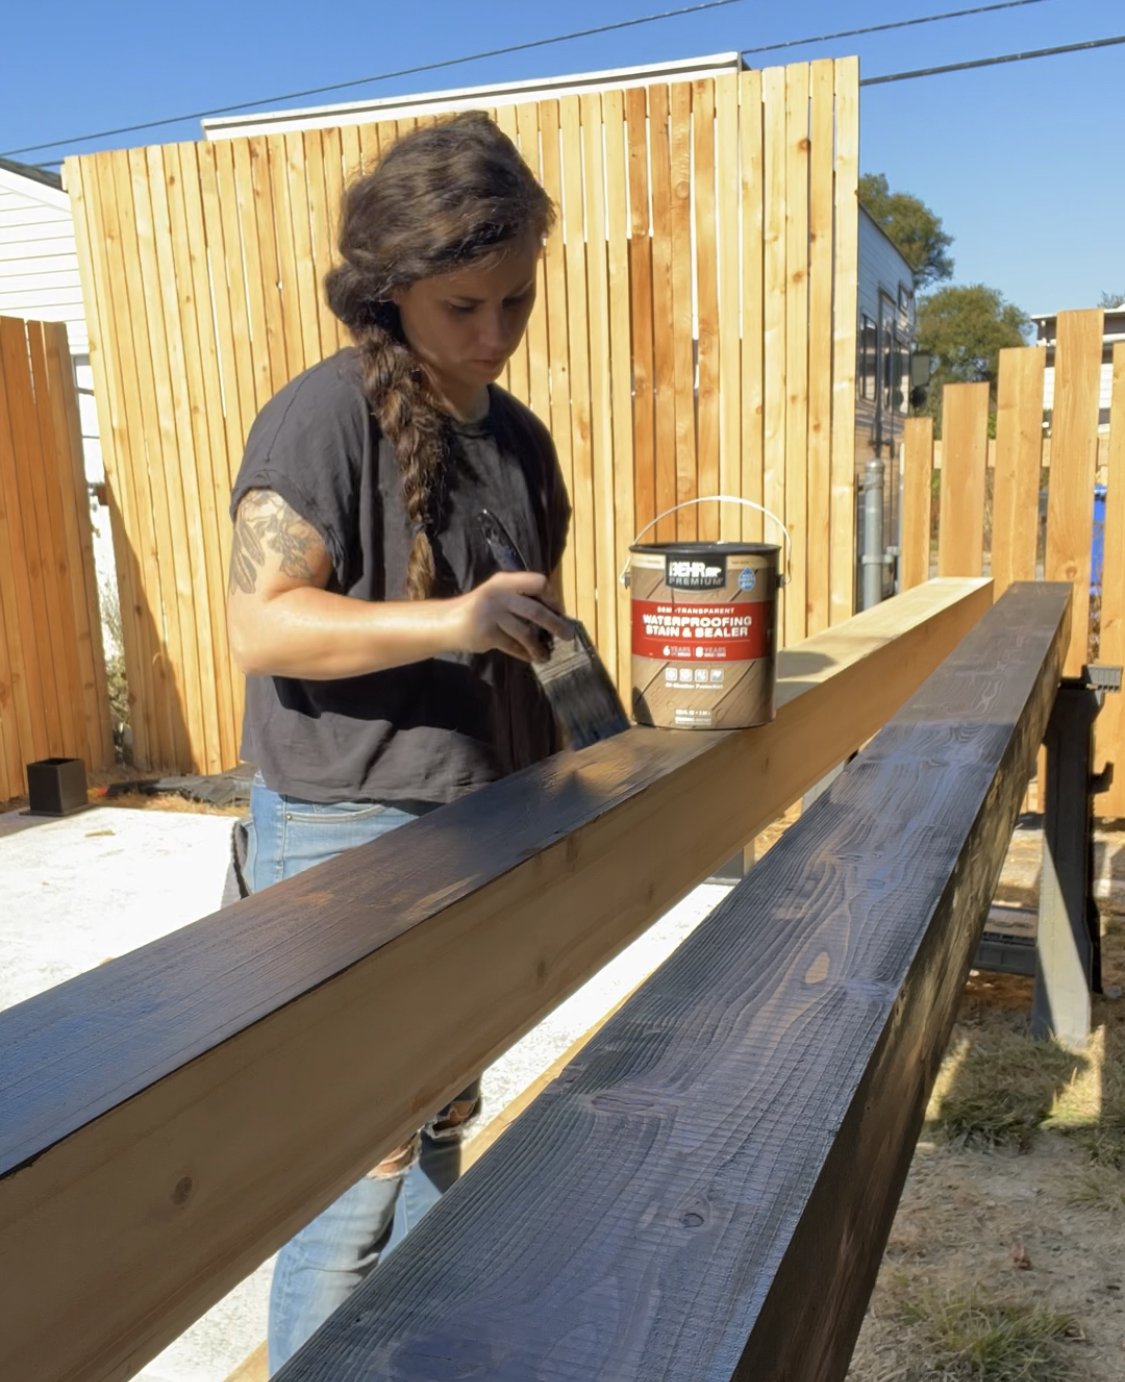
1 gal Behr semi-transparent stain in Slate
4 36x96in Wild Hog fence panels
2 6ft Wild Hog Hog Tracks kits
3 8ft cedar 2x4s
6 2x4 joist hanger brackets
16 1/4 x 4 1/2in concrete expansion anchors
Impact Driver
Rotary Hammer
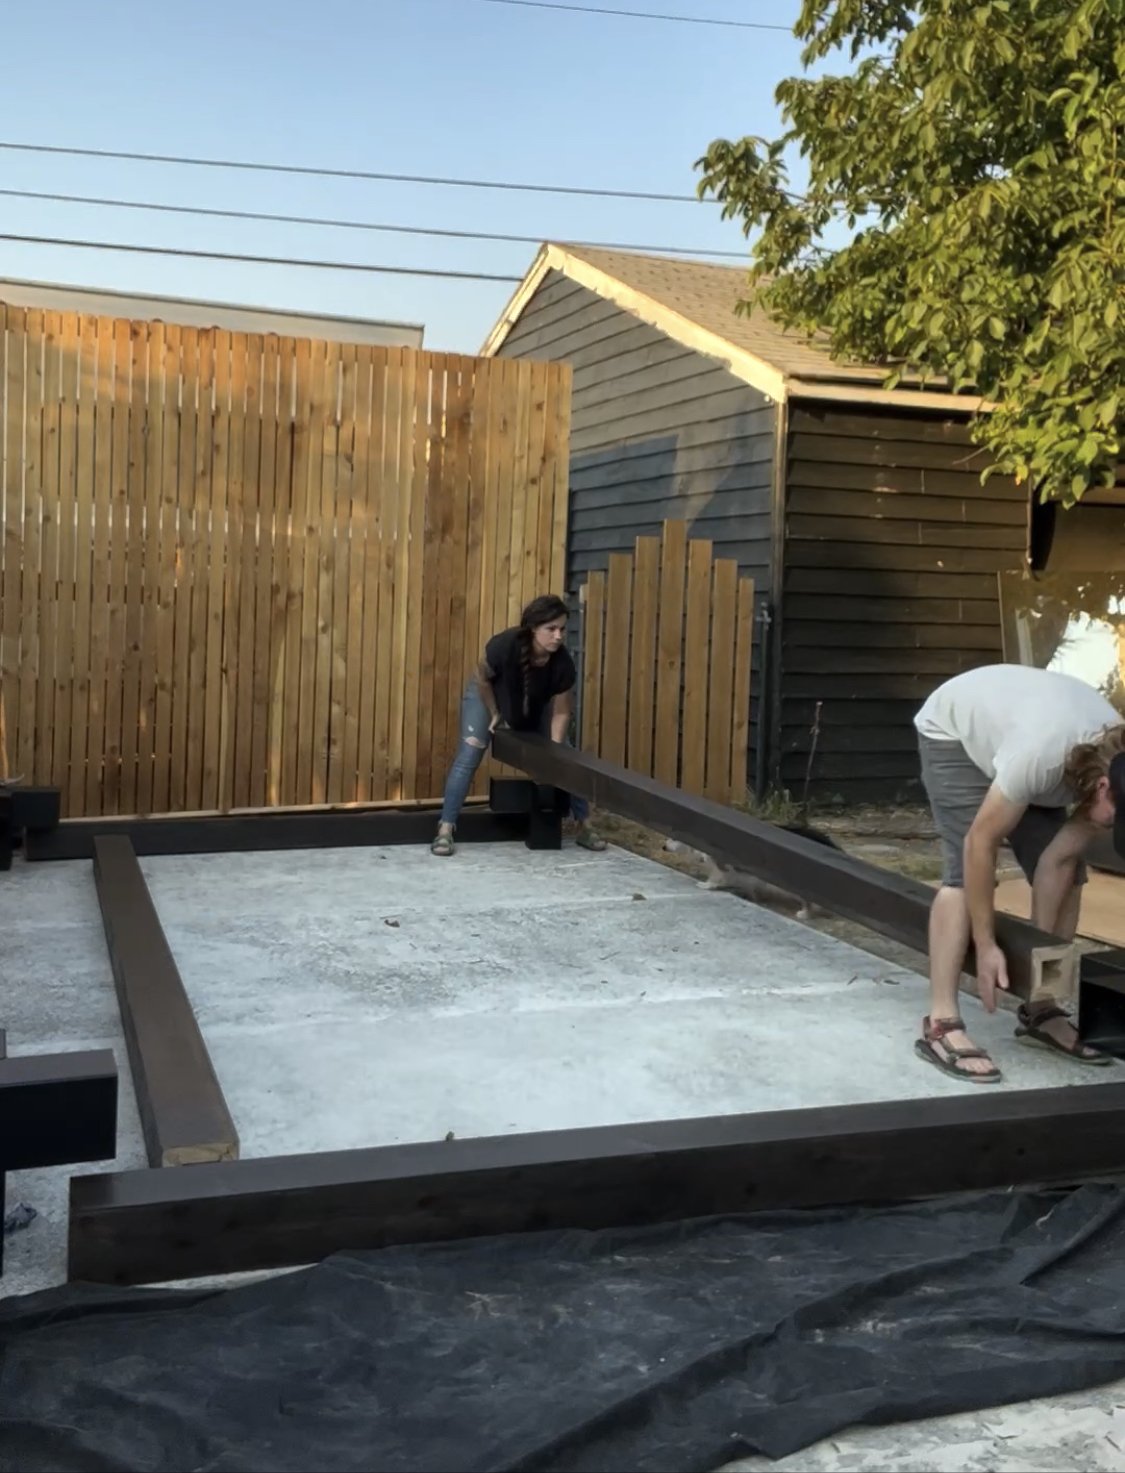
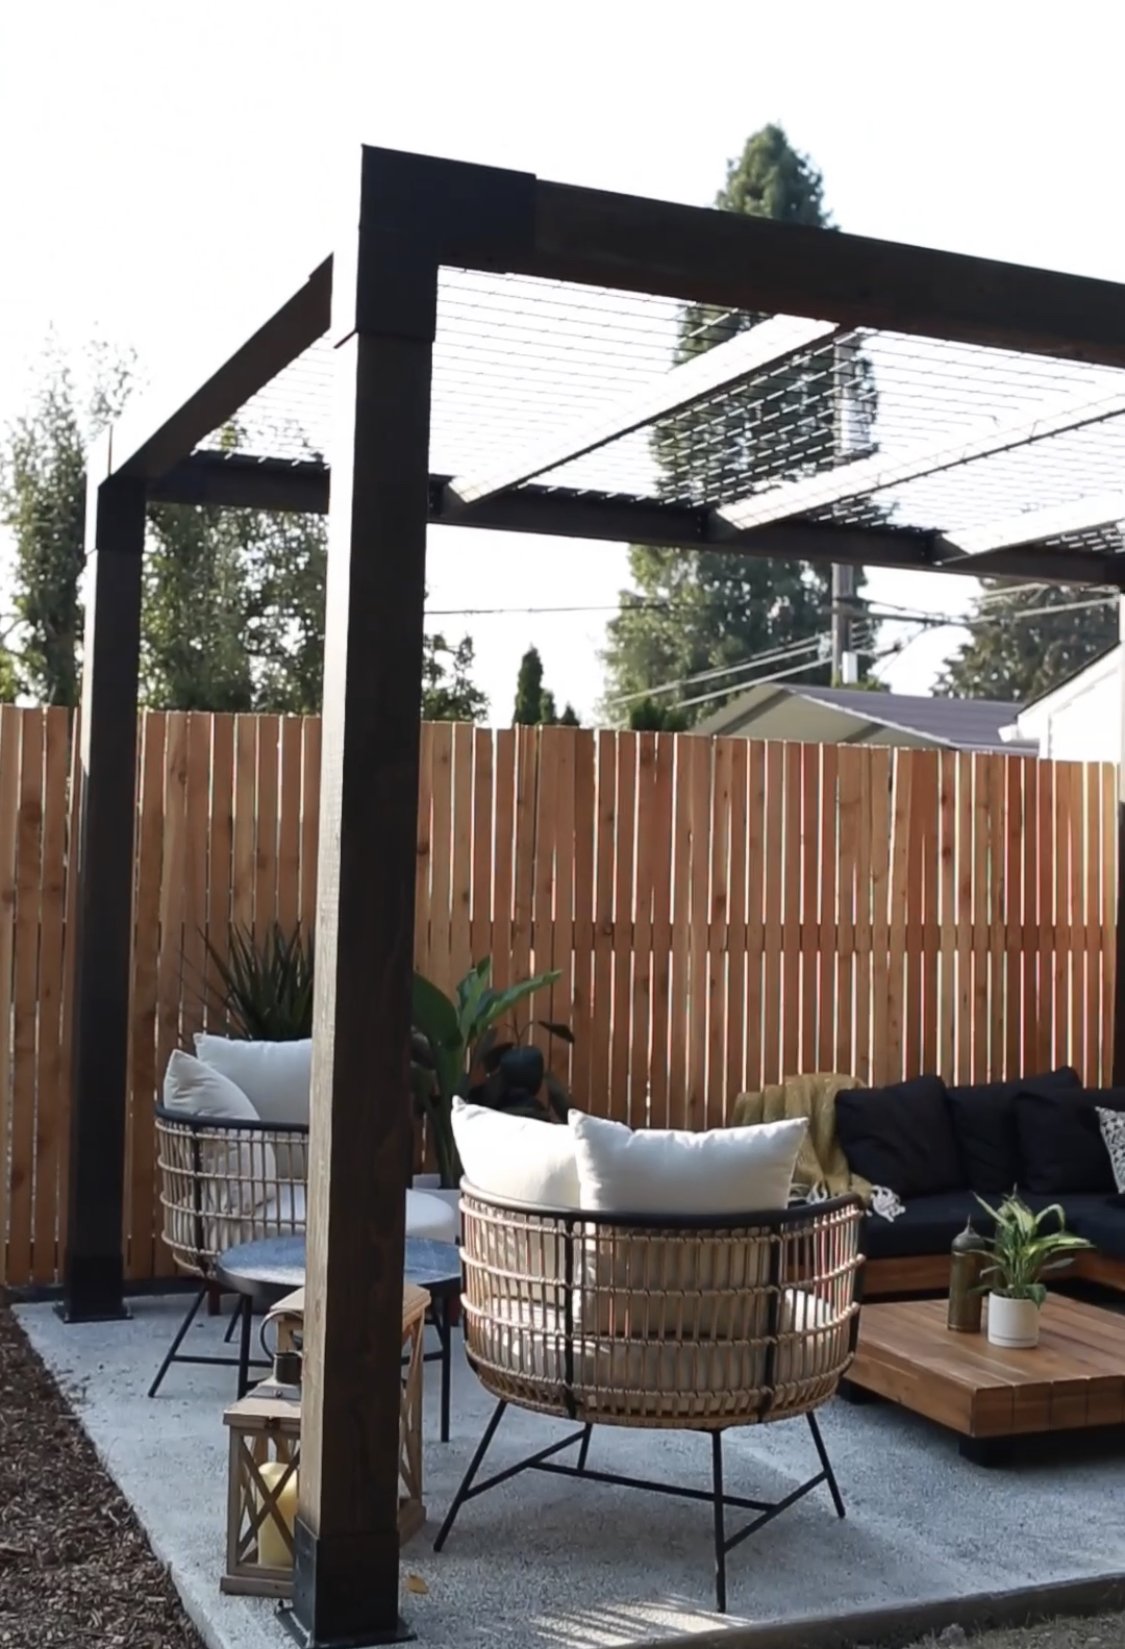
I knew I wanted enough space for a sectional and some lounge chairs on our patio, so I wanted a pergola that was about 8ft by 12ft. Because the posts are 6x6, that added 1ft to the total length and width of the pergola, and when we poured our concrete patio, we made it an additional foot larger to give 6 inches of space on the outside of the pergola.
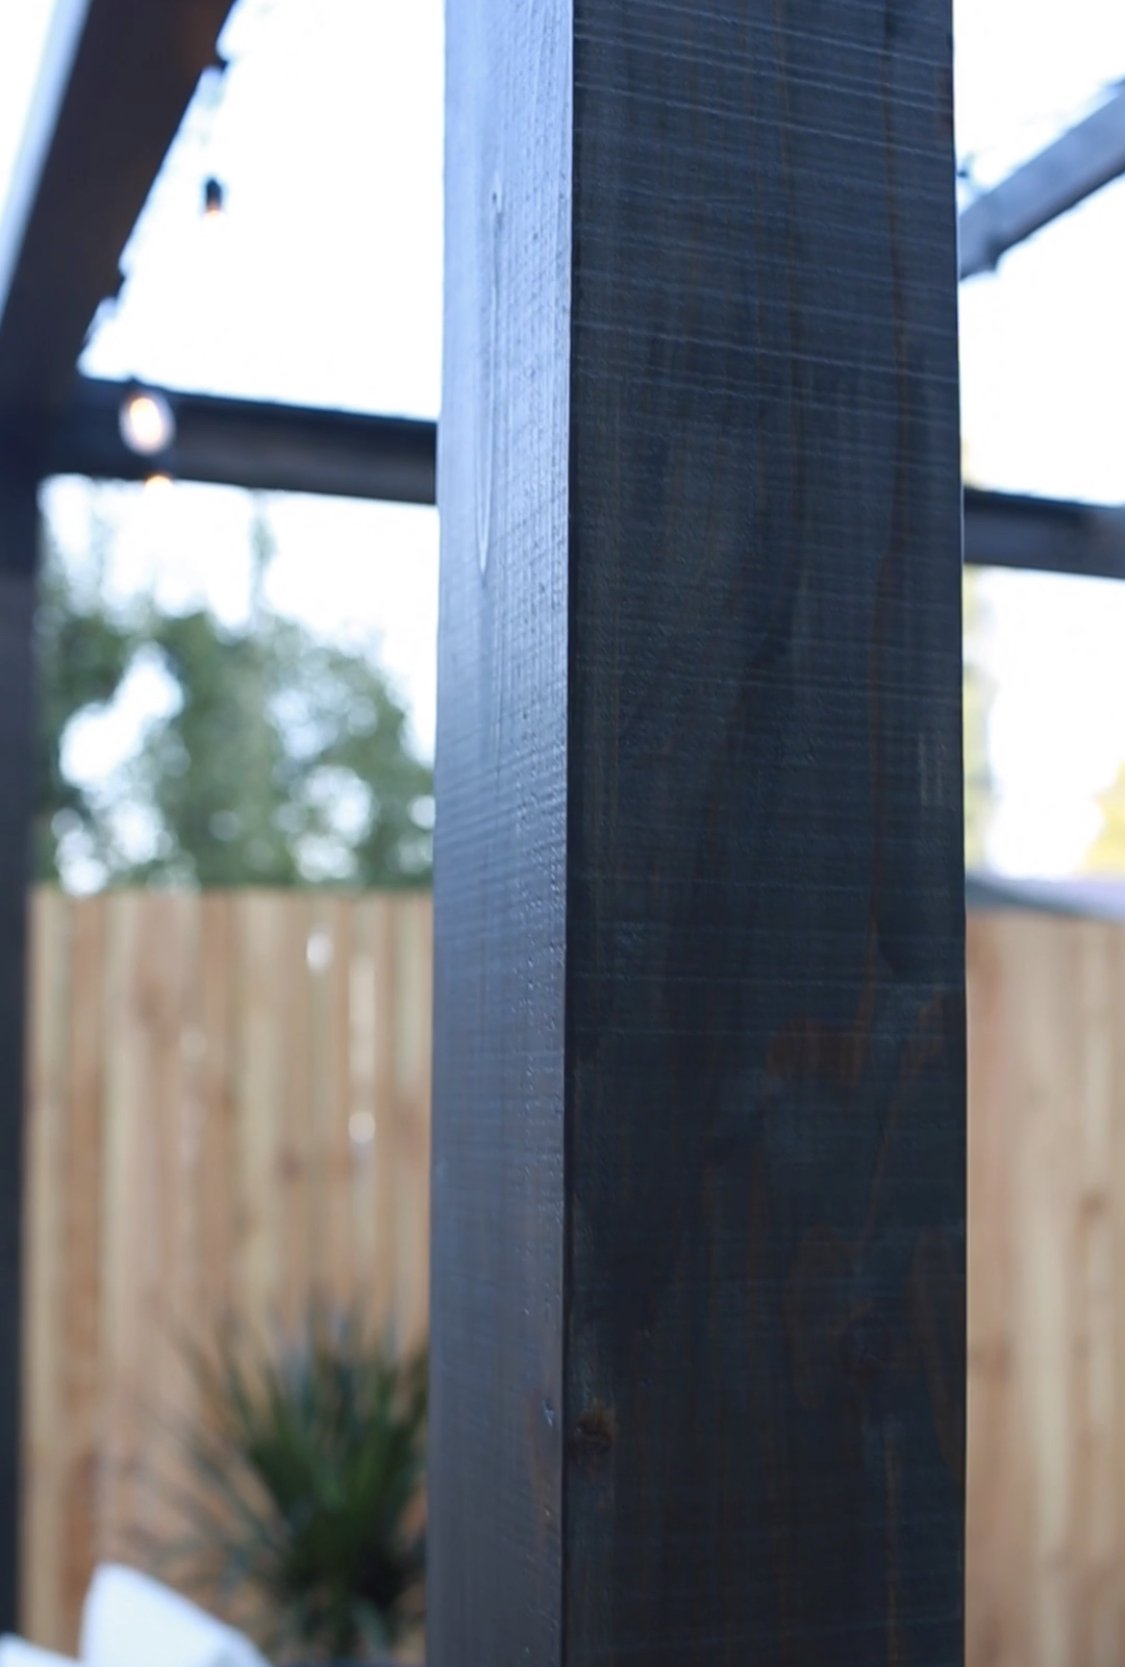
With the fencing and furniture having a lot of very warm wood tones, I didn’t want the pergola to disappear into the background, so I stained the timbers an off black color, the color Slate in Behr’s semi-transparent deck stain, to complete the modern look.
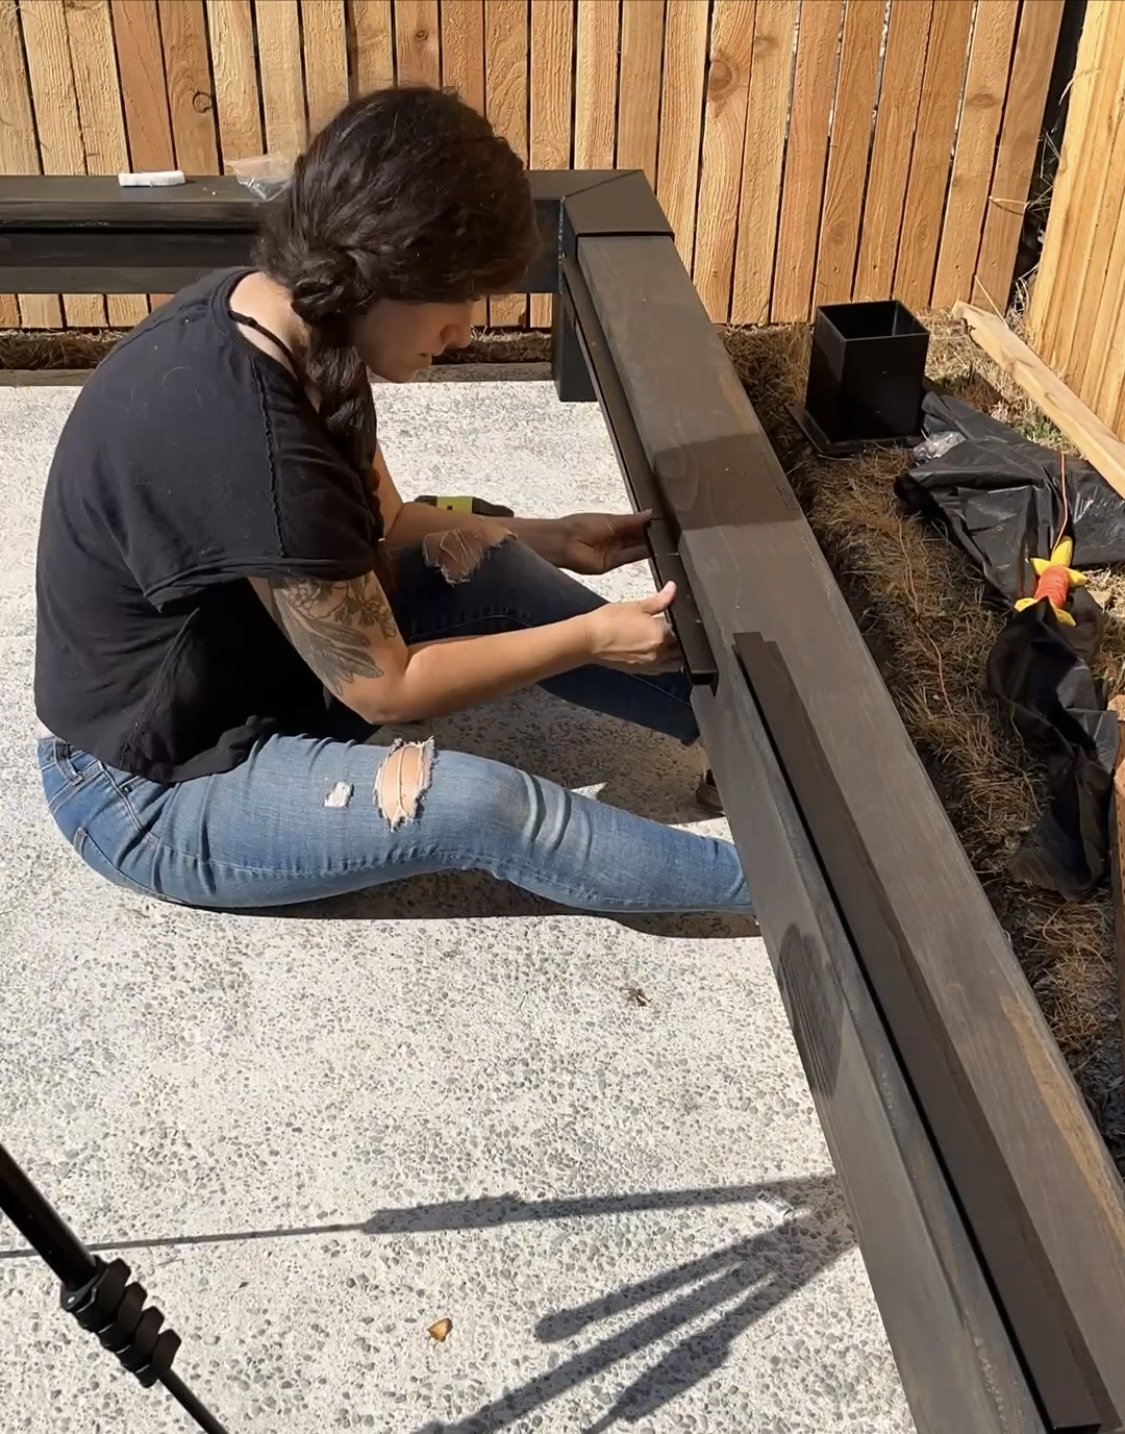
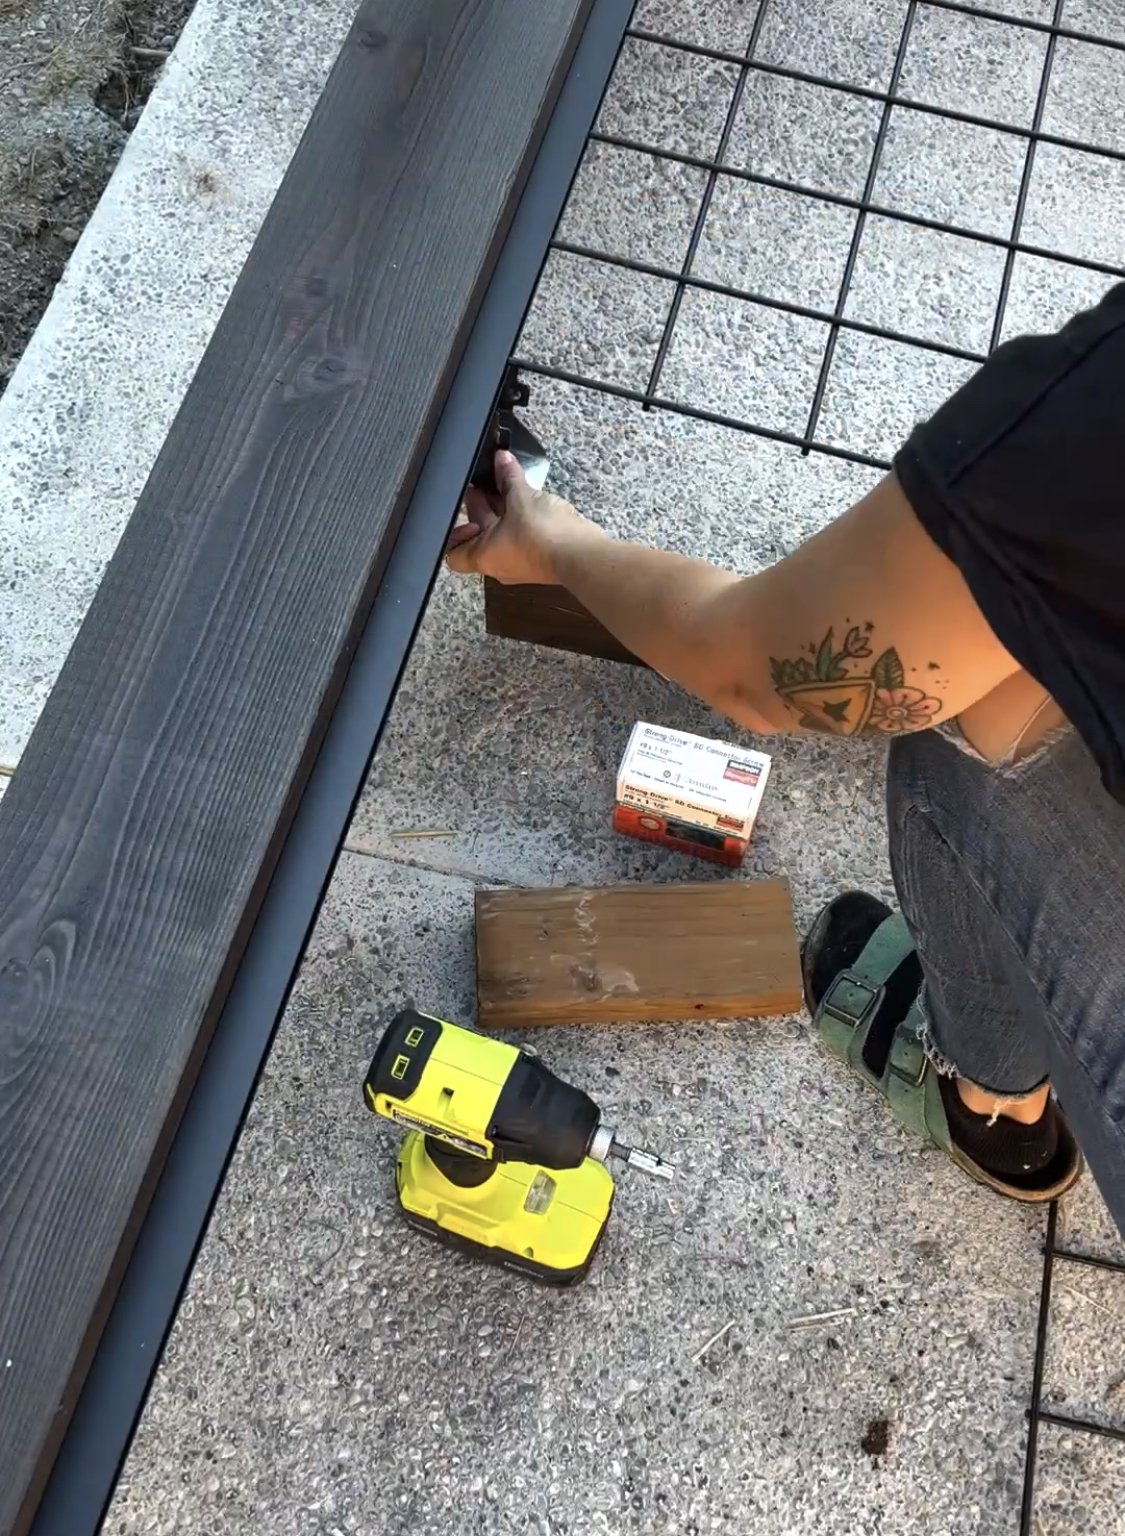
Once all the wood was stained, it was time to start assembling. You start by sliding the corner brackets onto the ends of two opposite side beams, then slide in the other two side beams to one of those to create a U shape. Finally, close up the U shape by sliding the final side, and secure with the provides screws. LINX includes all the screws as well as the driver bits, so you don’t have to worry about finding the proper screws.
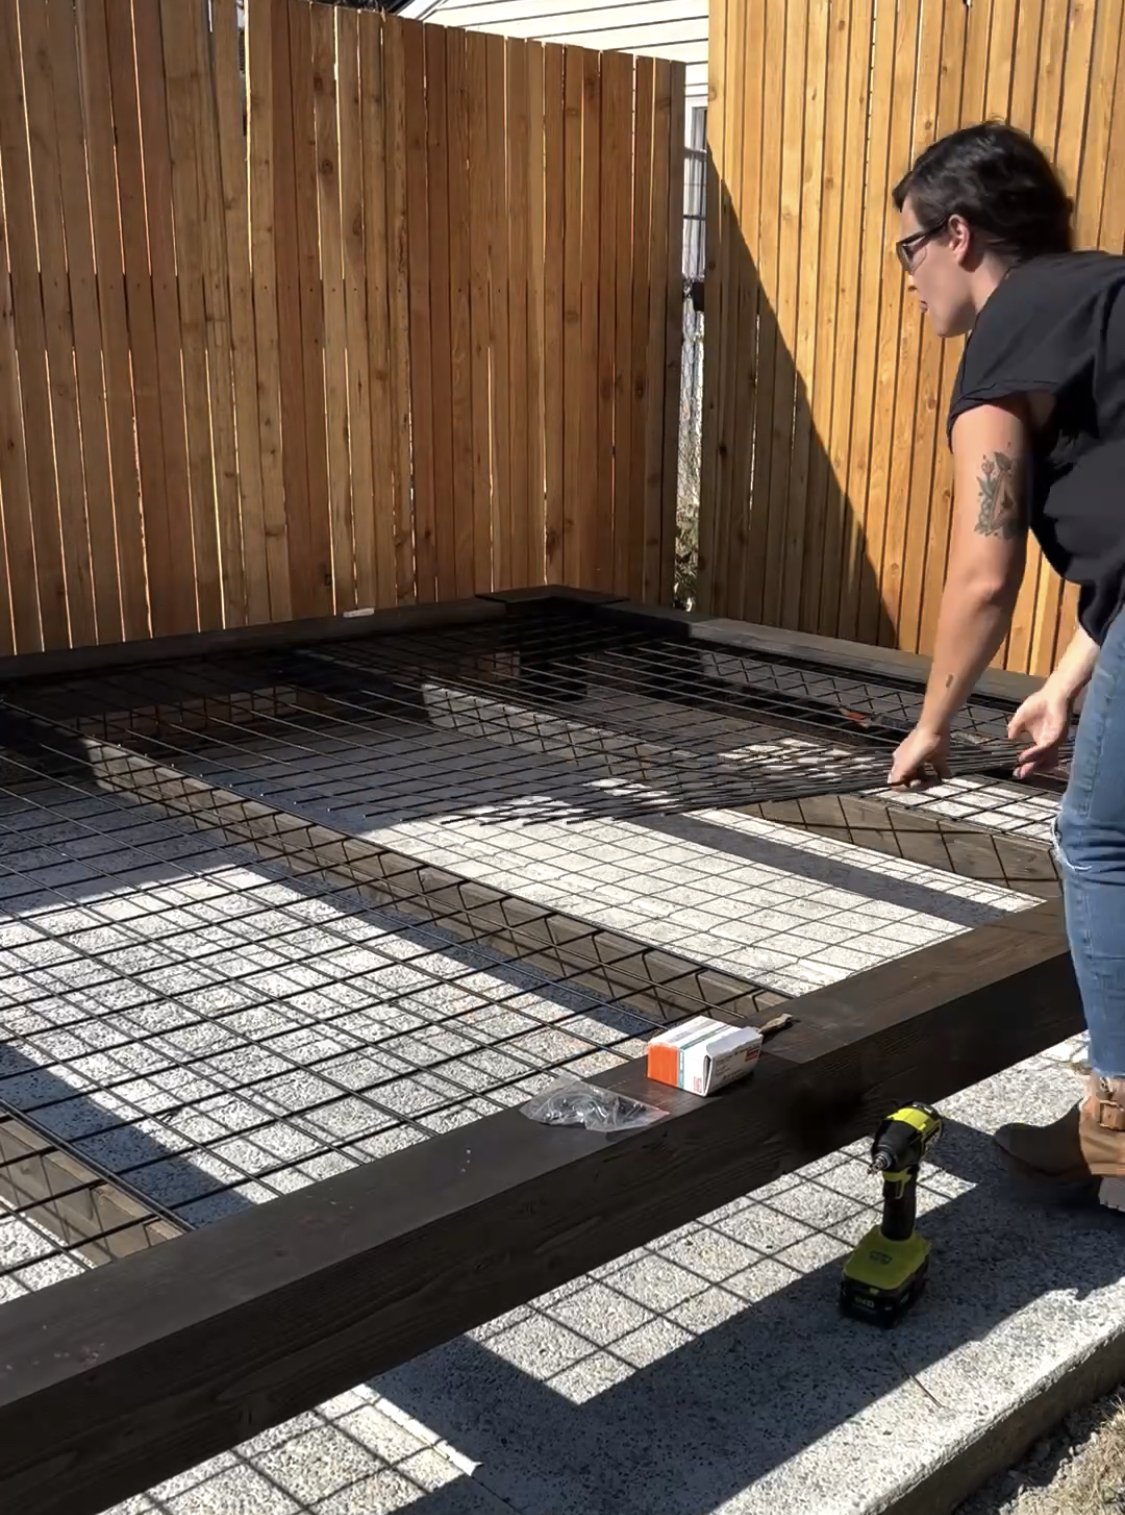
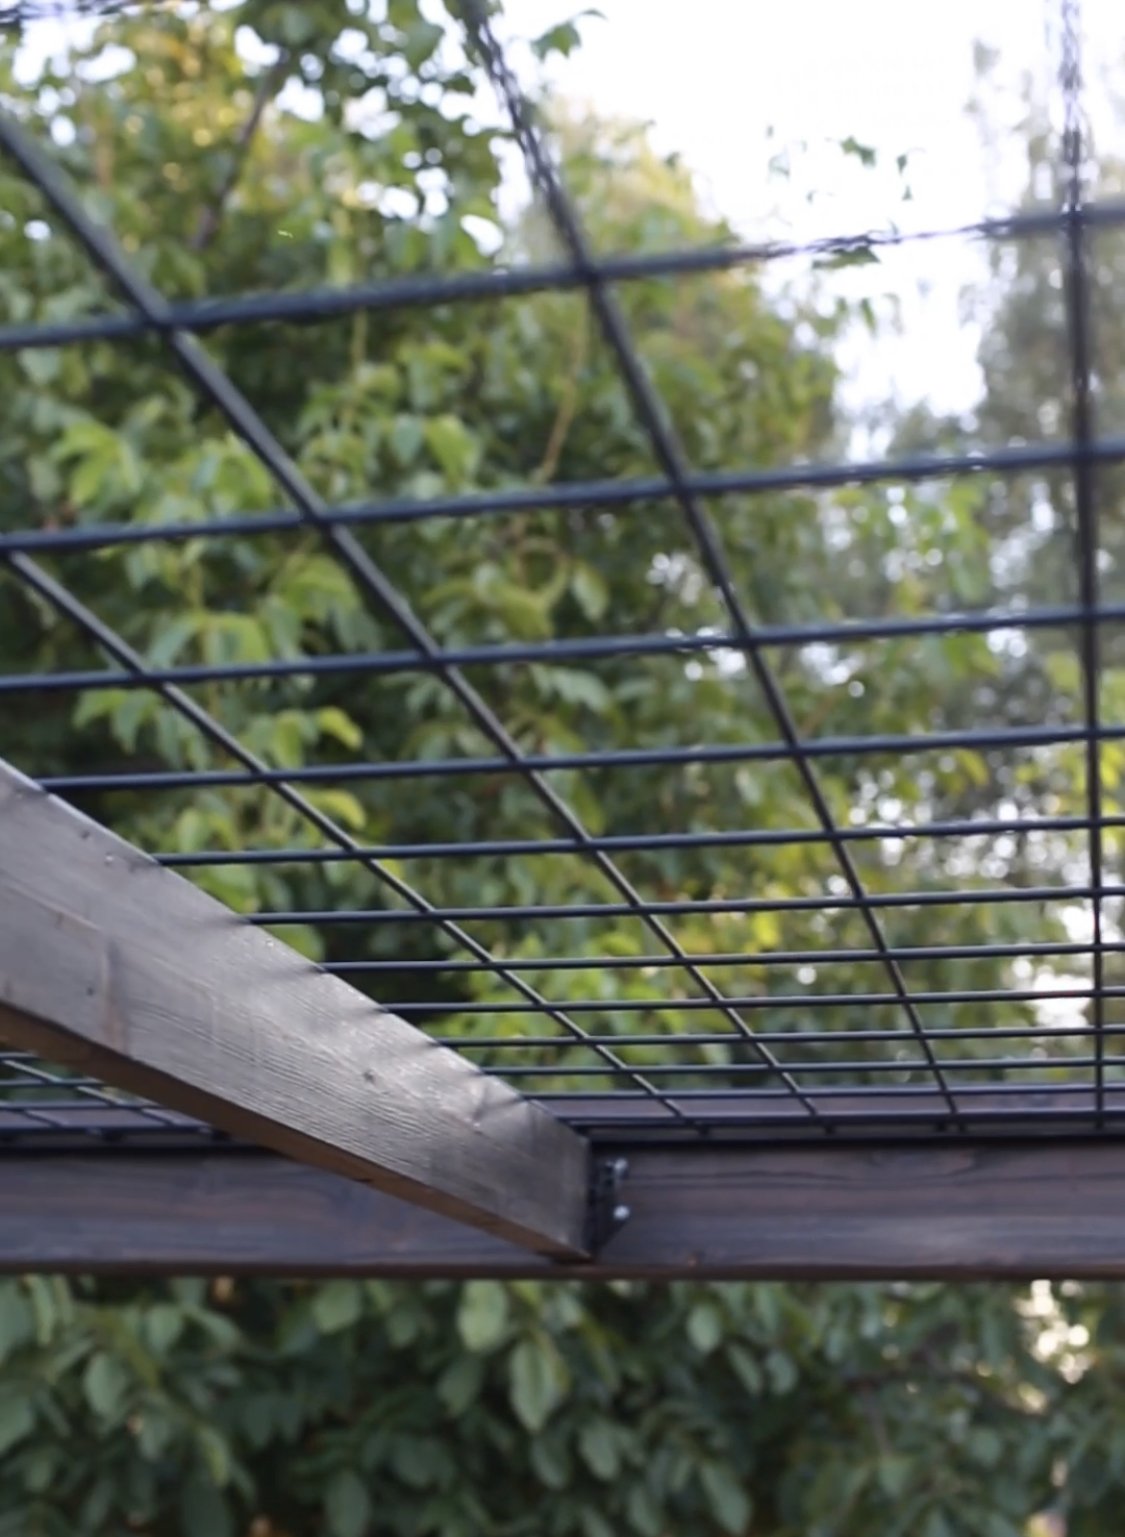
At this point you can install a shade cover if you want (LINX has shade covers that work perfectly with their system), but I wanted to create a gridded roof for my hop plants to climb on during the summer. I used Wild Hog fence panels along with their Hog Tracks to seamlessly integrate the fence panels into the pergola. I installed three cedar 2x4’s across the middle to support those Wild Hog fence panels.
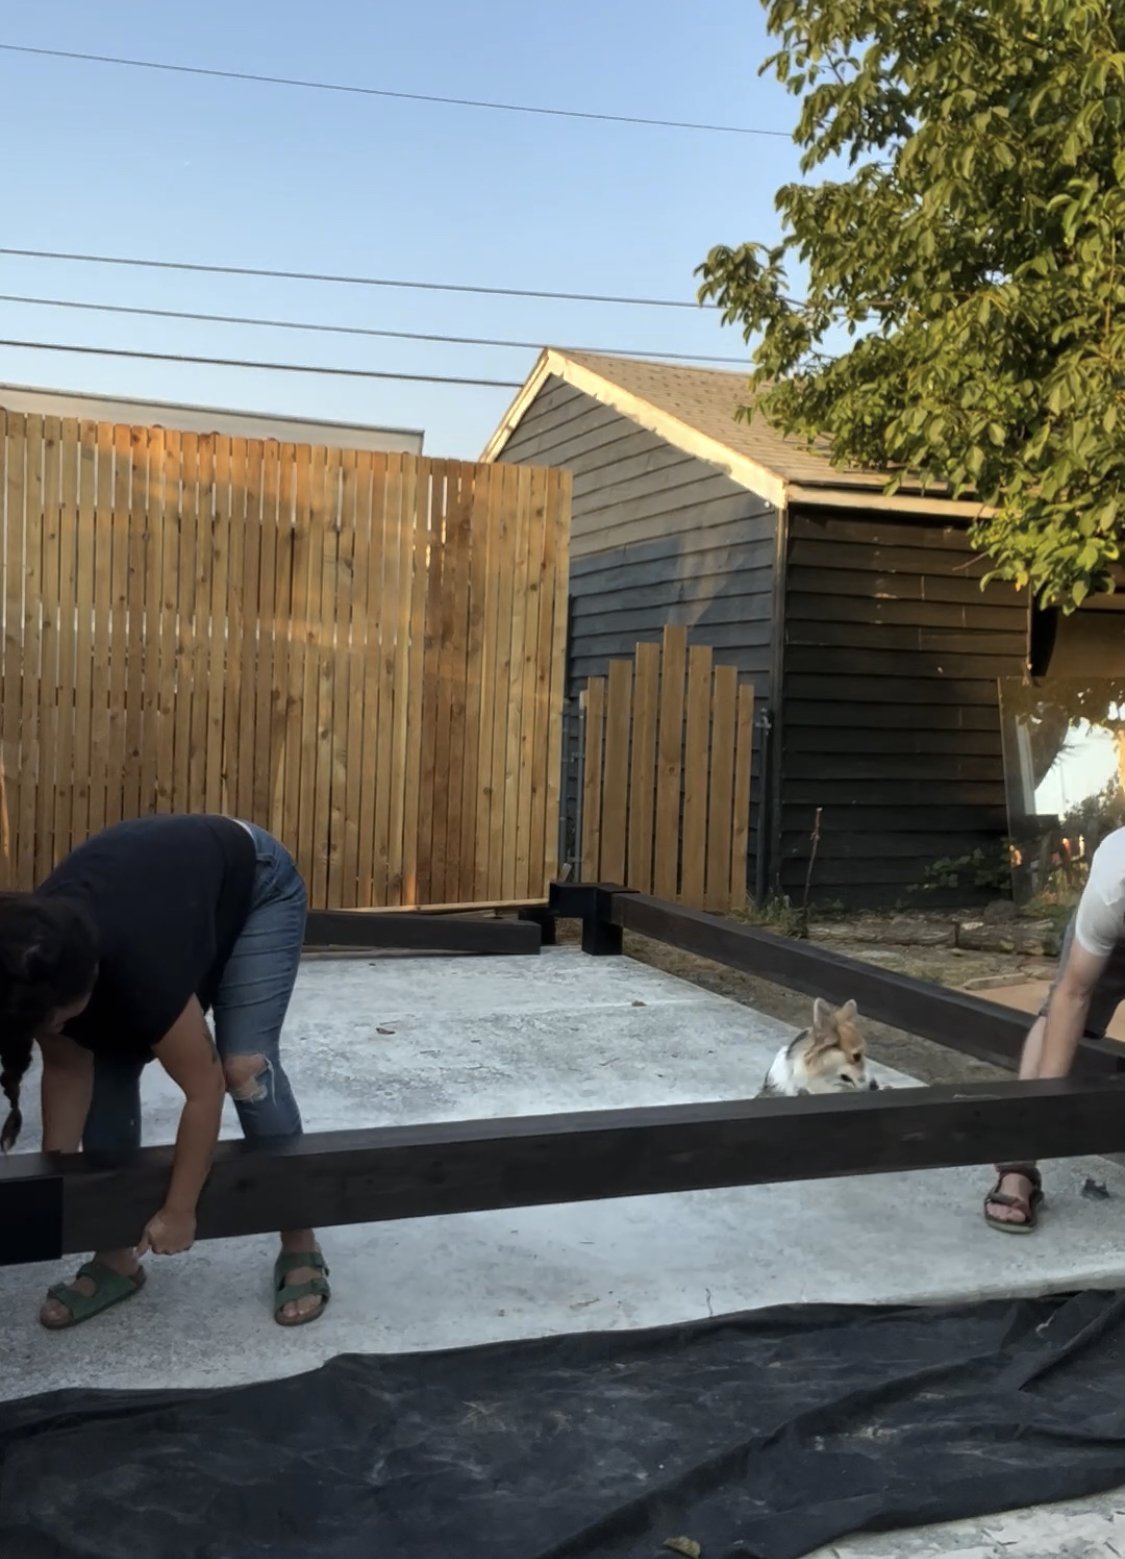
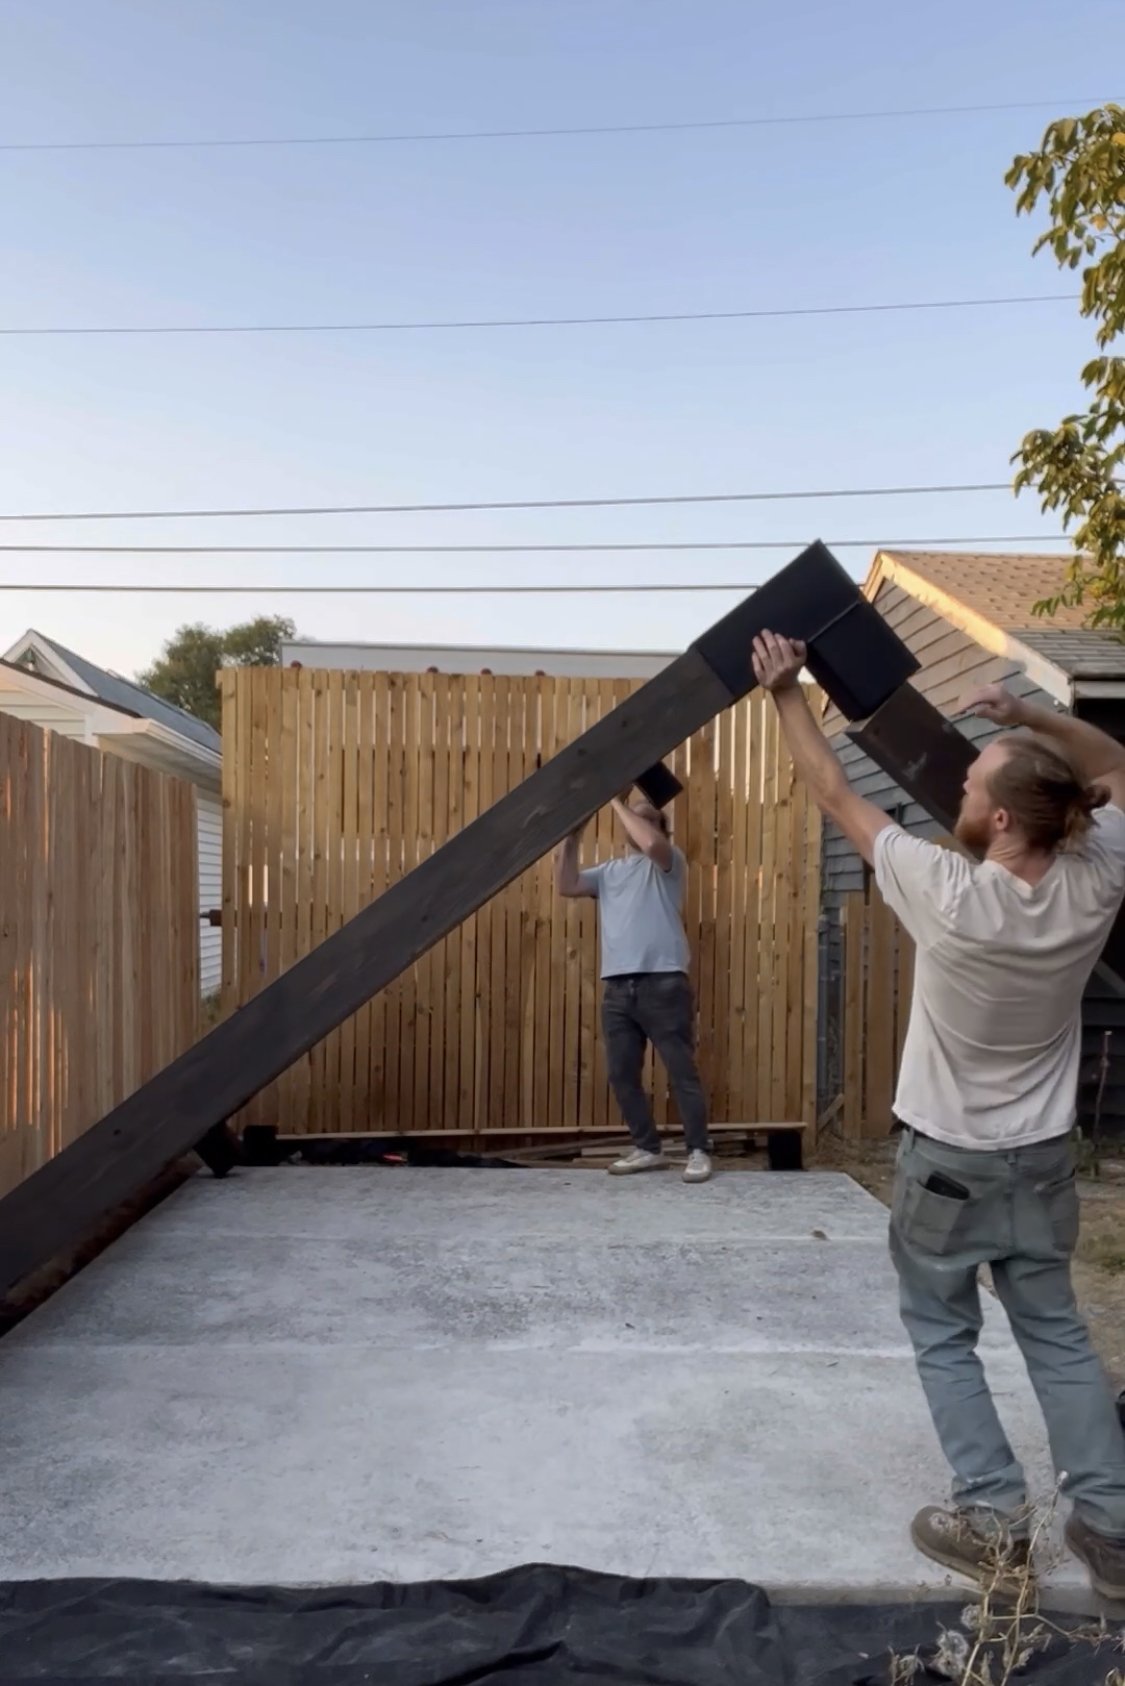
Now, the exciting part— getting this bad boy raised up! This is a step you definitely want to have help with. For a pergola with 6x6 lumber I’d highly recommend having at least 4 strong people, and you’ll want two 6ft ladders. First, you raise up one side at an angle to slide in the posts into the brackets. Then you’ll go to the other side, raise that side up so you can slide the ladders under to support it, then two people will climb up the ladders and raise the pergola high enough that the other two people can slide the remaining two posts in. Then, you’ll position the pergola in place (one person on each leg of the pergola, lift the pergola and carefully move it to its final resting place).
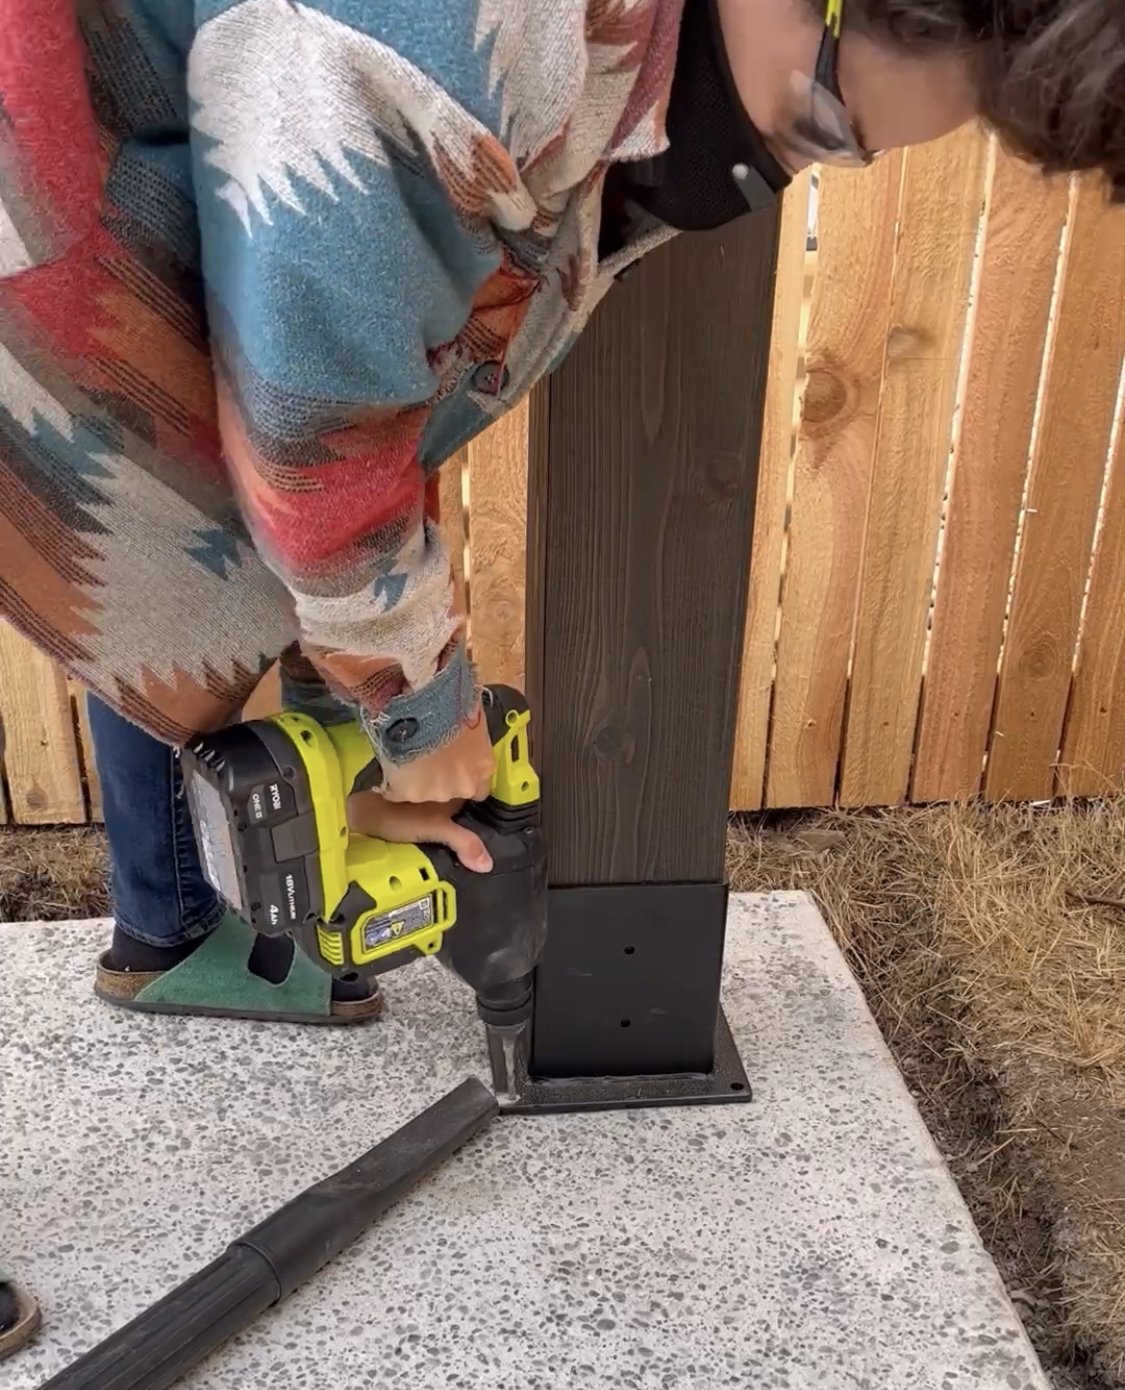
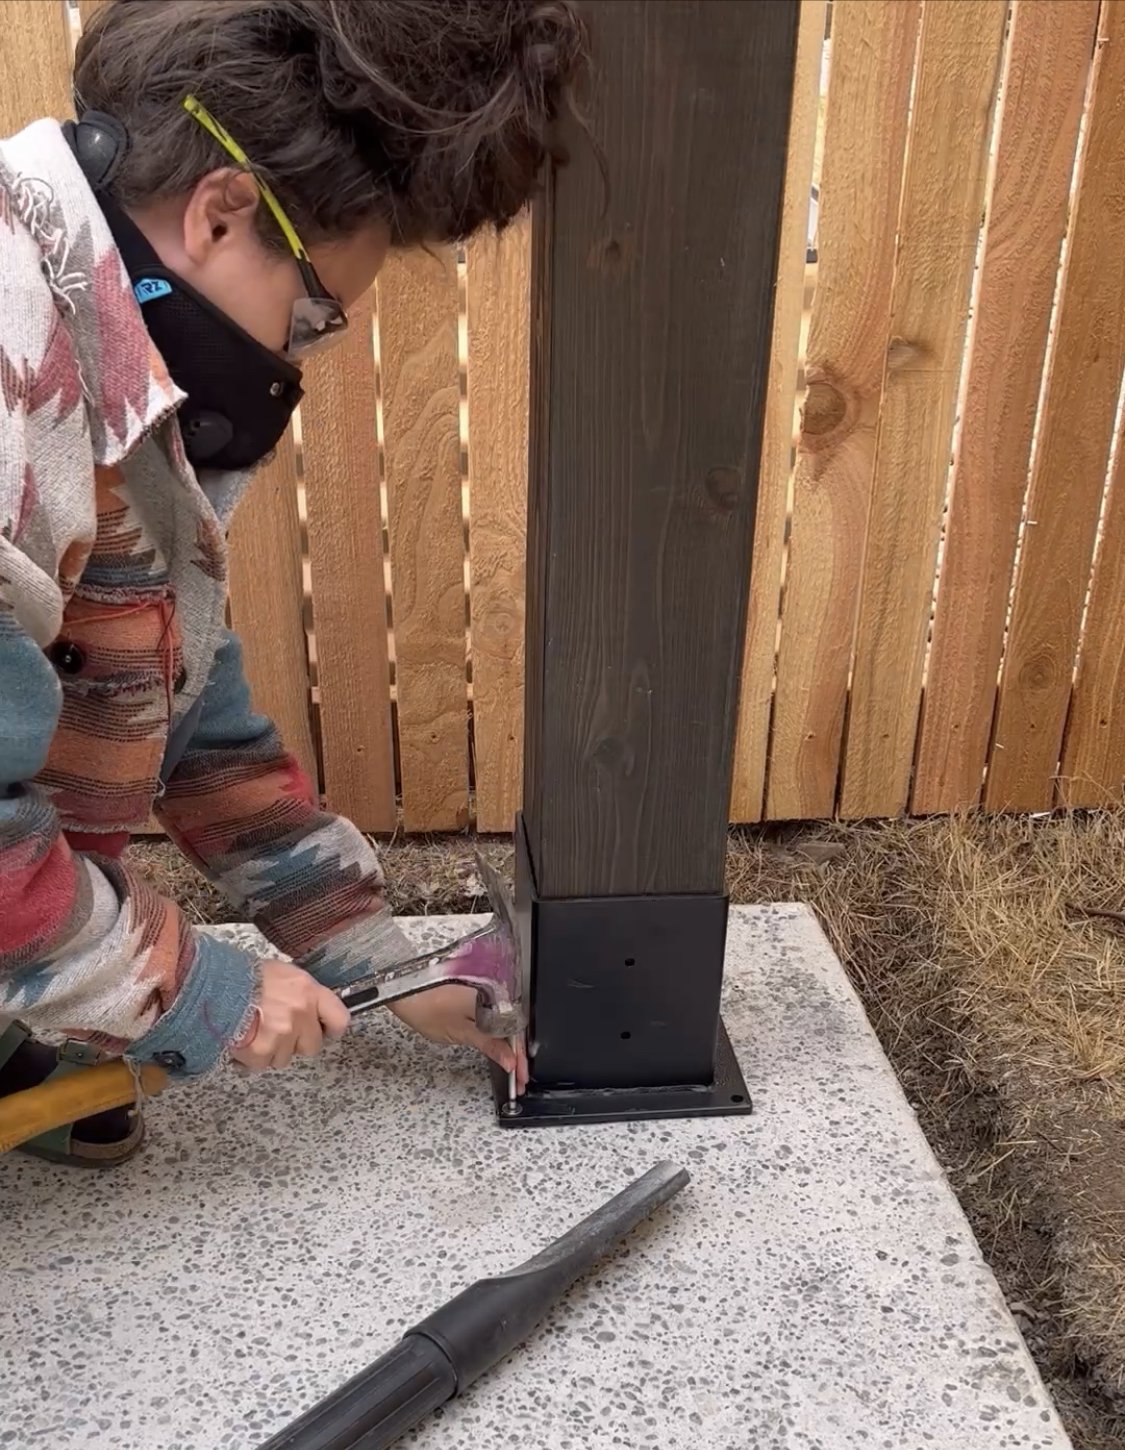
Securing the pergola will depend on what it’s sitting on. If it’s a deck, you’ll use the base brackets to attach it to the deck, since we put it on a concrete patio, we used concrete expansion anchors to secure it. If you’re not sure the best way to secure it, you can look up your local building codes.
That’s it! It’s a really simple plug-and-play installation, and with all the different bracket configurations, there’s a ton of options for creating something completely custom. Check out LINX’s instagram to see a bunch of ways that people have created their own custom designs! I’ve got some of my own ideas scheming up in my head for some custom creations!


![This print feels even more relevant today. We all joke about the dumpster fire of [insert year here], but the important message of this image to me is that *we persist* through the horrors. We stand, we fight— maybe for ourselves, maybe for oth](https://images.squarespace-cdn.com/content/v1/574dddd6d51cd4bc35c1609a/1730935170369-03GPKQ5NF73VAE65RHO6/image-asset.jpeg)