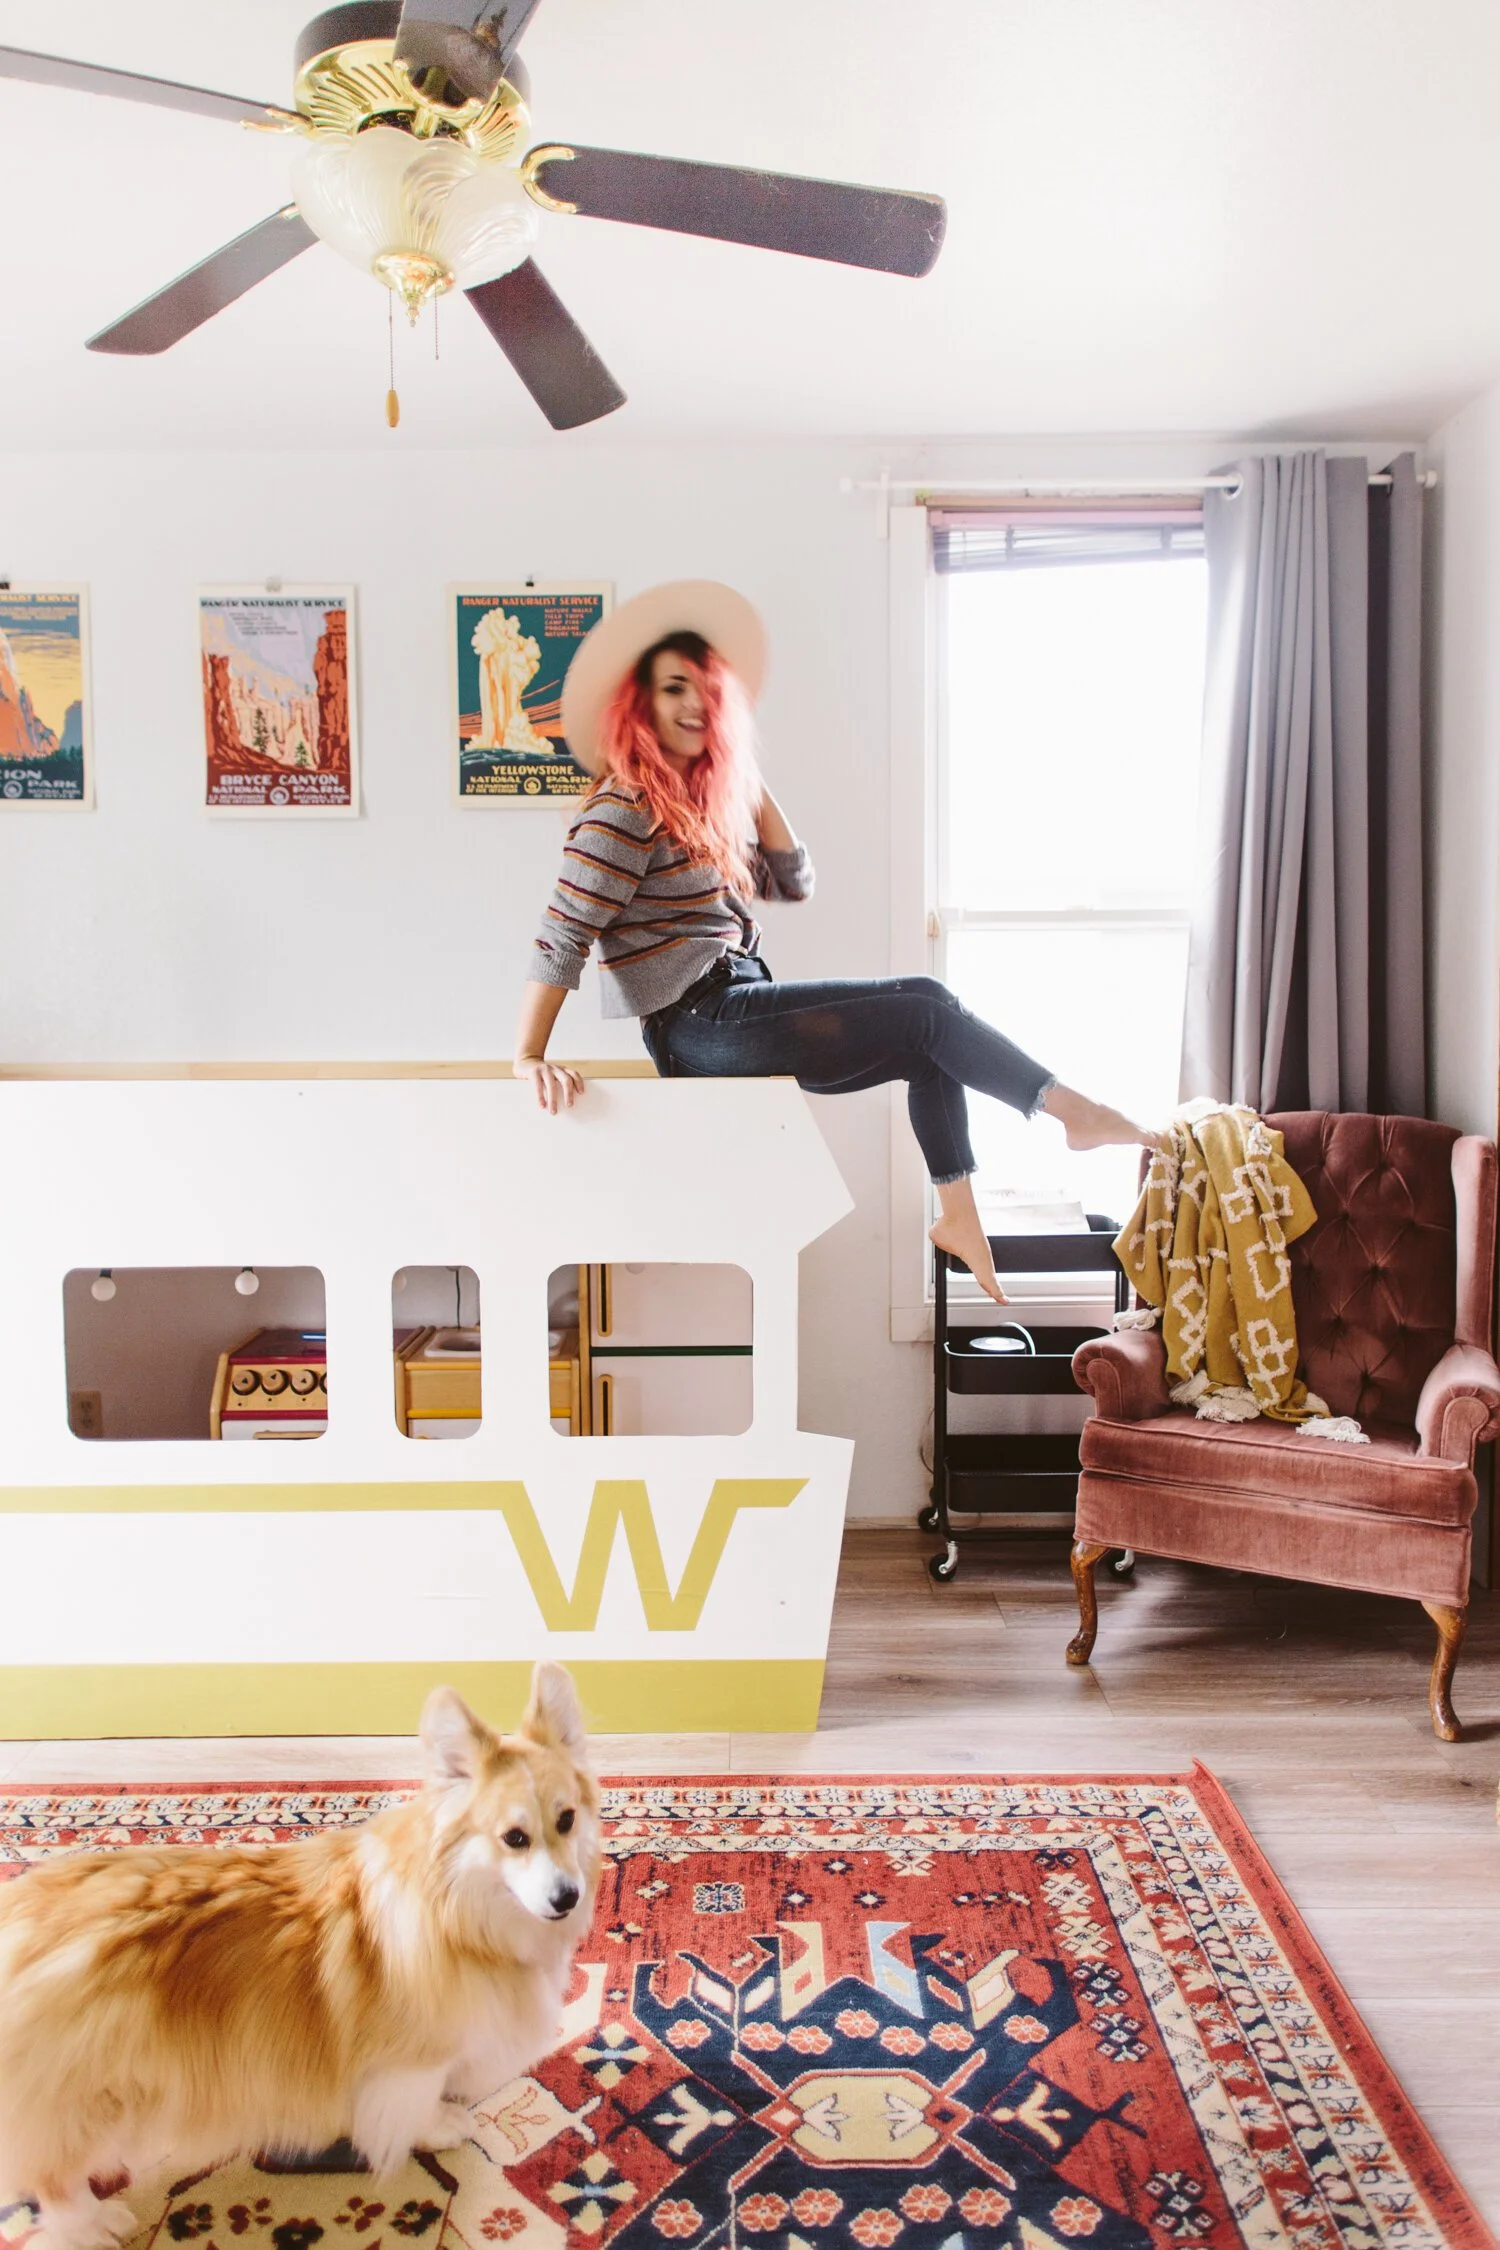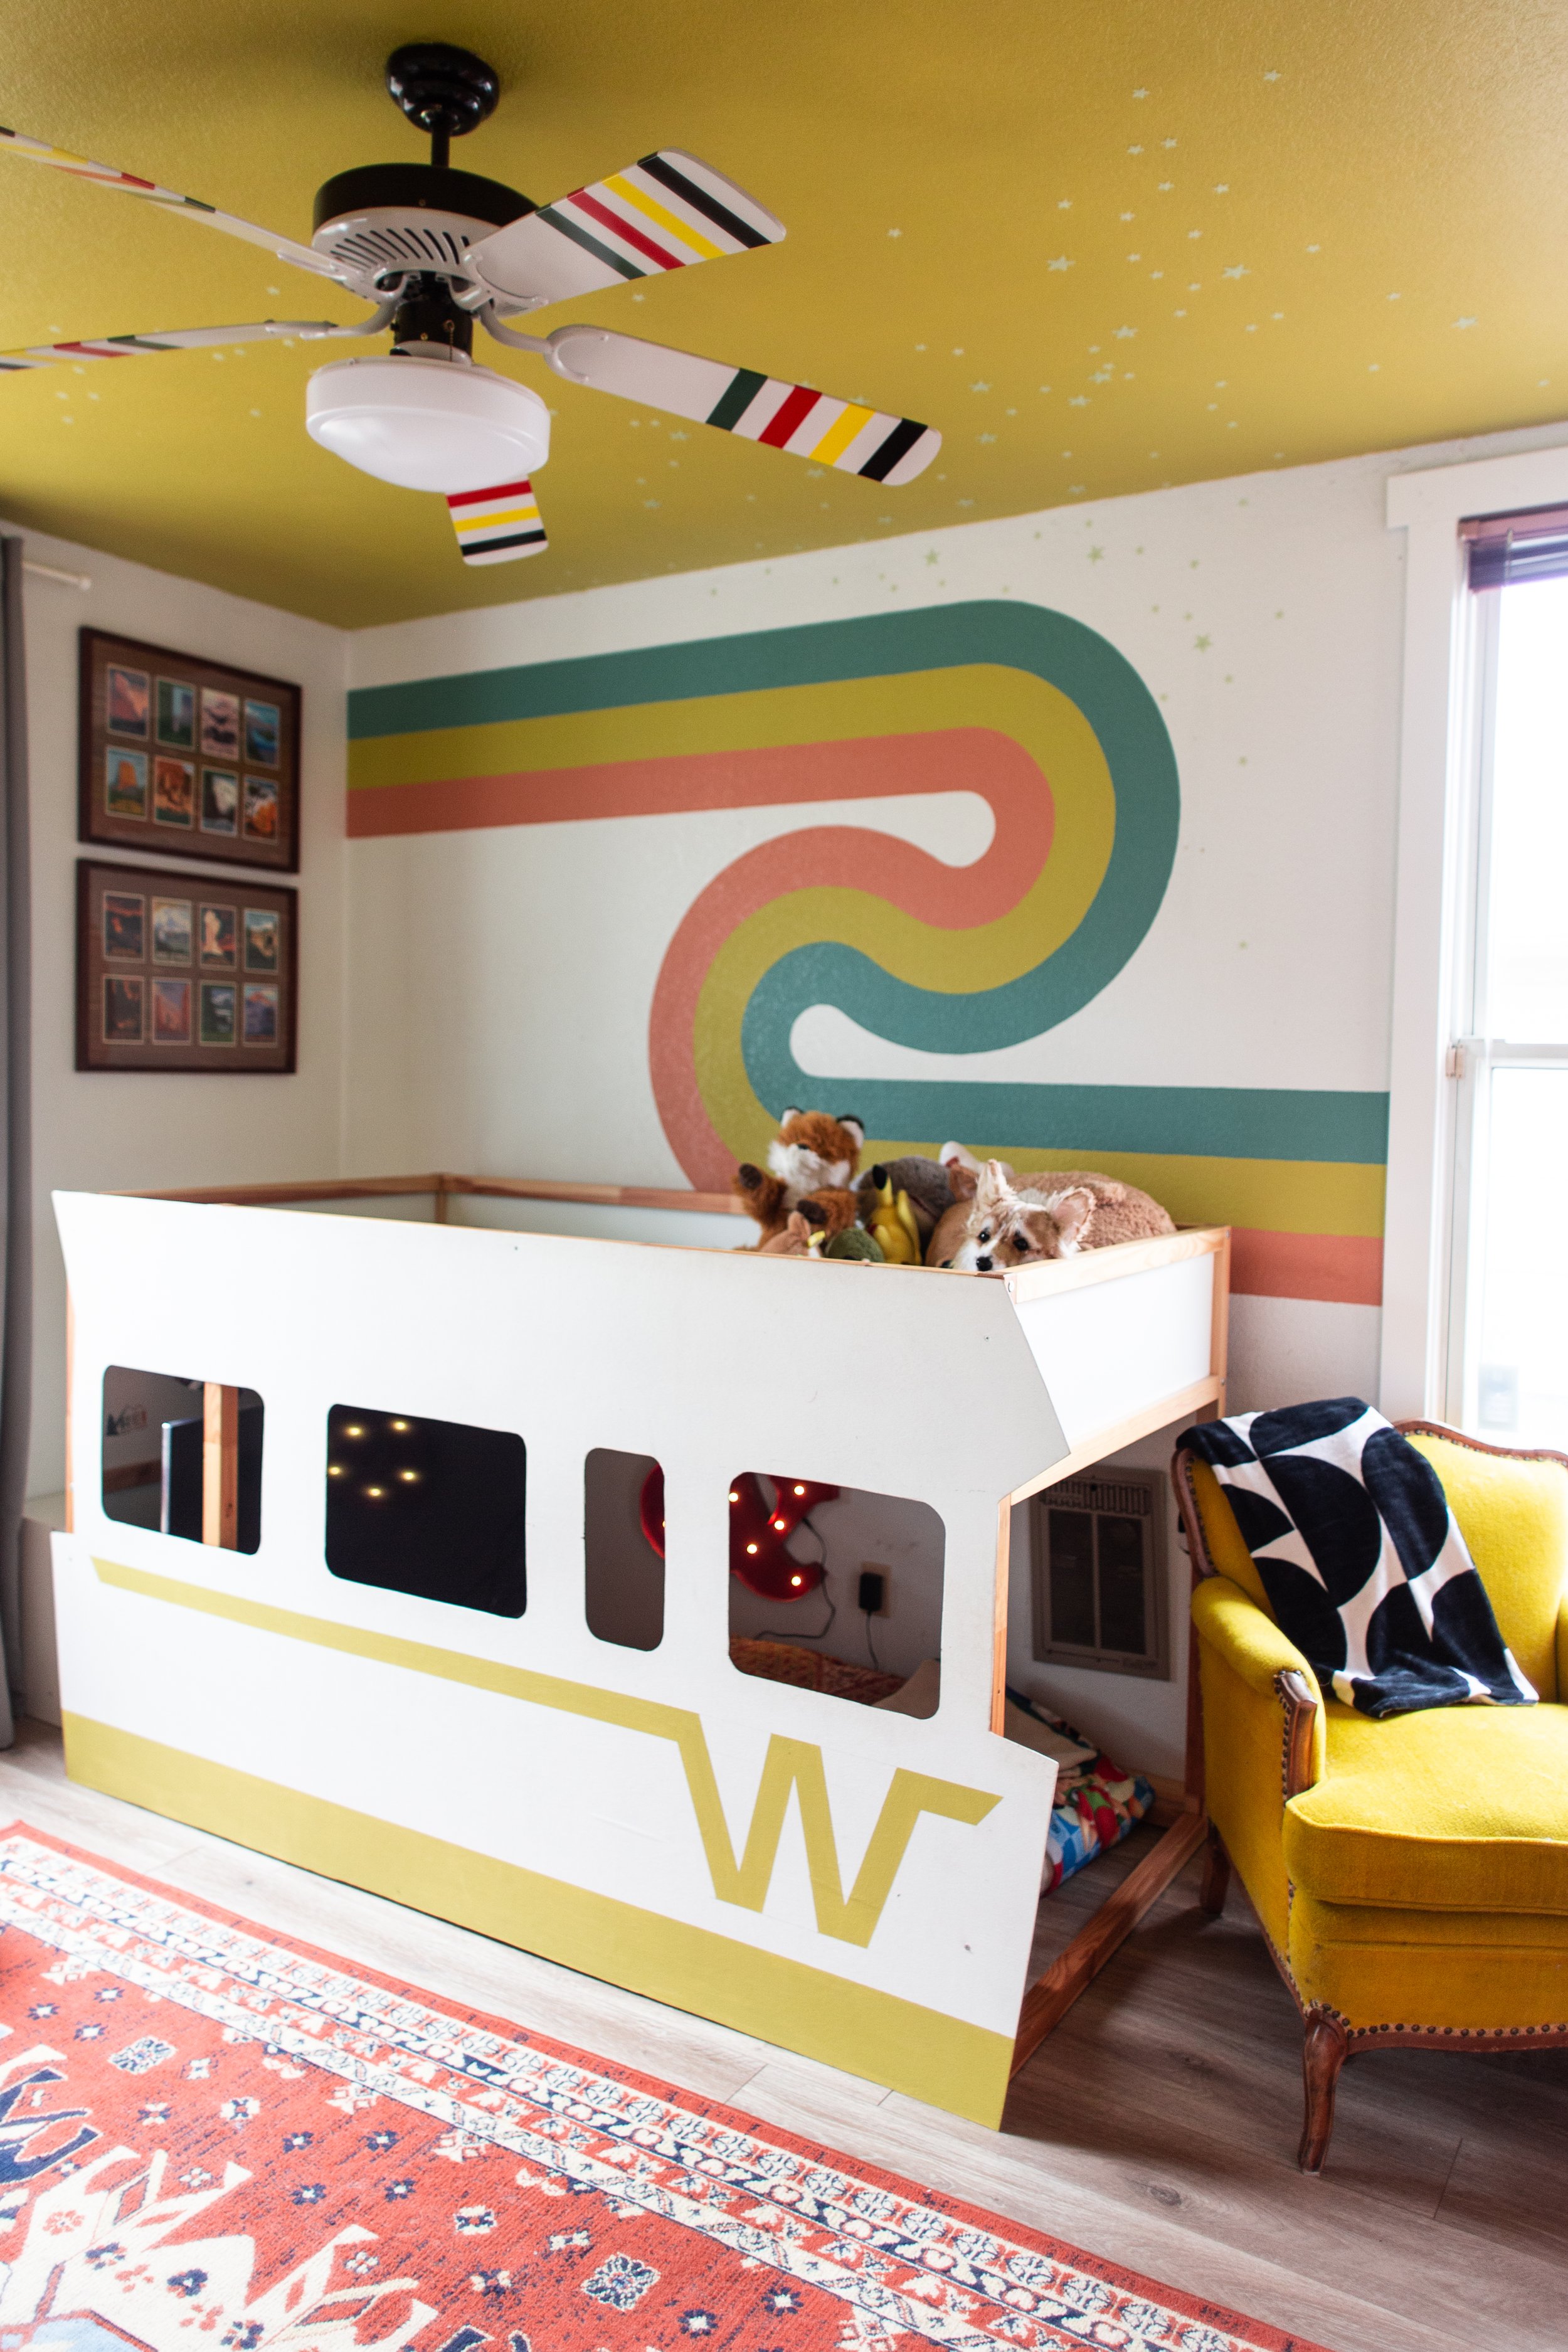
Jack’s little Winnie bunk bed is hands down one of my favorite (and one of my easiest) DIY projects. You could obviously use this method to create any number of cool shapes— I made a version of this as a submarine for a local preschool— but I thought it would be so fun to give Jack a kiddo version of my grown-up-real-life Winnebago Brave.
Here’s what I used for this project:
Materials:
1/8 in 4x8ft Utility Panel
3/4 in screws
Finish Washers
White and Yellow Paint
Ikea Kura Bed
Ikea Trofast Shelf
Tools:
Impact Driver/Drill
Circular Saw
Jigsaw

Here’s the diagram for all the measurements I used to cut and paint mine. These measurements will fit the Kura bed, but you may need to modify if you’re using a different base bed (though it shouldn’t be too much different since it’s a standard twin size bed length).
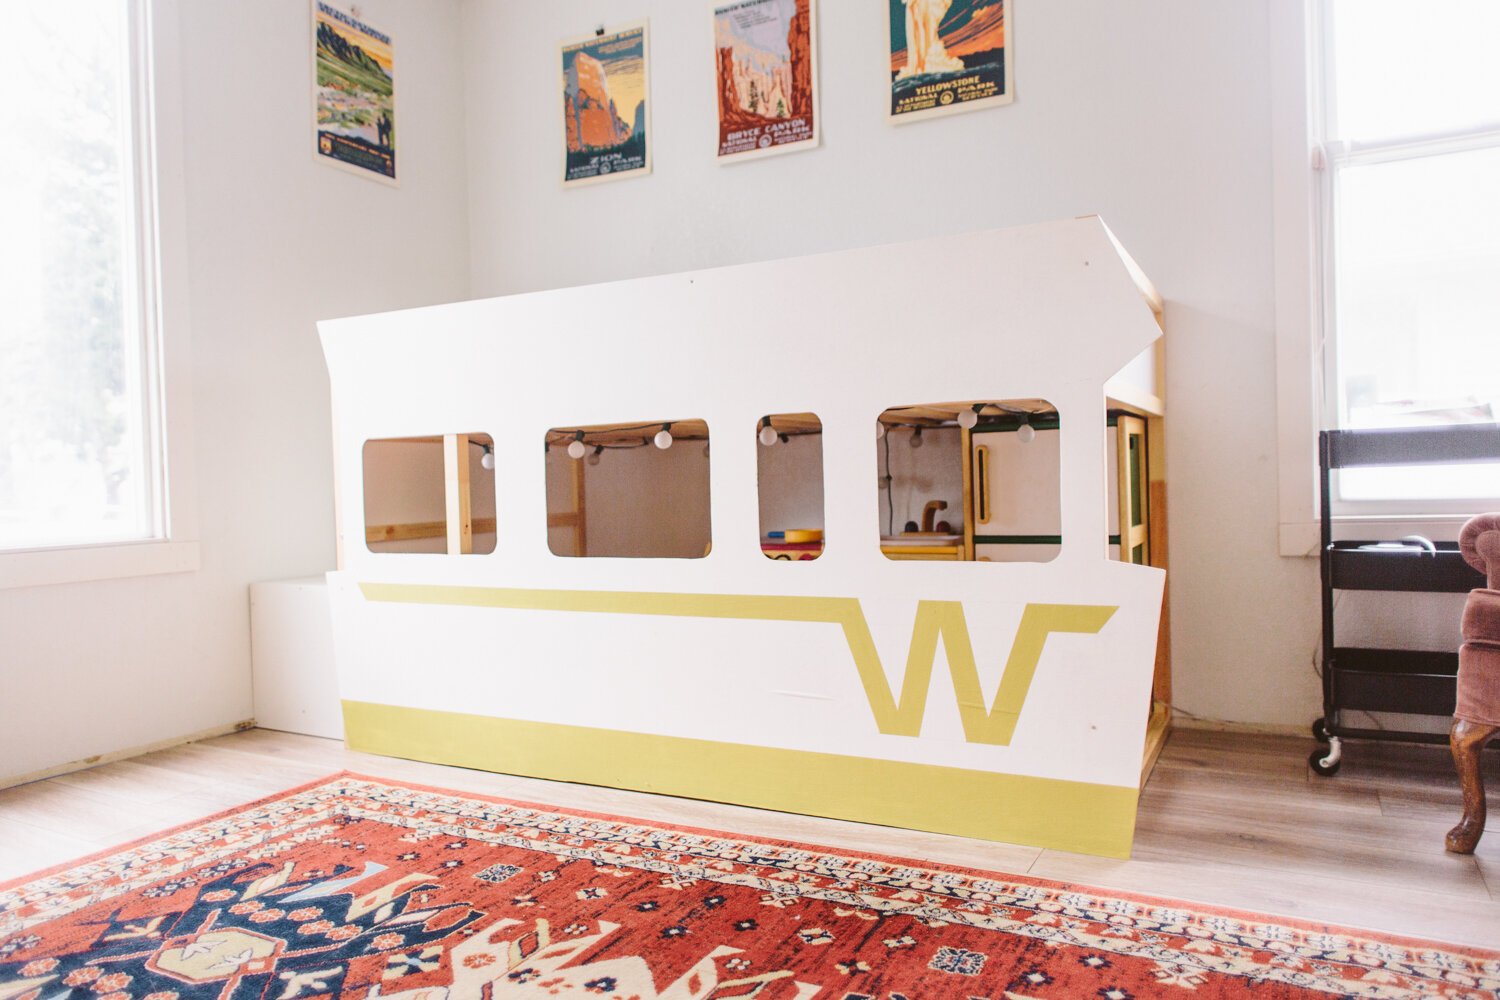
Cut out your plywood panel using the measurements. I used a circular saw for the larger straight cuts and then a jigsaw for the interior window cuts.
Paint two coats of white on the whole thing (you could do both sides, but I left the inside raw wood).
Use masking tape to mask off the RV stripes and paint two coats of yellow (or whatever color you prefer)
Attach the RV panel to the Kura bed using screws and finish washers. You can touch up paint over the screws to help them look less obvious. I did a few along the top, and a few along the bottom.
That’s it! On mine, I covered up the area on the bed where the ladder goes with the RV panel, so I used the Trofast shelf as a set of stairs so Jack could climb up to the bed. I initially had a play kitchen inside so it felt like a real mini RV, but now that Jack is a little older and the play kitchen isn’t his speed, we turned it into a little gaming den where he can play Minecraft with Dan. Super cute!