

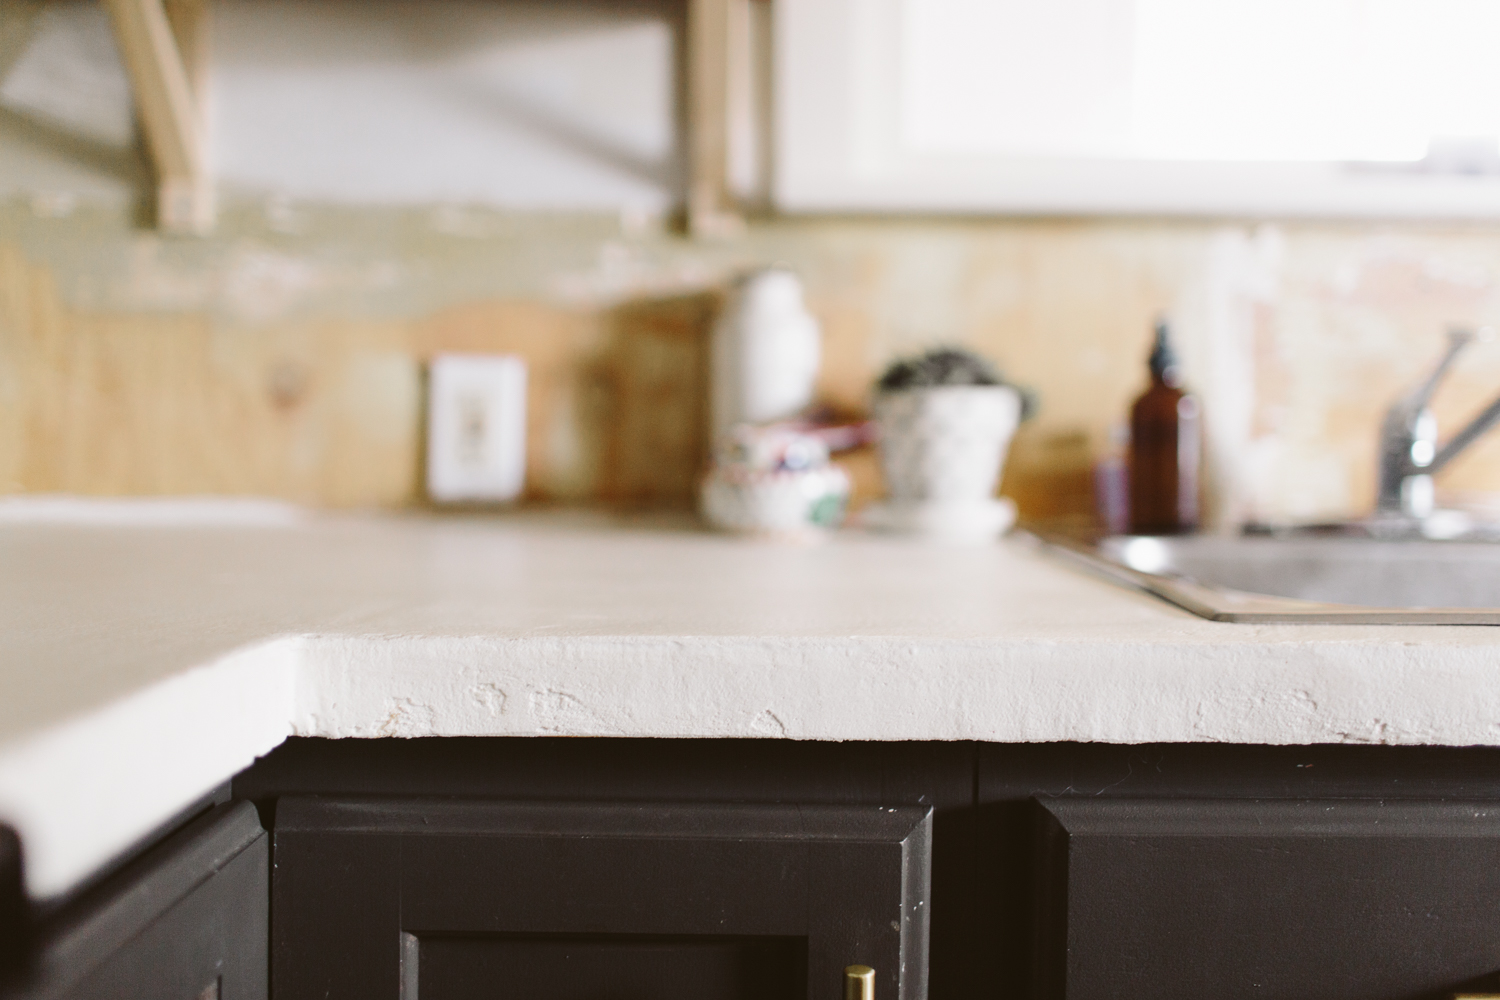
I was hoping to have my backsplash done in time to take some "after" photos of my counter, but that project is just taking too long to complete, so I'm getting this post up anyway, demo'd backsplash on full display!
I'm super thrilled about this DIY for multiple reasons. Not only does it create a super cool finish that's a little bit industrial, a little eclectic, a little farmhouse, but it's fast, pretty easy, and it's AFFORDABLE. That last one is really important to us because we just don't have money to throw around on new counters (and to be honest, the reason our backsplash has looked this way for almost 3 months is because I haven't been able to afford the tile).
I did a little research on what product I wanted to use. Originally I had planned on doing walnut butcher block counters in our kitchen but since we weren't replacing the cabinets I was worried that removing the original counters would damage the cabinets. We're also thinking about eventually putting this house up for rent and I was concerned that a more high maintenance substance like butcher block wouldn't fare as well with renters. Concrete answered both of those problems, as well as the financial issue as well. Butcher block (even the fake Ikea stuff) was around $3 - 400, which is super affordable compared to a lot of counter options out there, but this skimcoat product only cost me $173. That's a price I can get behind.
Since I'd already painted the cabinets a dark grey, I was worried that doing the regular grey concrete color would just make for too much grey in the space and make it feel too cool (as in cool toned, not like... awesome cool), and I'd just seen a friend do white concrete counters and loved that look, so I went on the search for a skimcoat product that would allow me to do white concrete.
I found what I was looking for with Direct Colors Inc. They do a concrete overlay product that is specifically designed to skimcoat formica counters, which is what we had. I bought their DCI Concrete overlay, with smooth texture, white base color, and added the Pearl color pack, which was supposed to make it even more white (I didn't make a batch of it without the pearl color added, so I'm not sure how white the white base would be without it, but I think it'd probably be plenty white if you wanted to skip that. It cost $10.95 more). I also bought the 550 Water Based matte Polyurethane Concrete Sealer in the Matte finish (I didn't want shiny counters). And I added on a Magic Trowel because I didn't have a trowel to smooth things out. I didn't realize that I should've also bought a primer sealer which should go on before the 550 Water Based Sealer, so I'd recommend getting that too and applying it before the 550 sealer. Our counter is working fine, though, with two coats of the 550 Water Based Polyurethane Concrete Sealer.
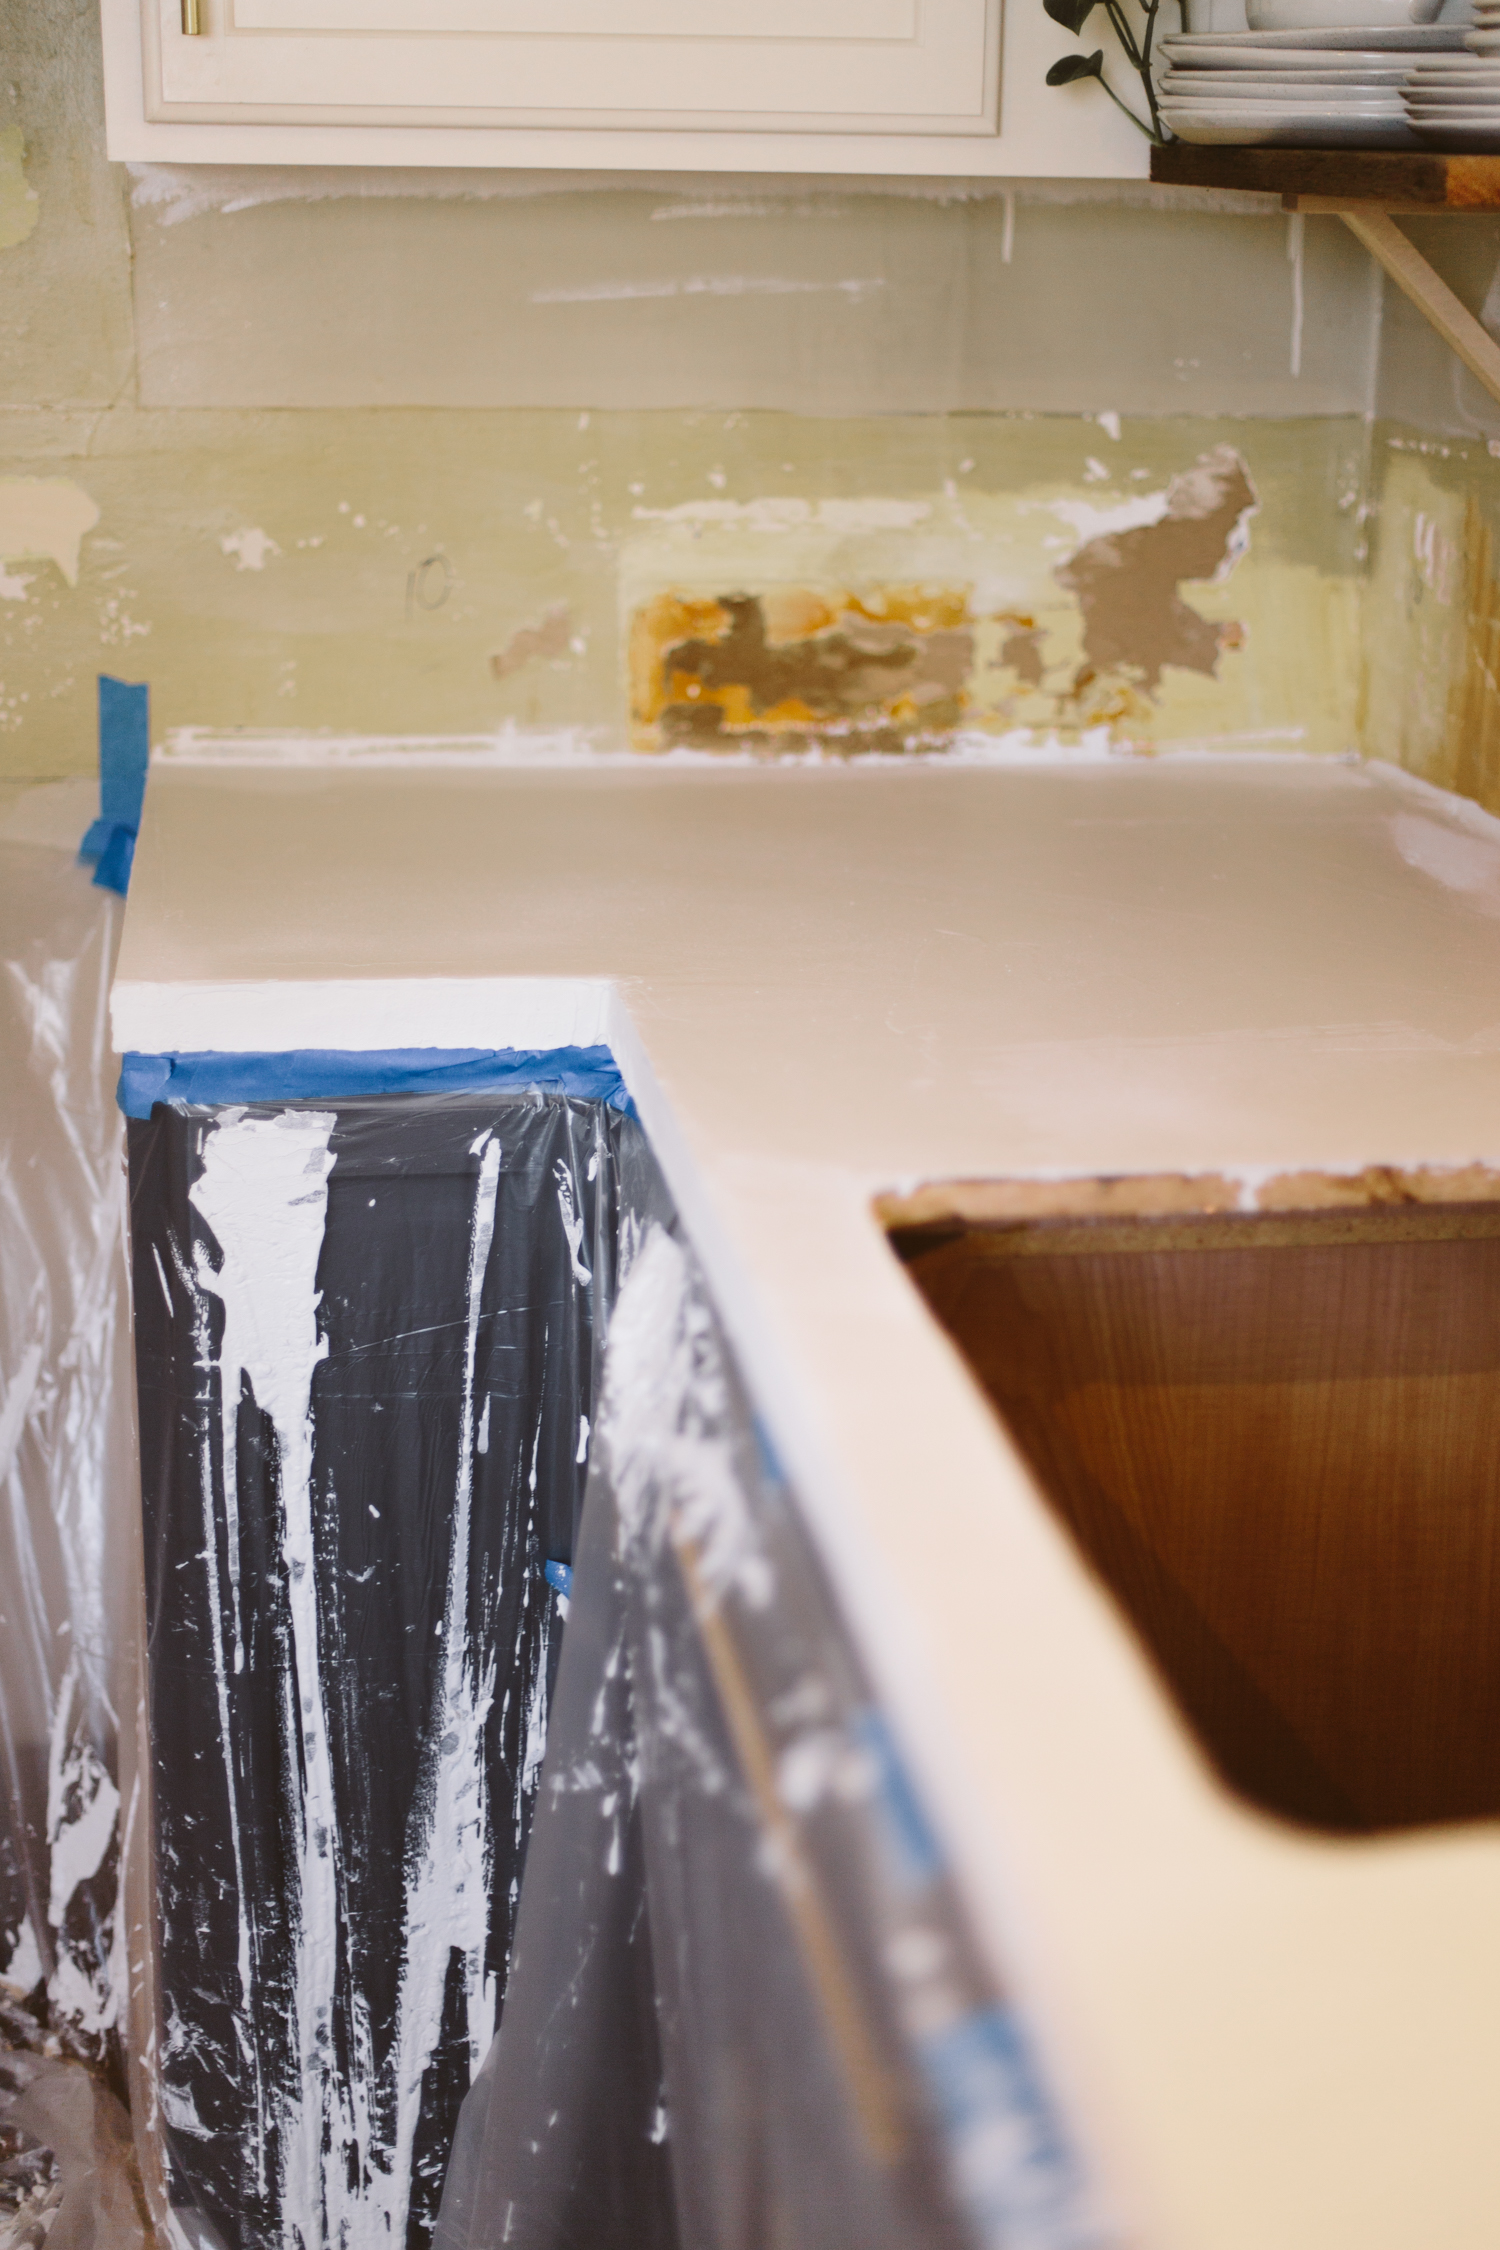
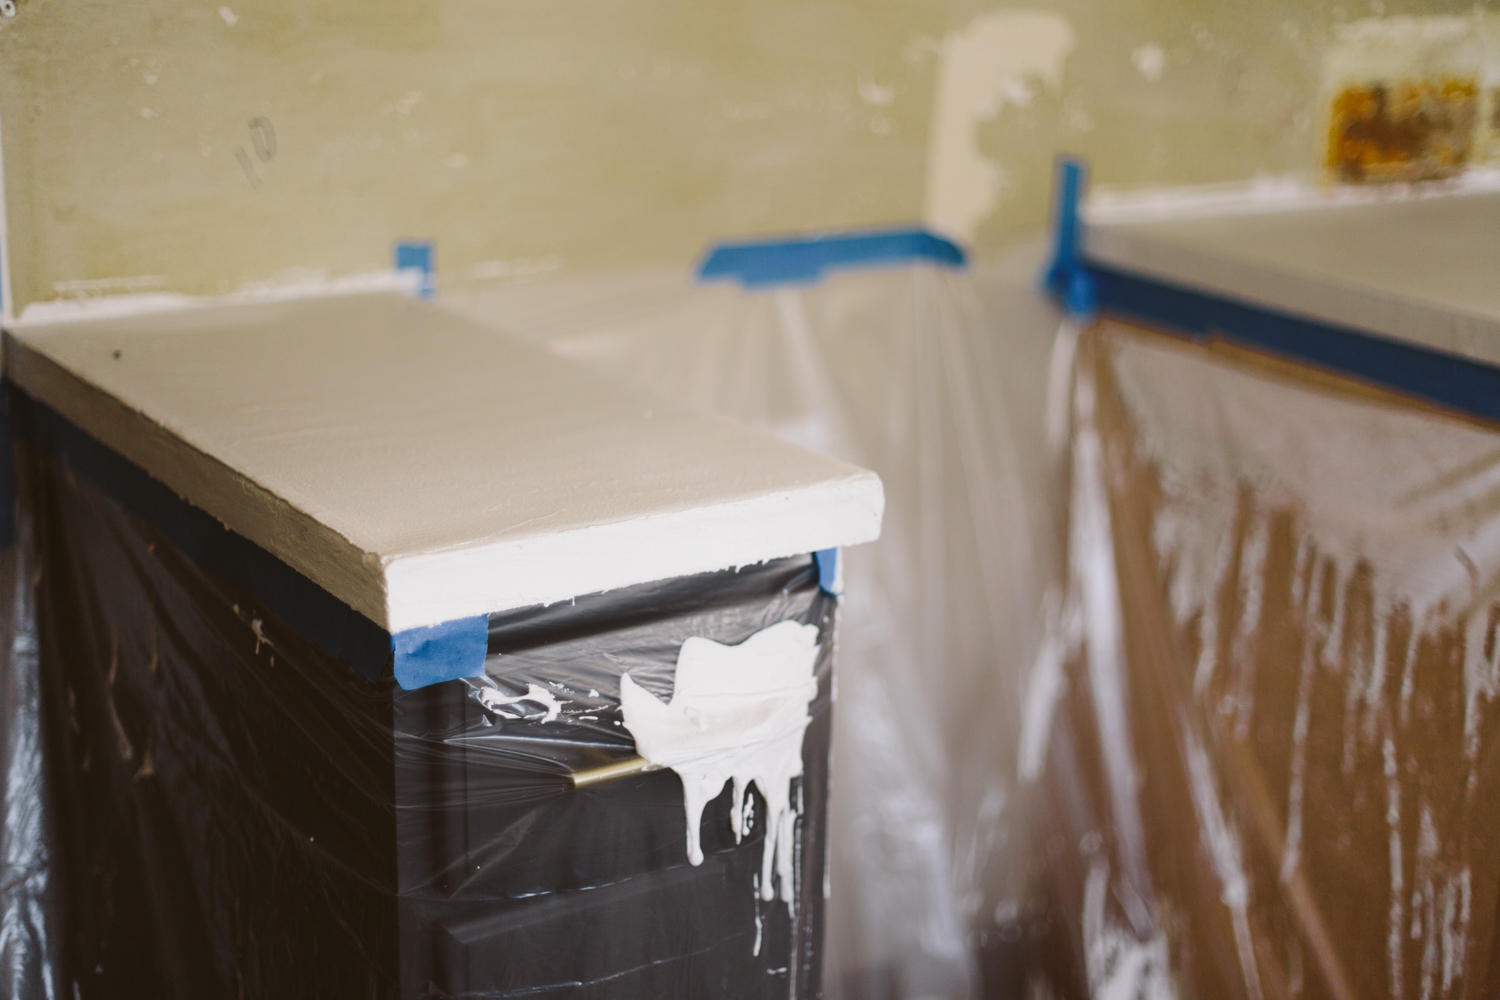
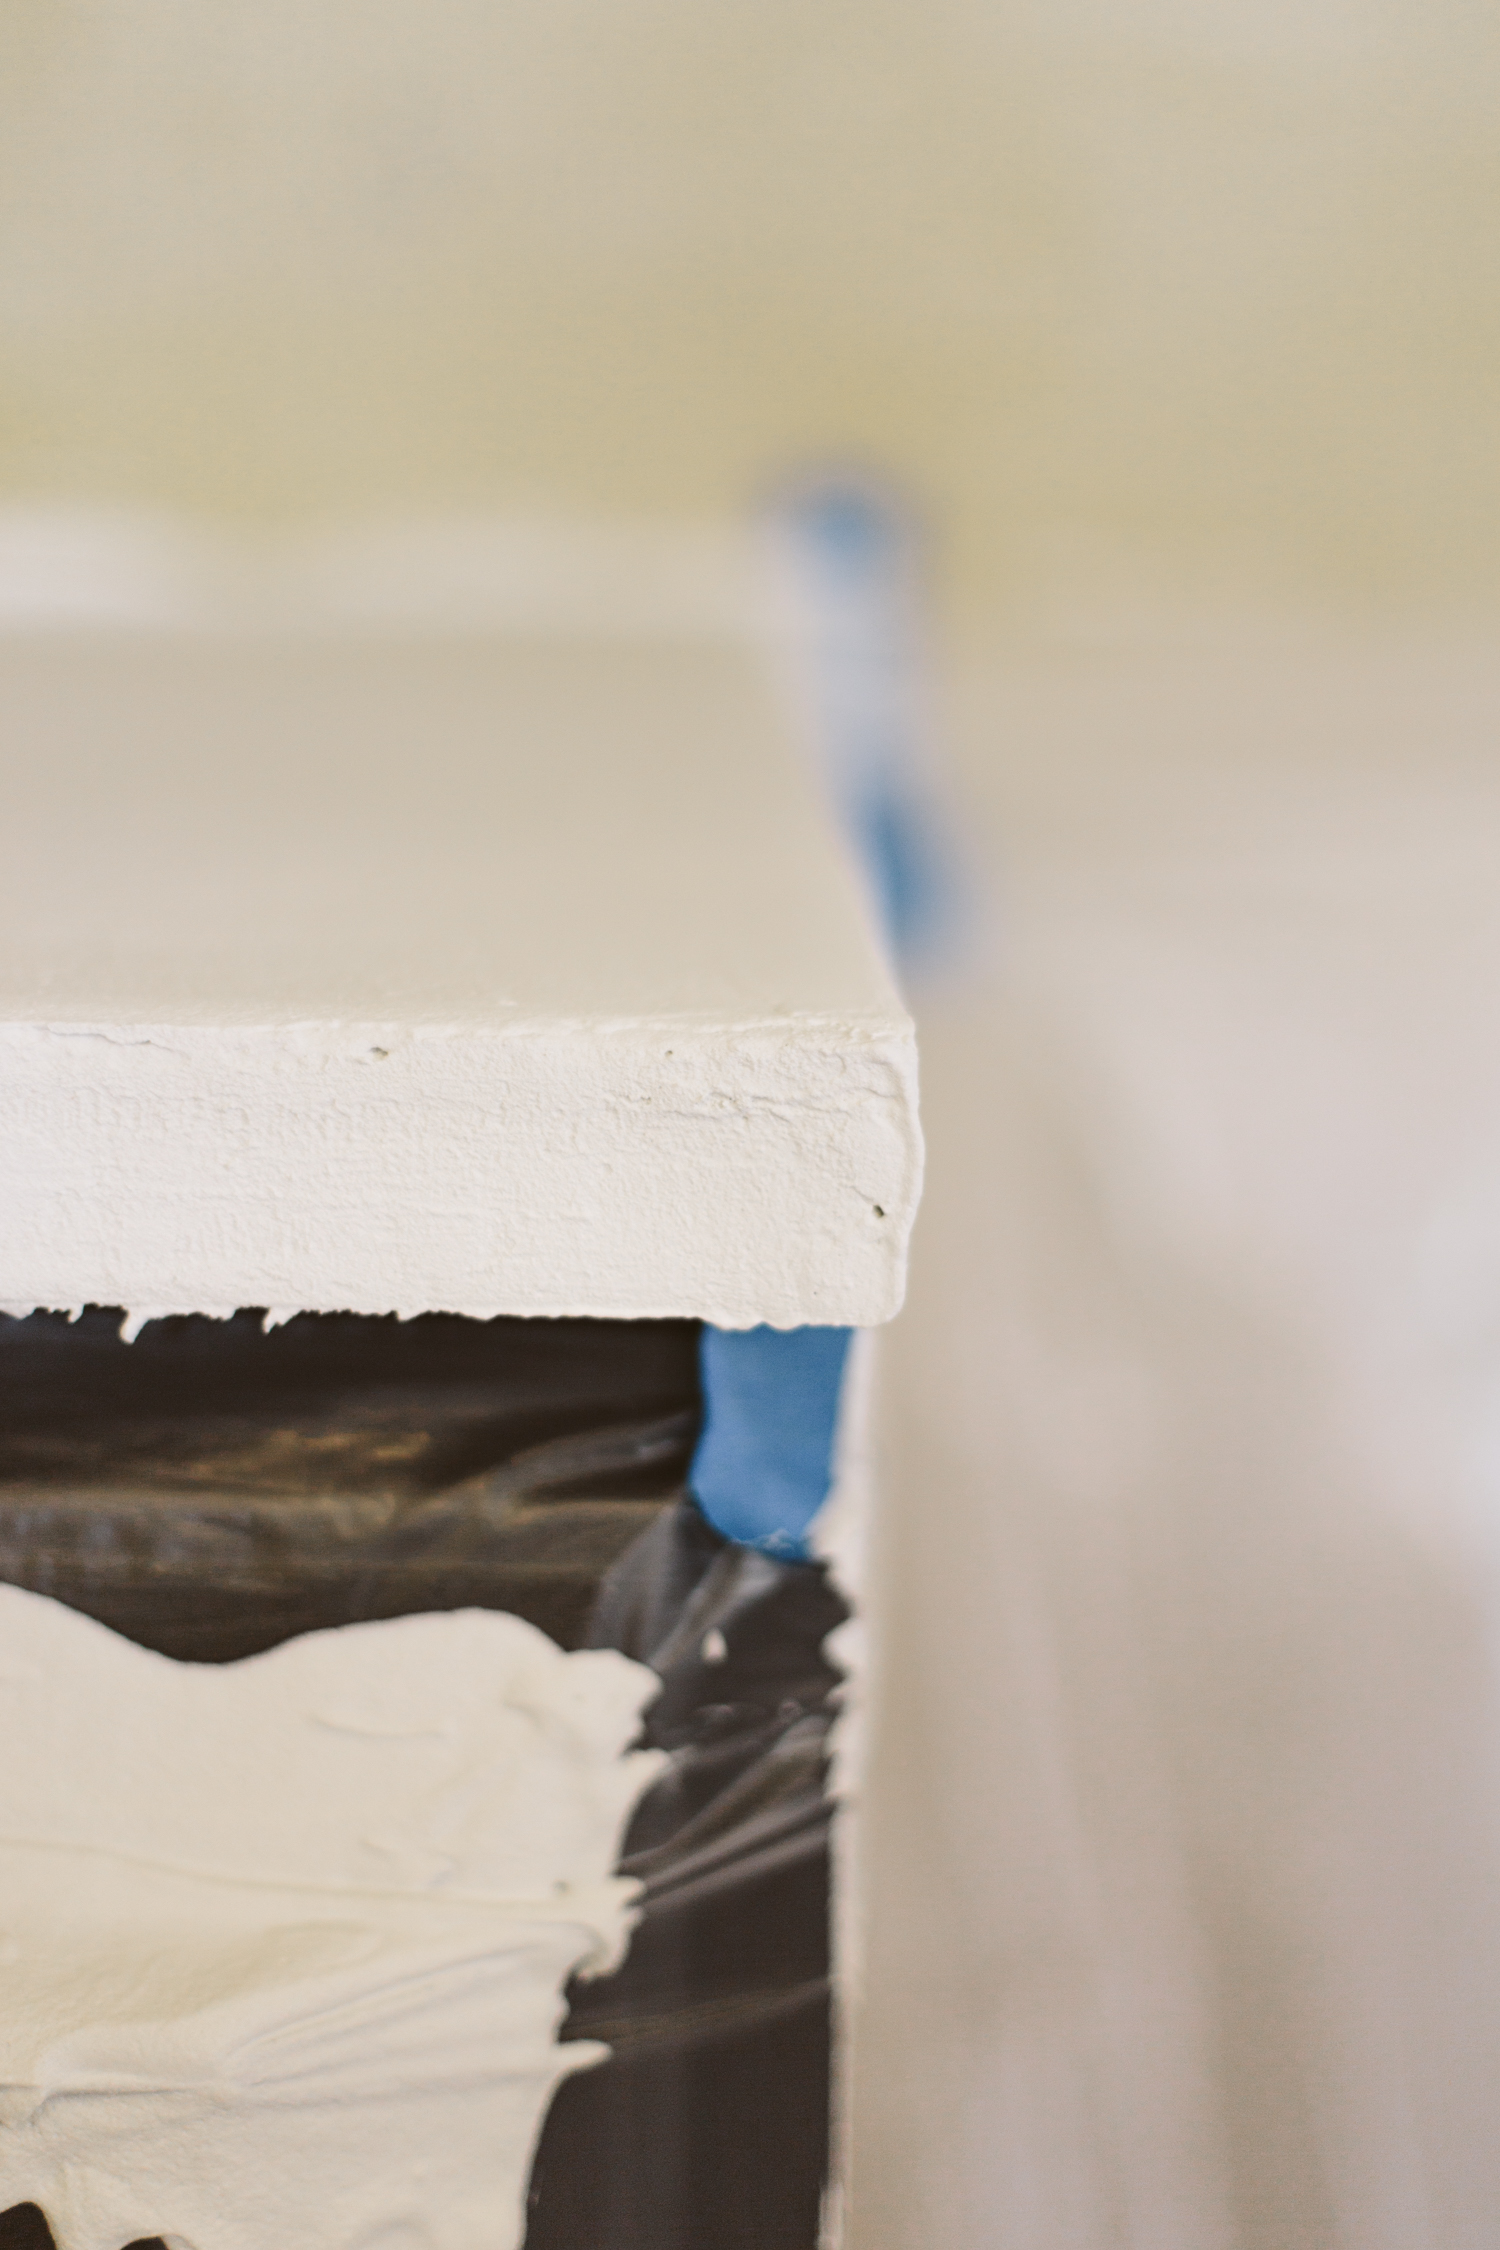
You're really gonna want to prep your work space, I promise. This stuff is messy. Or maybe I'm just messy. But historically I'm not messy with wet/goopy stuff and I was messy with this. So get some dropcloths/plastic to protect your lower cabinets and floors. The concrete gets heavy when it's on the plastic, too, so make sure you tape it to the top edge really good. I had my tape let go and then I had concrete dripping down behind it onto my cabinets and was frantically trying to get it re-taped while also covered in concrete, which is about as easy as it sounds.
I'd also recommend having a partner to help you. I did it by myself and it would've definitely been helpful to have someone to assist.
If you're doing a formica counter like me, just give it a sanding before you start to give it some texture to stick to. I used a 120 grit.
The first thing you'll do is the front vertical edge, which needs a bit of a thicker consistency to stick, so make up a small batch of that (If you're using the DCI product they send lots of instructions on how to use it/make a batch, and they also have lots of video tutorials on their site which I watched thoroughly before starting). For the top surface you want it mixed to a pancake batter consistency, but with the vertical surfaces, you want it much more thick and sticky. I bought a mixing accessory for my drill, which I used to mix the concrete. Since I wasn't making huge quantities, I could just mix the product and water in a 5 gallon bucket (or smaller for the vertical surface batch) with my drill.
Once you've made up your more sticky batch, apply that just with your hands wearing vinyl gloves. It's a little hard to get a smooth finish, but I wasn't too worried about that because I didn't mind getting a more "rustic" finish. You can use a trowel to smooth it out too if you want it more uniform.
Then mix up your batch for the top, to about a pancake batter consistency. You can pour it directly on the counter and then smooth it out with a trowel. You want about a 1/8 - 1/4 inch thick skimcoat, and do your best to get it as smooth as you can because it's super annoying to have to sand and put another slurry coat on there.
This product doesn't require a second coat (unless you want to fix some errors) so you just have to wait 24 hours to let it dry and then seal it with the sealer!
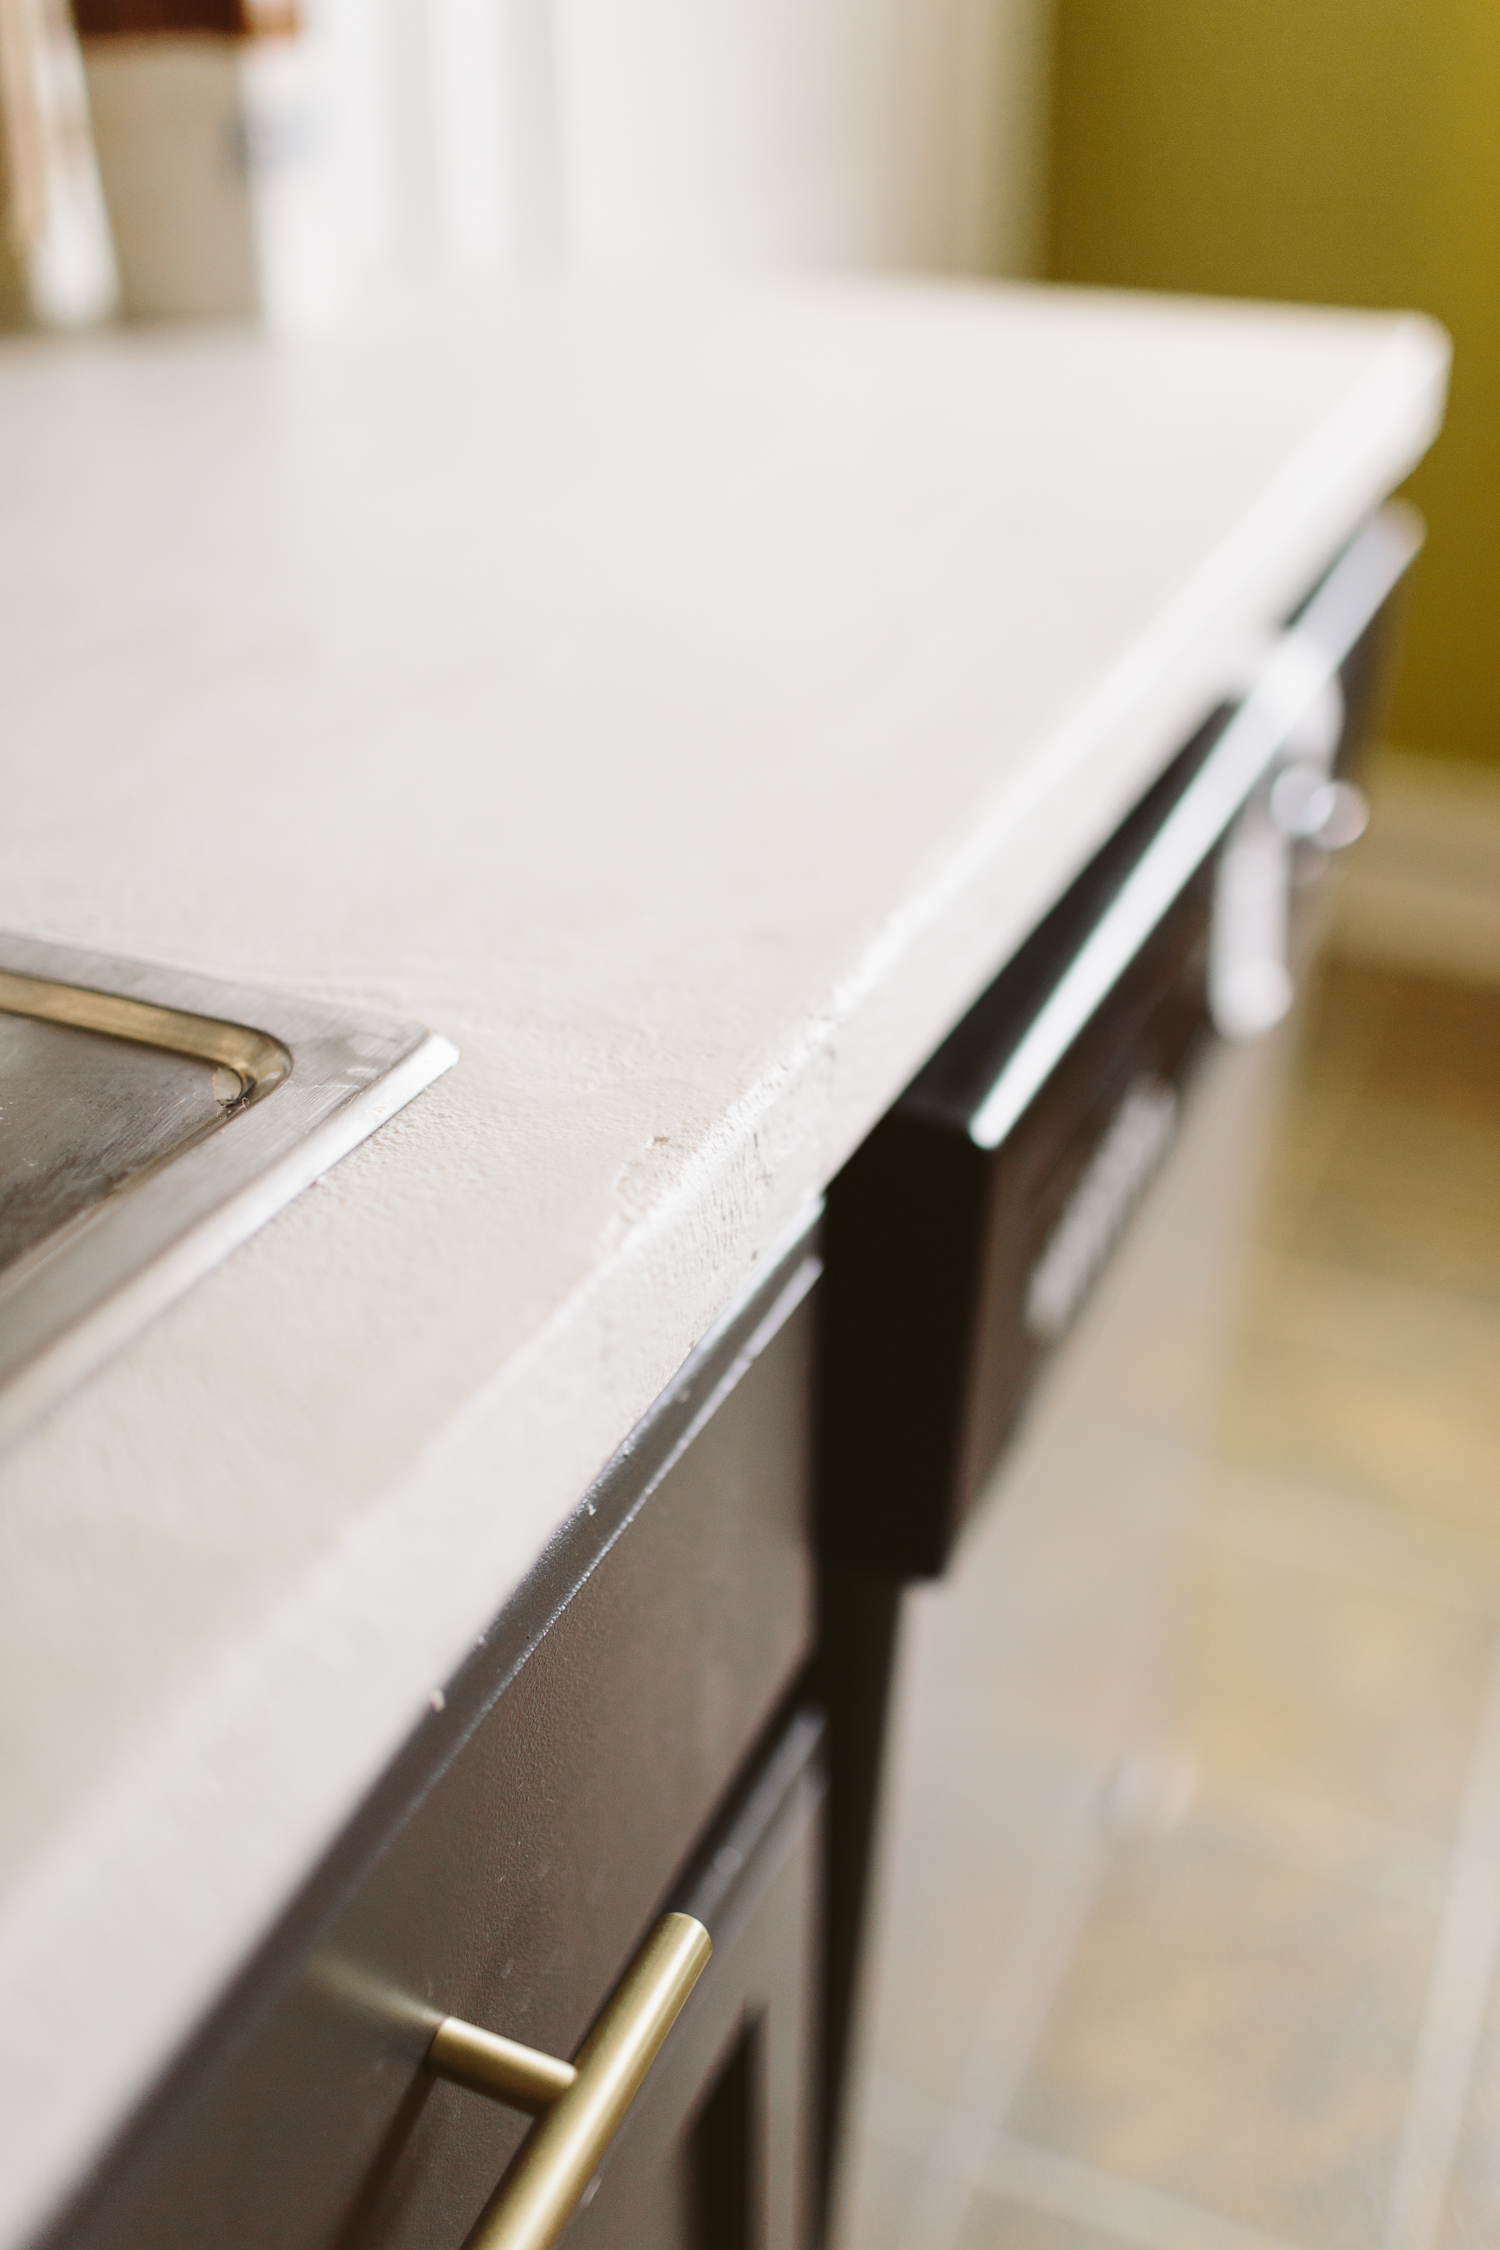
I've only had the counters for about a month and a half, but I really like how they've been holding up. I haven't had any staining, which I was a little worried about since they are white, and no chipping or any other issues. Obviously that's not a lot of time for regular wear and tear to conduct a really good evaluation so I'll update in a while once it's had time to be sufficiently tested. That being said I know two people who have refinished their counters by skimcoating with concrete and both were super happy with it (and one is in an RV, so you know that gets jostled around a lot while on the road!). Neither of those folks used the same product that I did, so it's not exactly the same, but the finish as a whole seems solid and durable!


![As per usual I’m pushing right up against a deadline and have hyperfixated on this painting all week to finish in time.
Chikayaasix̂ [Fireweed] Transplanted- acrylic on wood.
Every generation my family has moved farther and farther from ances](https://images.squarespace-cdn.com/content/v1/574dddd6d51cd4bc35c1609a/1714708076216-UAPXPXK9DVDBP7F1C65E/image-asset.jpeg)

