

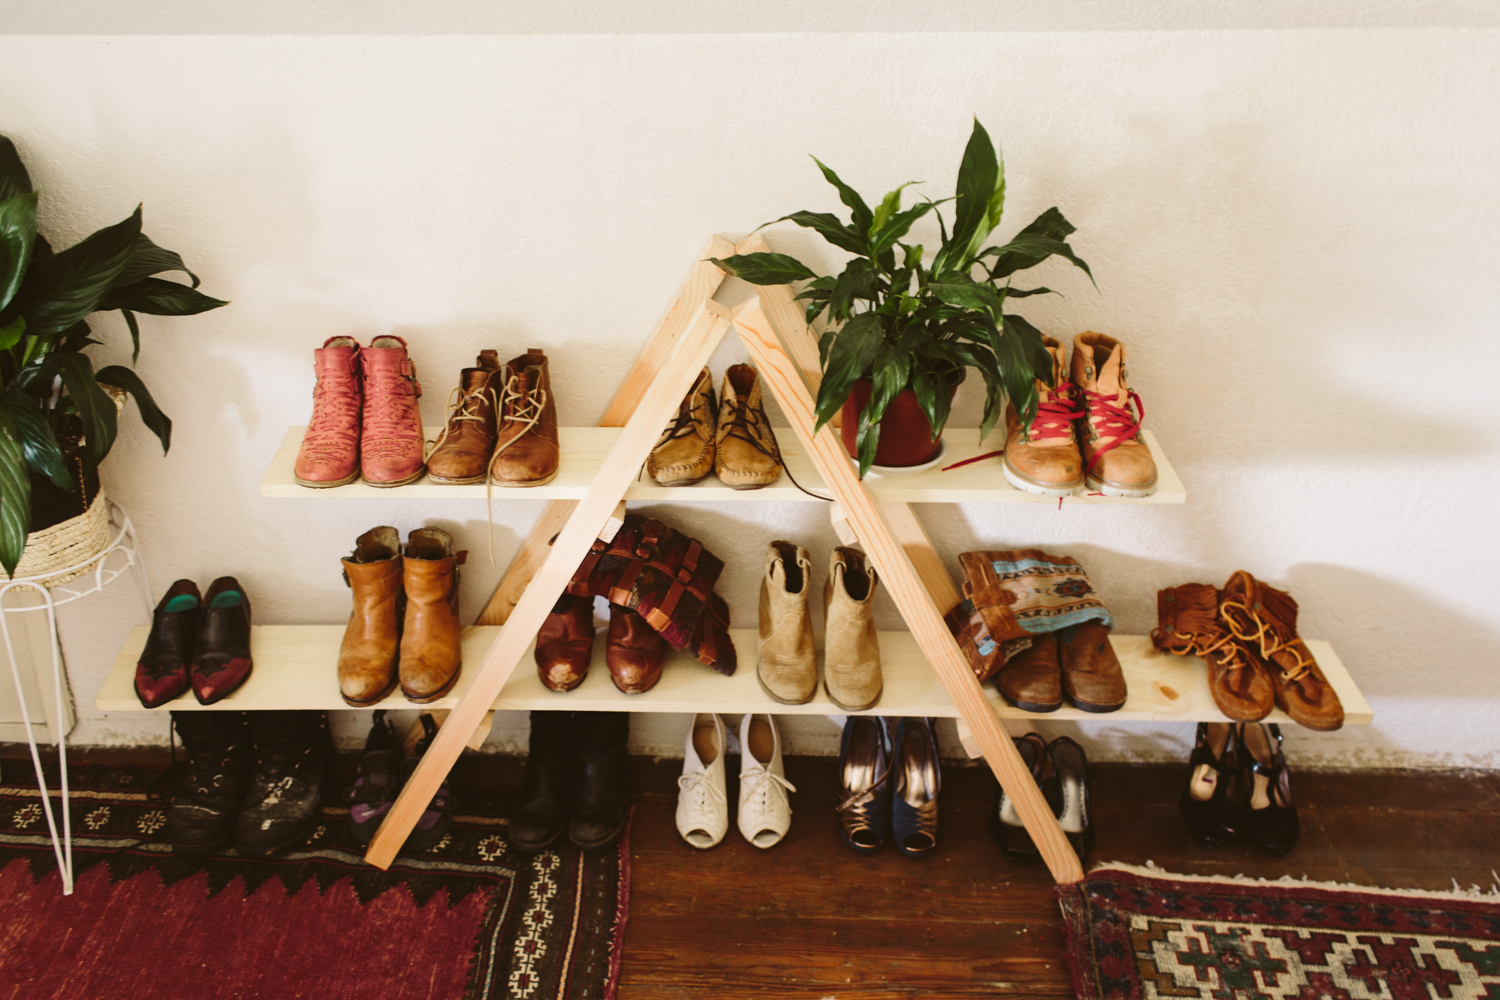
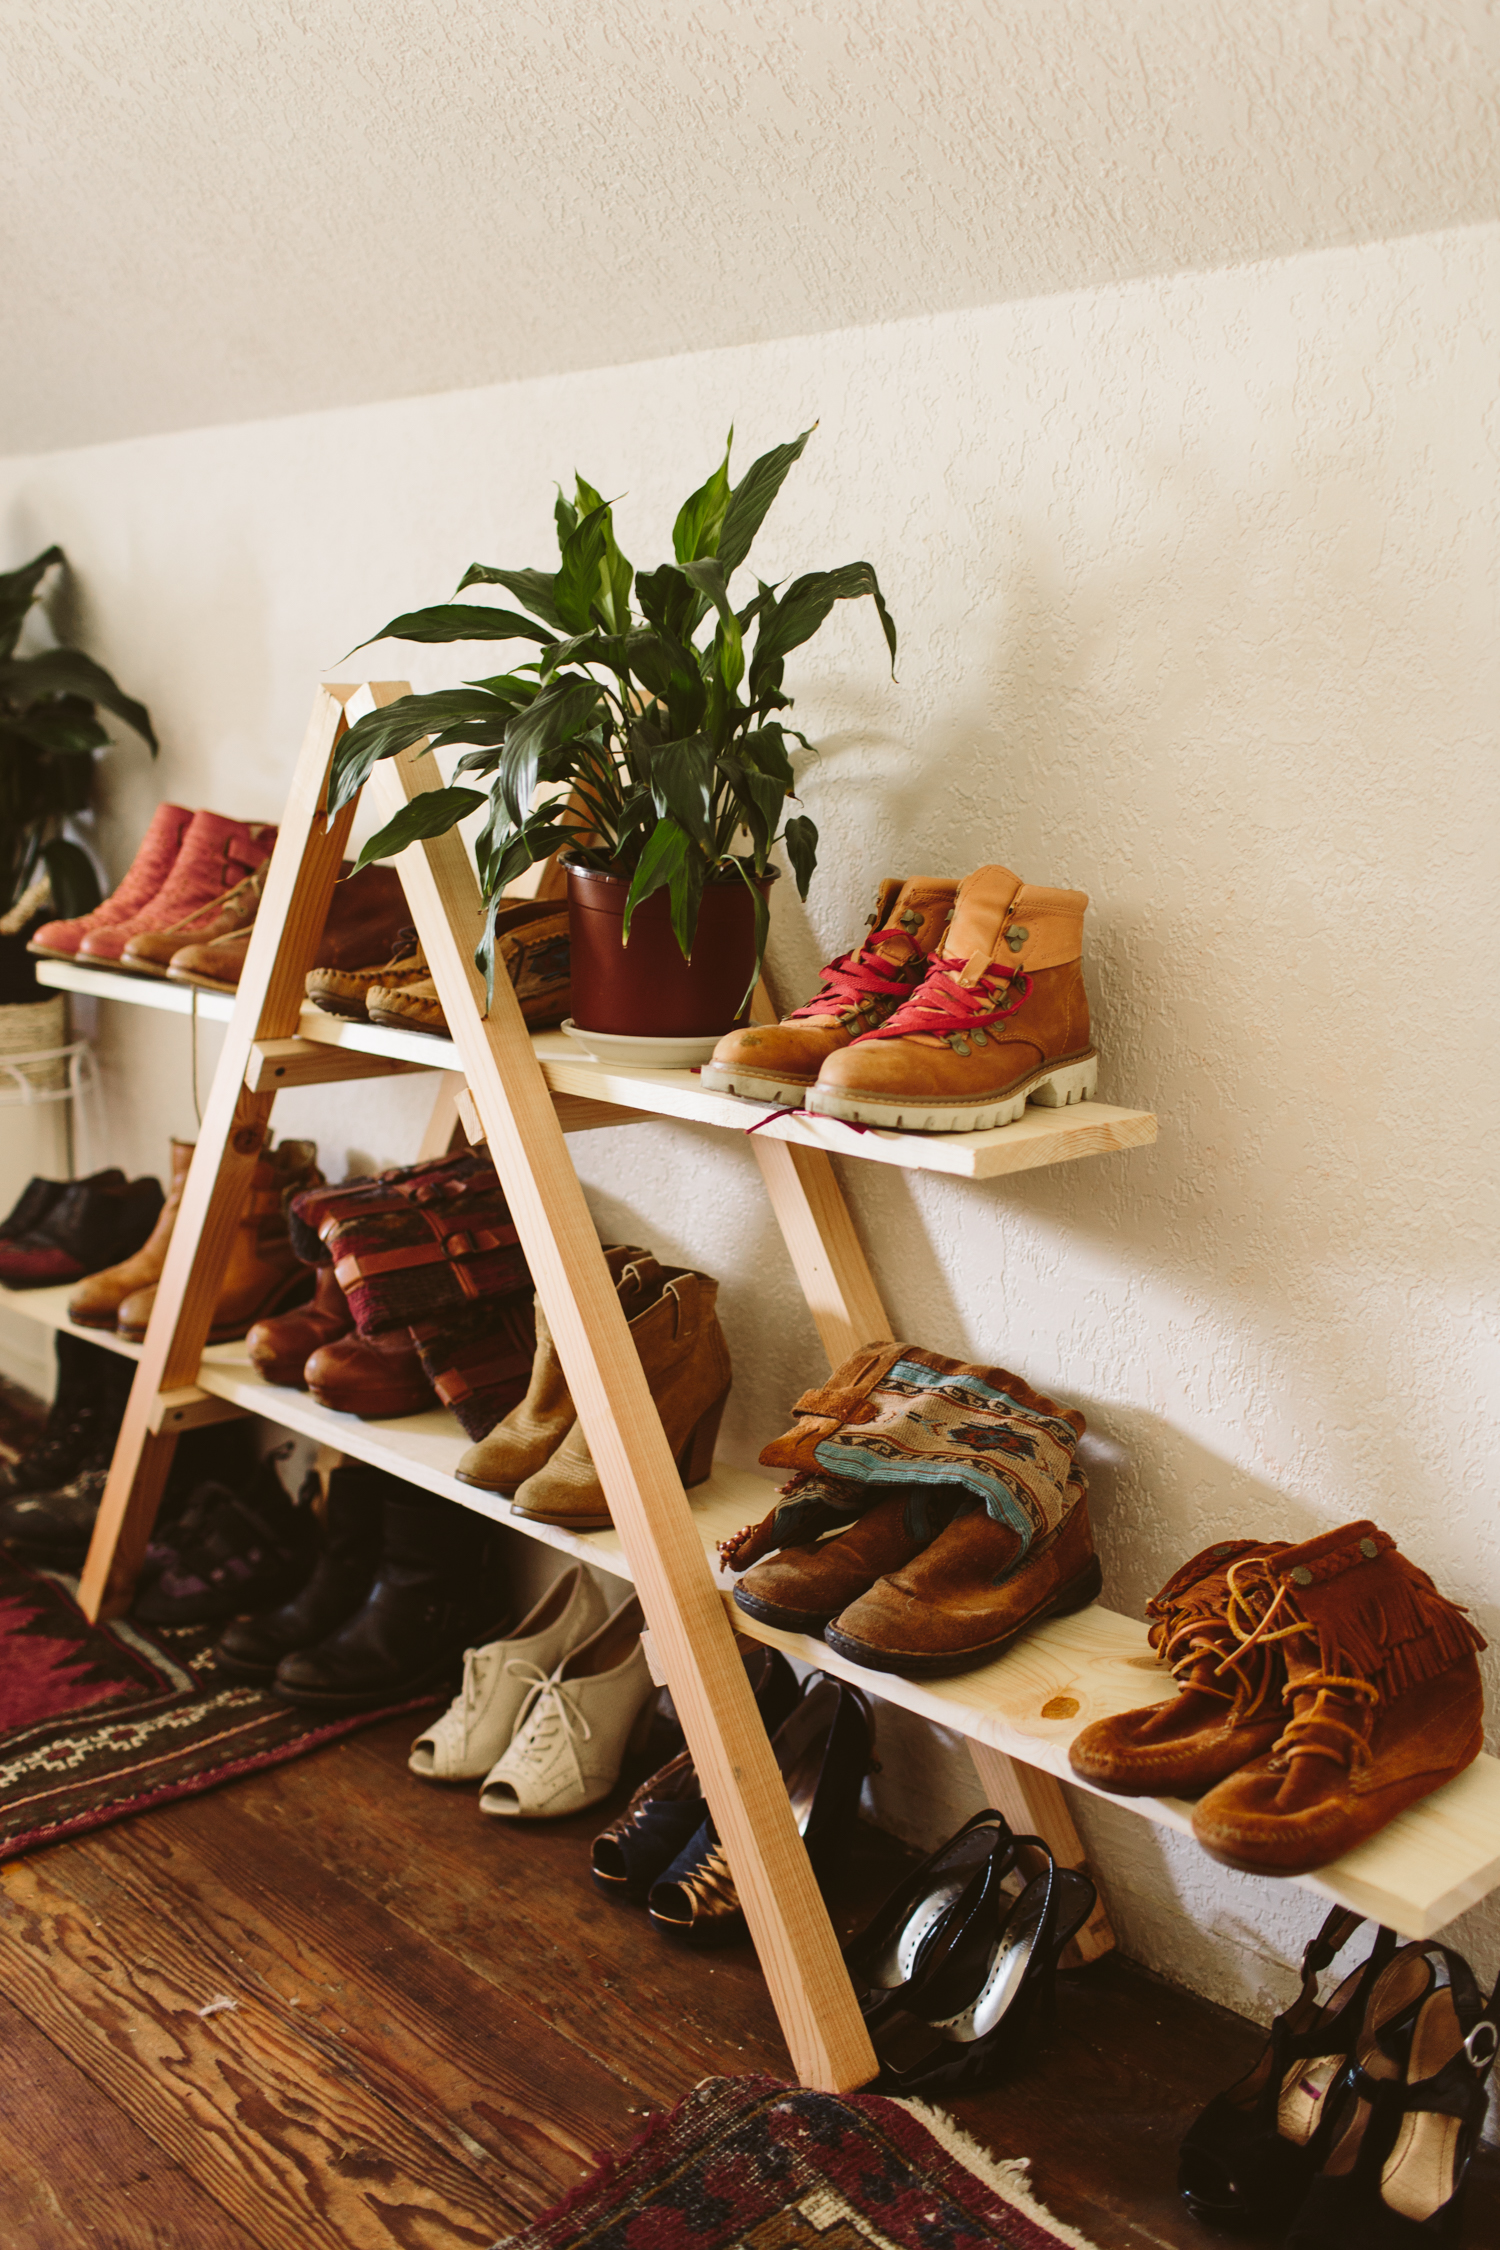
I knew I needed a better solution for my shoe storage and I wanted something cuter than just a bunch of cubbies, when I found a large version of this shelf on Pinterest (it was like a 6ft high version) I knew I wanted to make a small one that would fit beneath the angled ceilings of our attic closet. The wood for this was super affordable, and it only took about an hour and a half from start to finish to complete it!
What you’ll need:
2 8ft 2x2s
1 8ft 1x2
8 1.5 in screws
2 2 inch mending plates with screws
4 corner braces with screws
1 4ft 1x8 plank
1 6ft 1x8 plank
Drill
Skillsaw

1/ Using a skillsaw (or a handsaw) cut your 2x2s into four 41 inch long pieces for the ladder sides, and your 1x2 into four 11 inch pieces for the ladder rungs.

2/ Make a ladder by laying two 2x2s next to each other, marking a line 13 inches and 29 inches on each one. Separate the two sides and place the top of the 1x2 rungs at each line, screwing them to the 2x2s. The ends of the 1x2s should be flush with the sides of the 2x2s so the total depth of the ladder is 11 inches. Repeat for the second ladder. I pre-drilled the screw holes on the 1x2s because otherwise the screws would split the wood, so I recommend doing that.
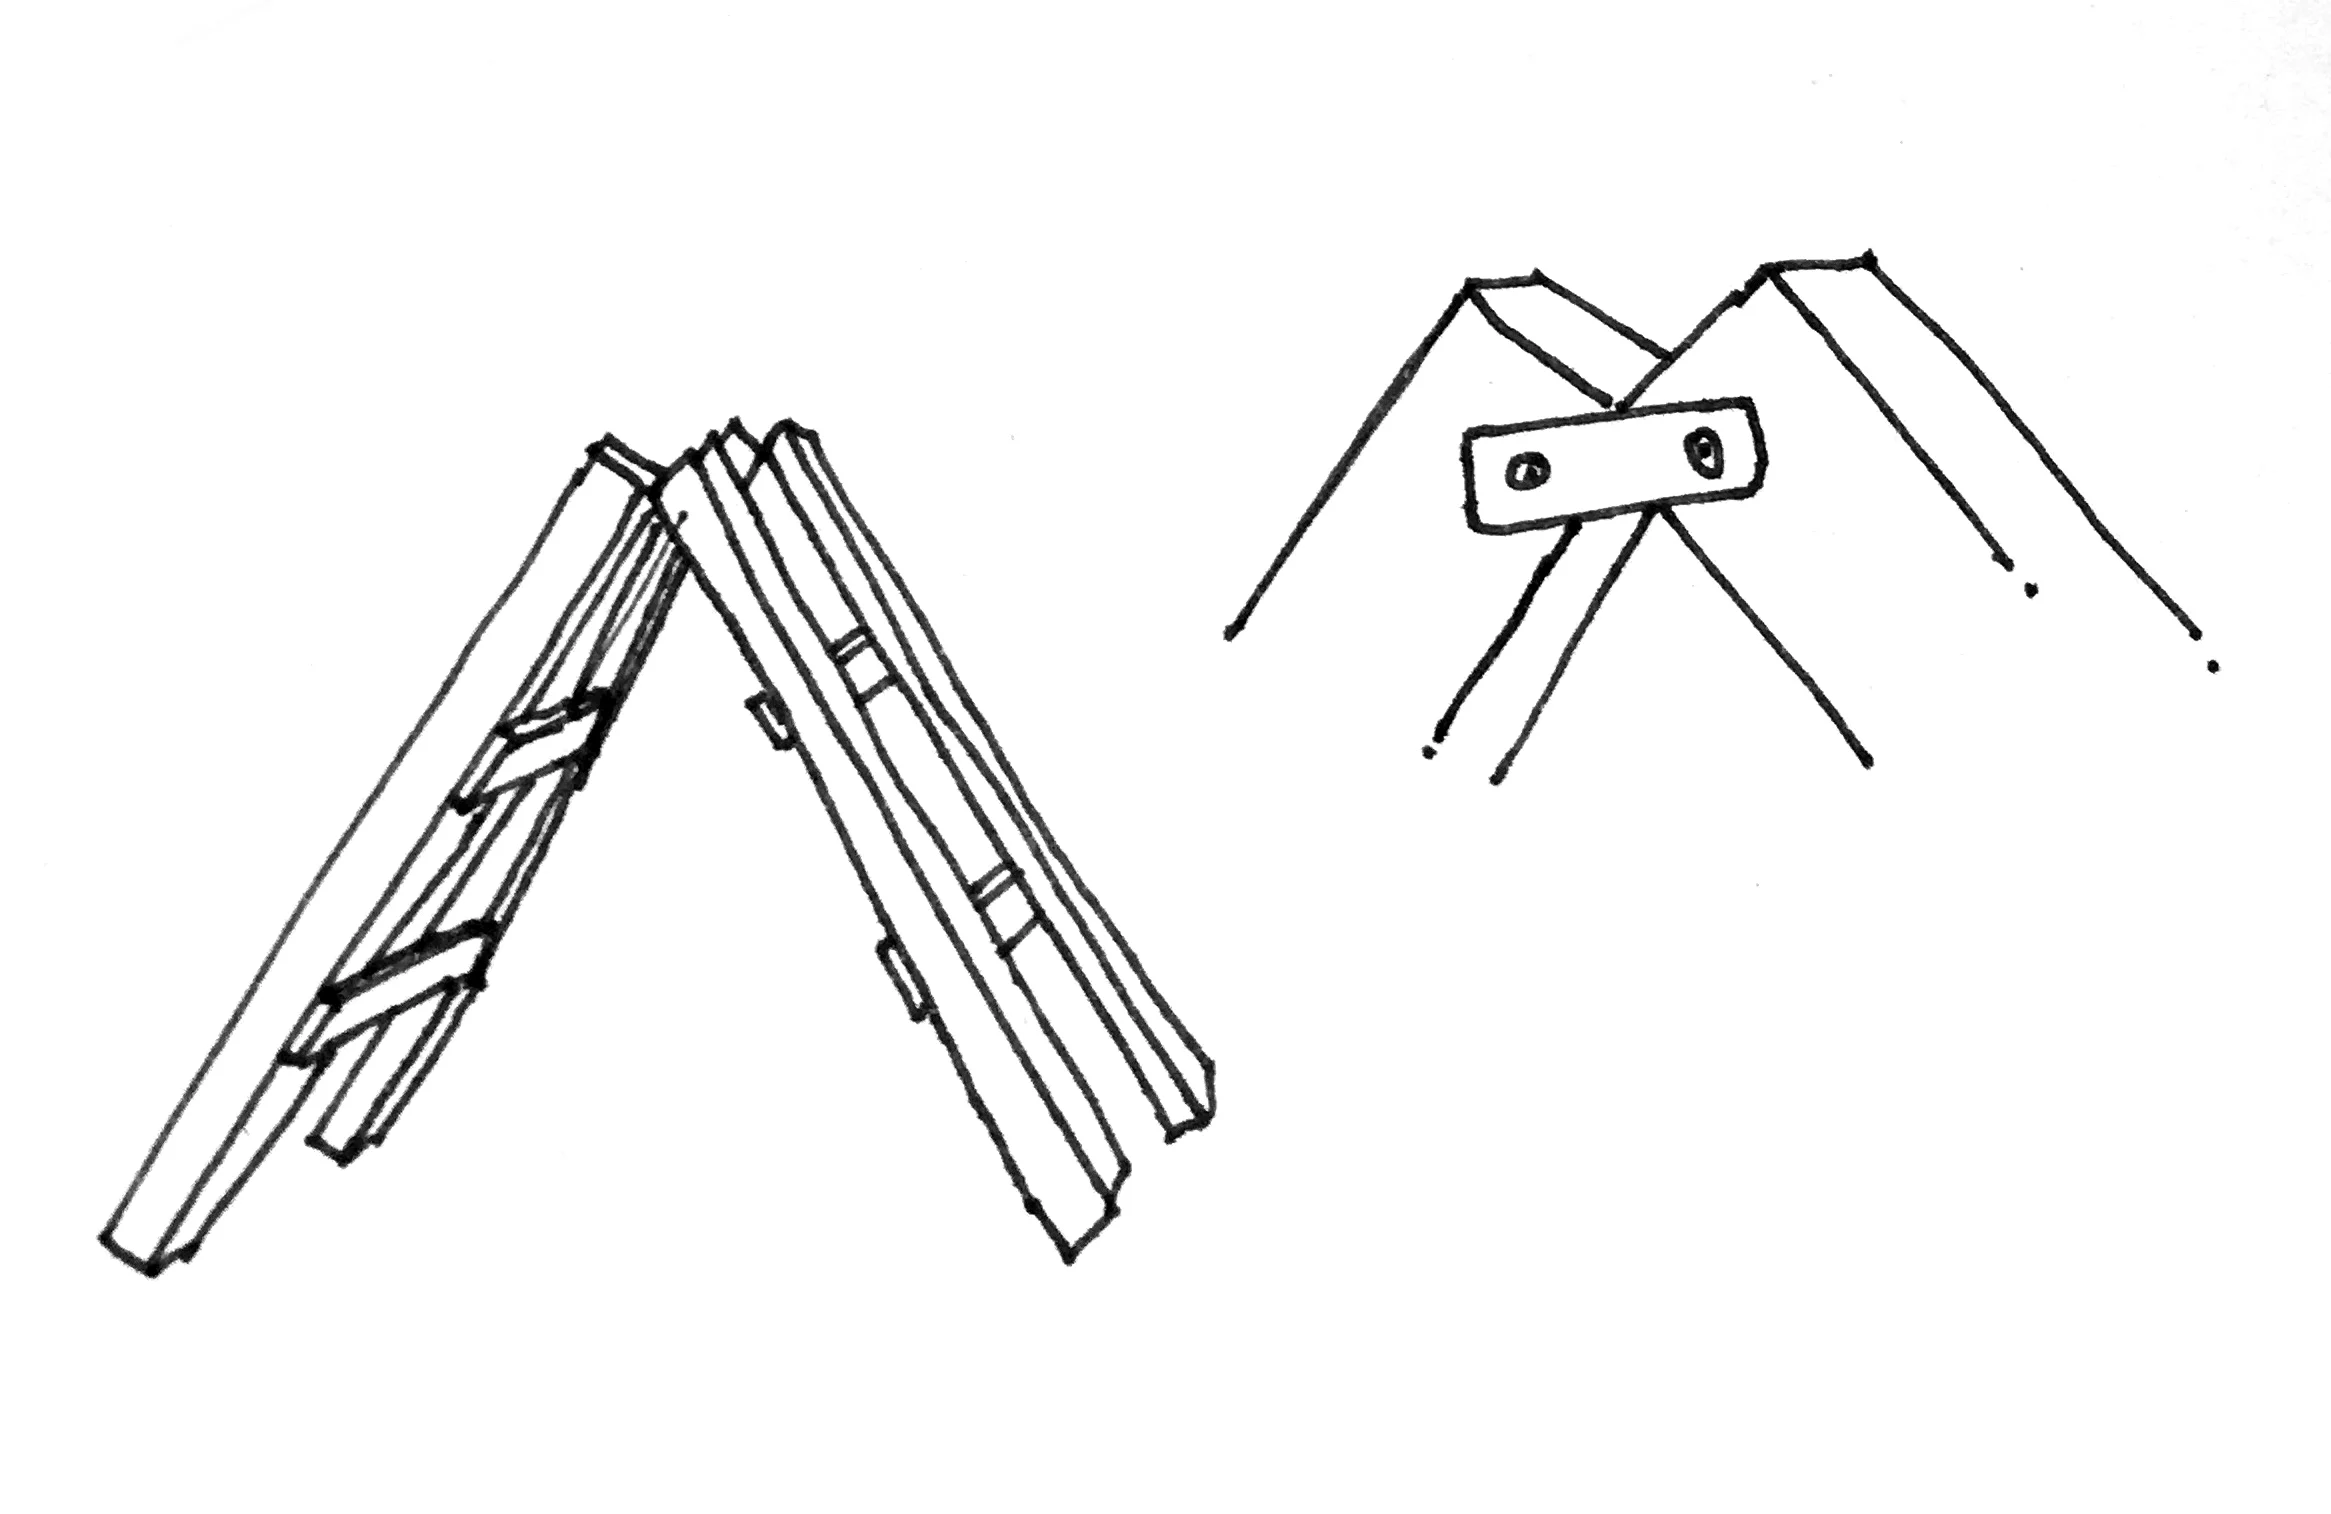
3/ Use your flat brackets to attach the tops of the ladders to each other. Using a speed square, make sure the angle of the two ladders is 60º at the top where they meet. In order to keep them together while I got the angle right, I used clamps to hold the tops together and then used a piece of scrap wood and screwed it into the sides to keep the angle correct. If you have a friend helping, though, you can probably just use them to help hold the ladders together while you screw the brackets at the top.

4/ Place the planks on each shelf, the shorter one on the top shelf. Make sure they’re centered so that each side has the same overhang length. Use the L bracket and screw the vertical side to the inside of the 2x2, just below the shelf, then screw the horizontal side up into the bottom of the shelf, securing the shelf to the ladder. Do this on both sides for each shelf. I only put one L bracket on for each shelf, but you could put one on each side of the ladder for both sides of the the shelves if you want a little more security.
If you’ve screwed on a scrap piece of wood to the ladders to keep them at the right angle, you can unscrew that now. You’re all done!
I made sure that all the brackets were behind the wood so you don’t see them from the front, but that’s just me being nitpicky because #aesthetics.


![As per usual I’m pushing right up against a deadline and have hyperfixated on this painting all week to finish in time.
Chikayaasix̂ [Fireweed] Transplanted- acrylic on wood.
Every generation my family has moved farther and farther from ances](https://images.squarespace-cdn.com/content/v1/574dddd6d51cd4bc35c1609a/1714708076216-UAPXPXK9DVDBP7F1C65E/image-asset.jpeg)

