decor

Our Dining Room Transformation!

IMG_0473.jpg

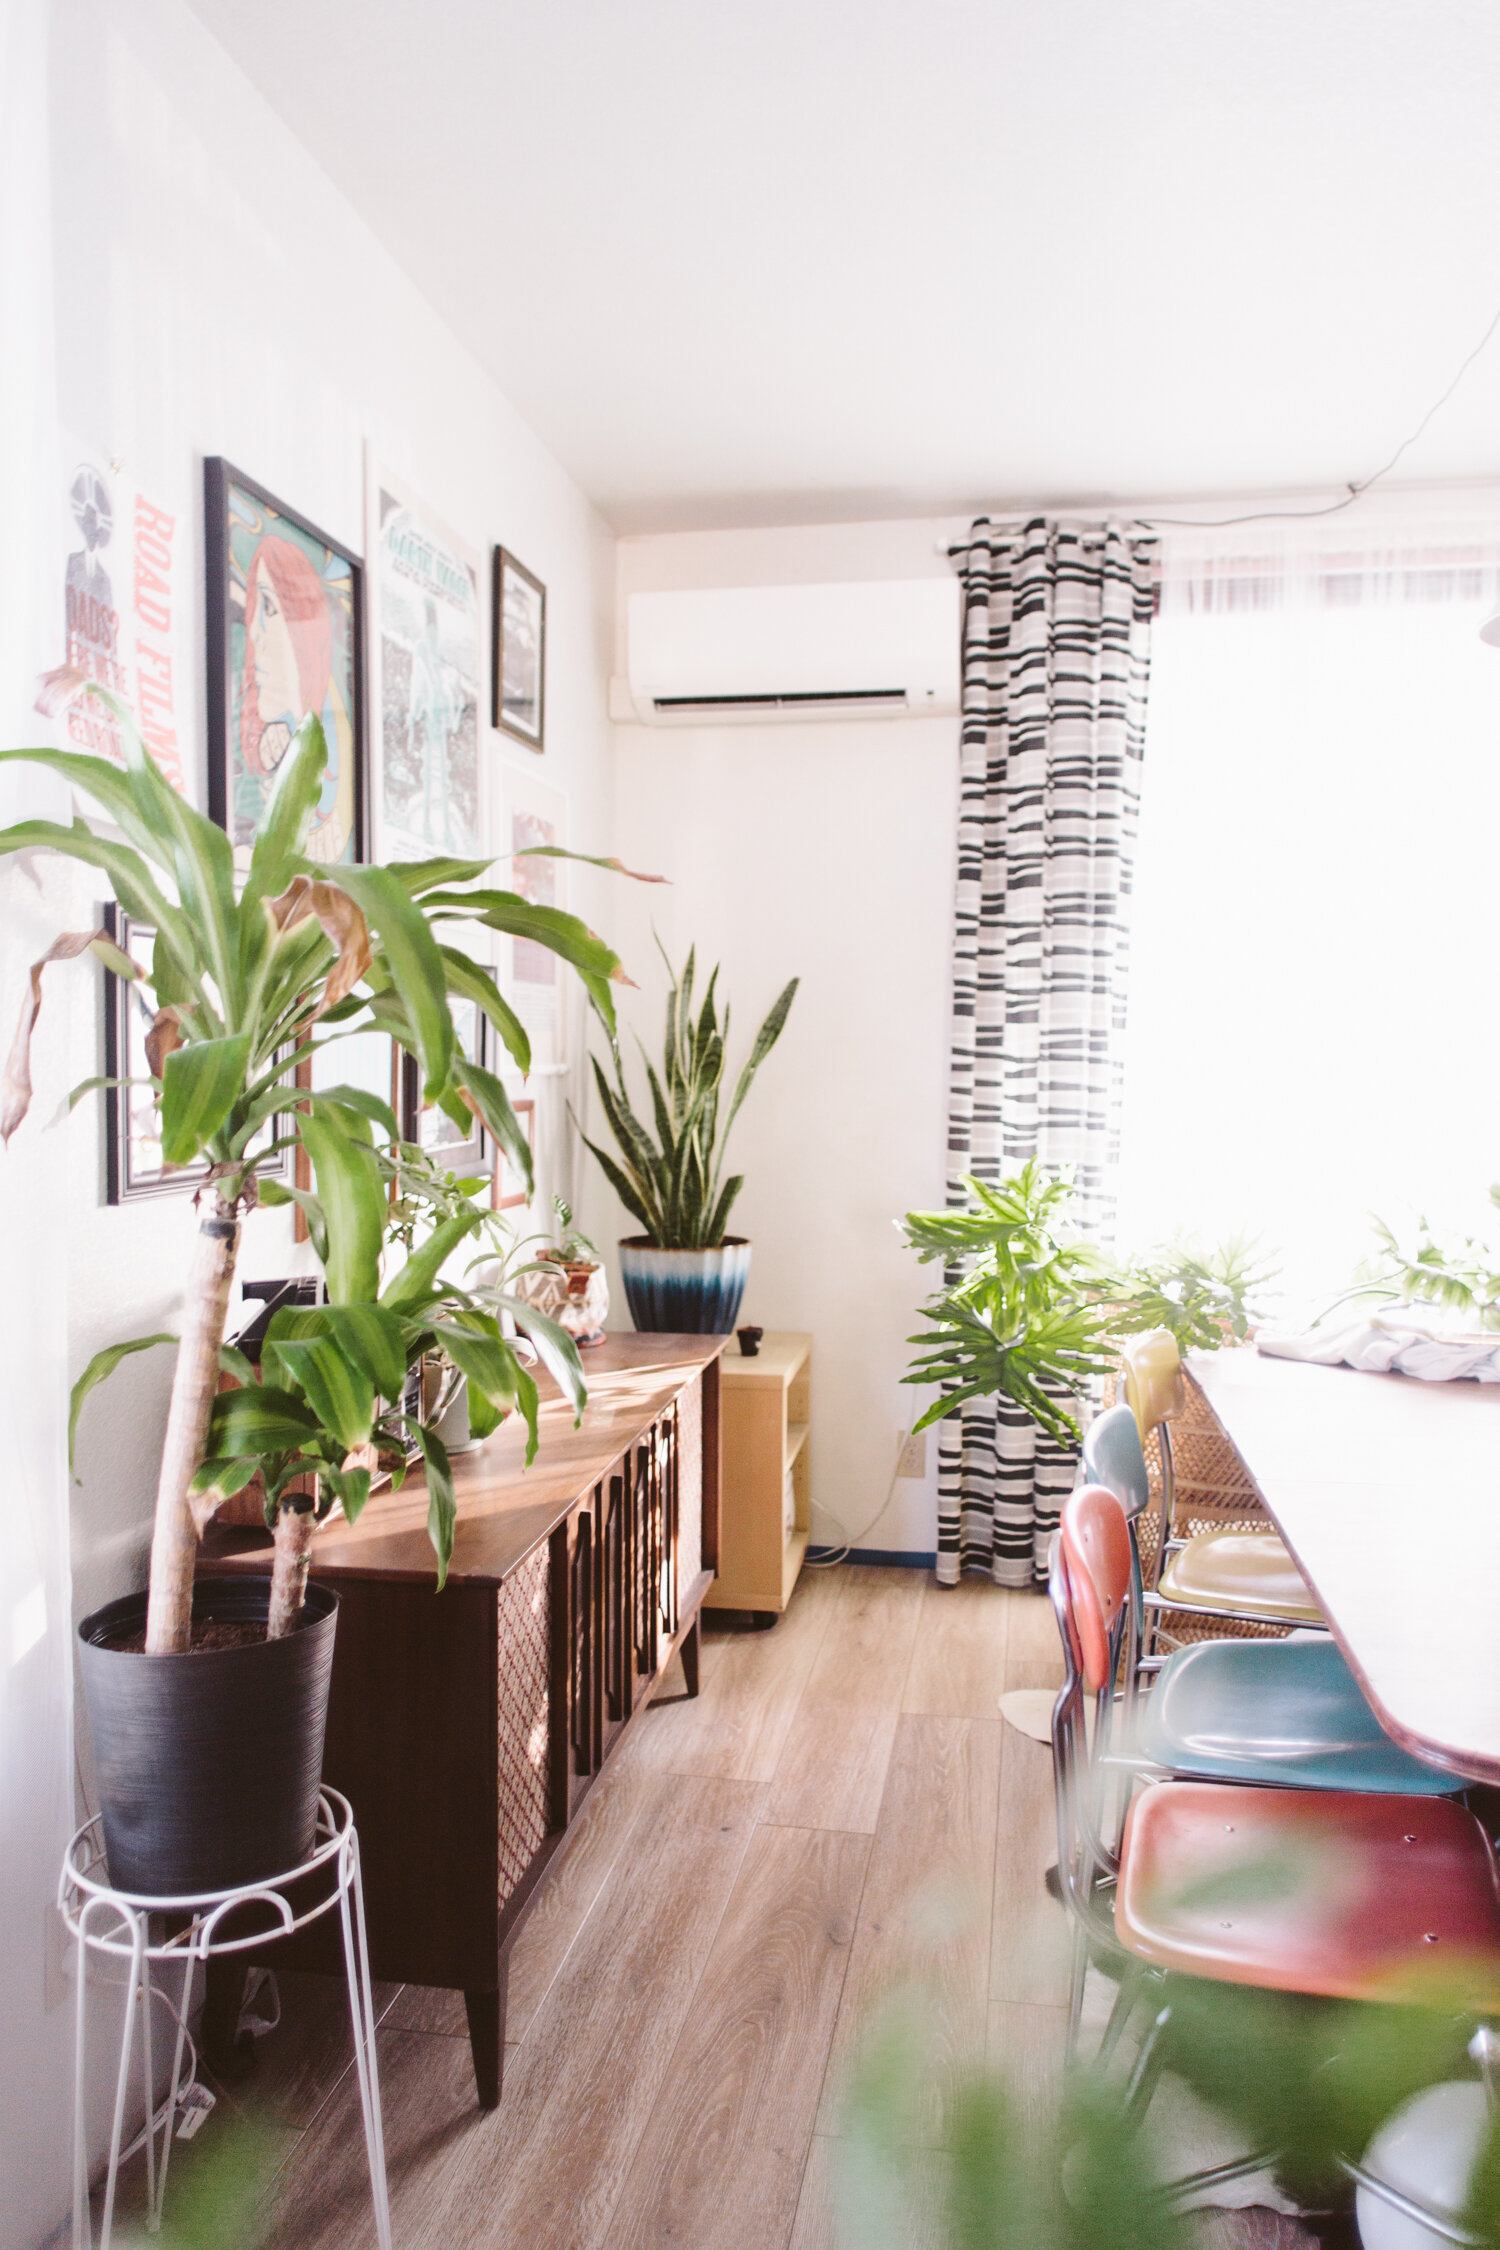
This space is still very much a work in progress, but I love being able to look back at what it looked like when we bought the house, and appreciate how far we’ve come. This room is * technically * the living room, but it’s smaller space and right by the front door, so having the entry there takes away some space too, so we decided to flip them, and put the living room next to the kitchen and move the dining room to the front of the house.

For us, having a dining table is nice for hosting friends, and doing crafts and projects, but we don’t use it on the daily, so moving the living room to the center of the home, right next to the kitchen, made way more sense. We use the living room and kitchen all the time, so putting them close together was perfect for us.

Because this wasn’t designed as a dining room we didn’t have a hardwired light over the table, so I found one at the thrift store for $5 and strung it up with a hook! It’s a plug in lamp so I plugged it into a smart plug so now we just tell Google to turn on the dining room light and it turns on! Way easier than going through the work to install a hardwired light. We may still eventually install one, but for now this works great!

IMG_0469.jpg
IMG_1637.jpg
IMG_3340.jpg

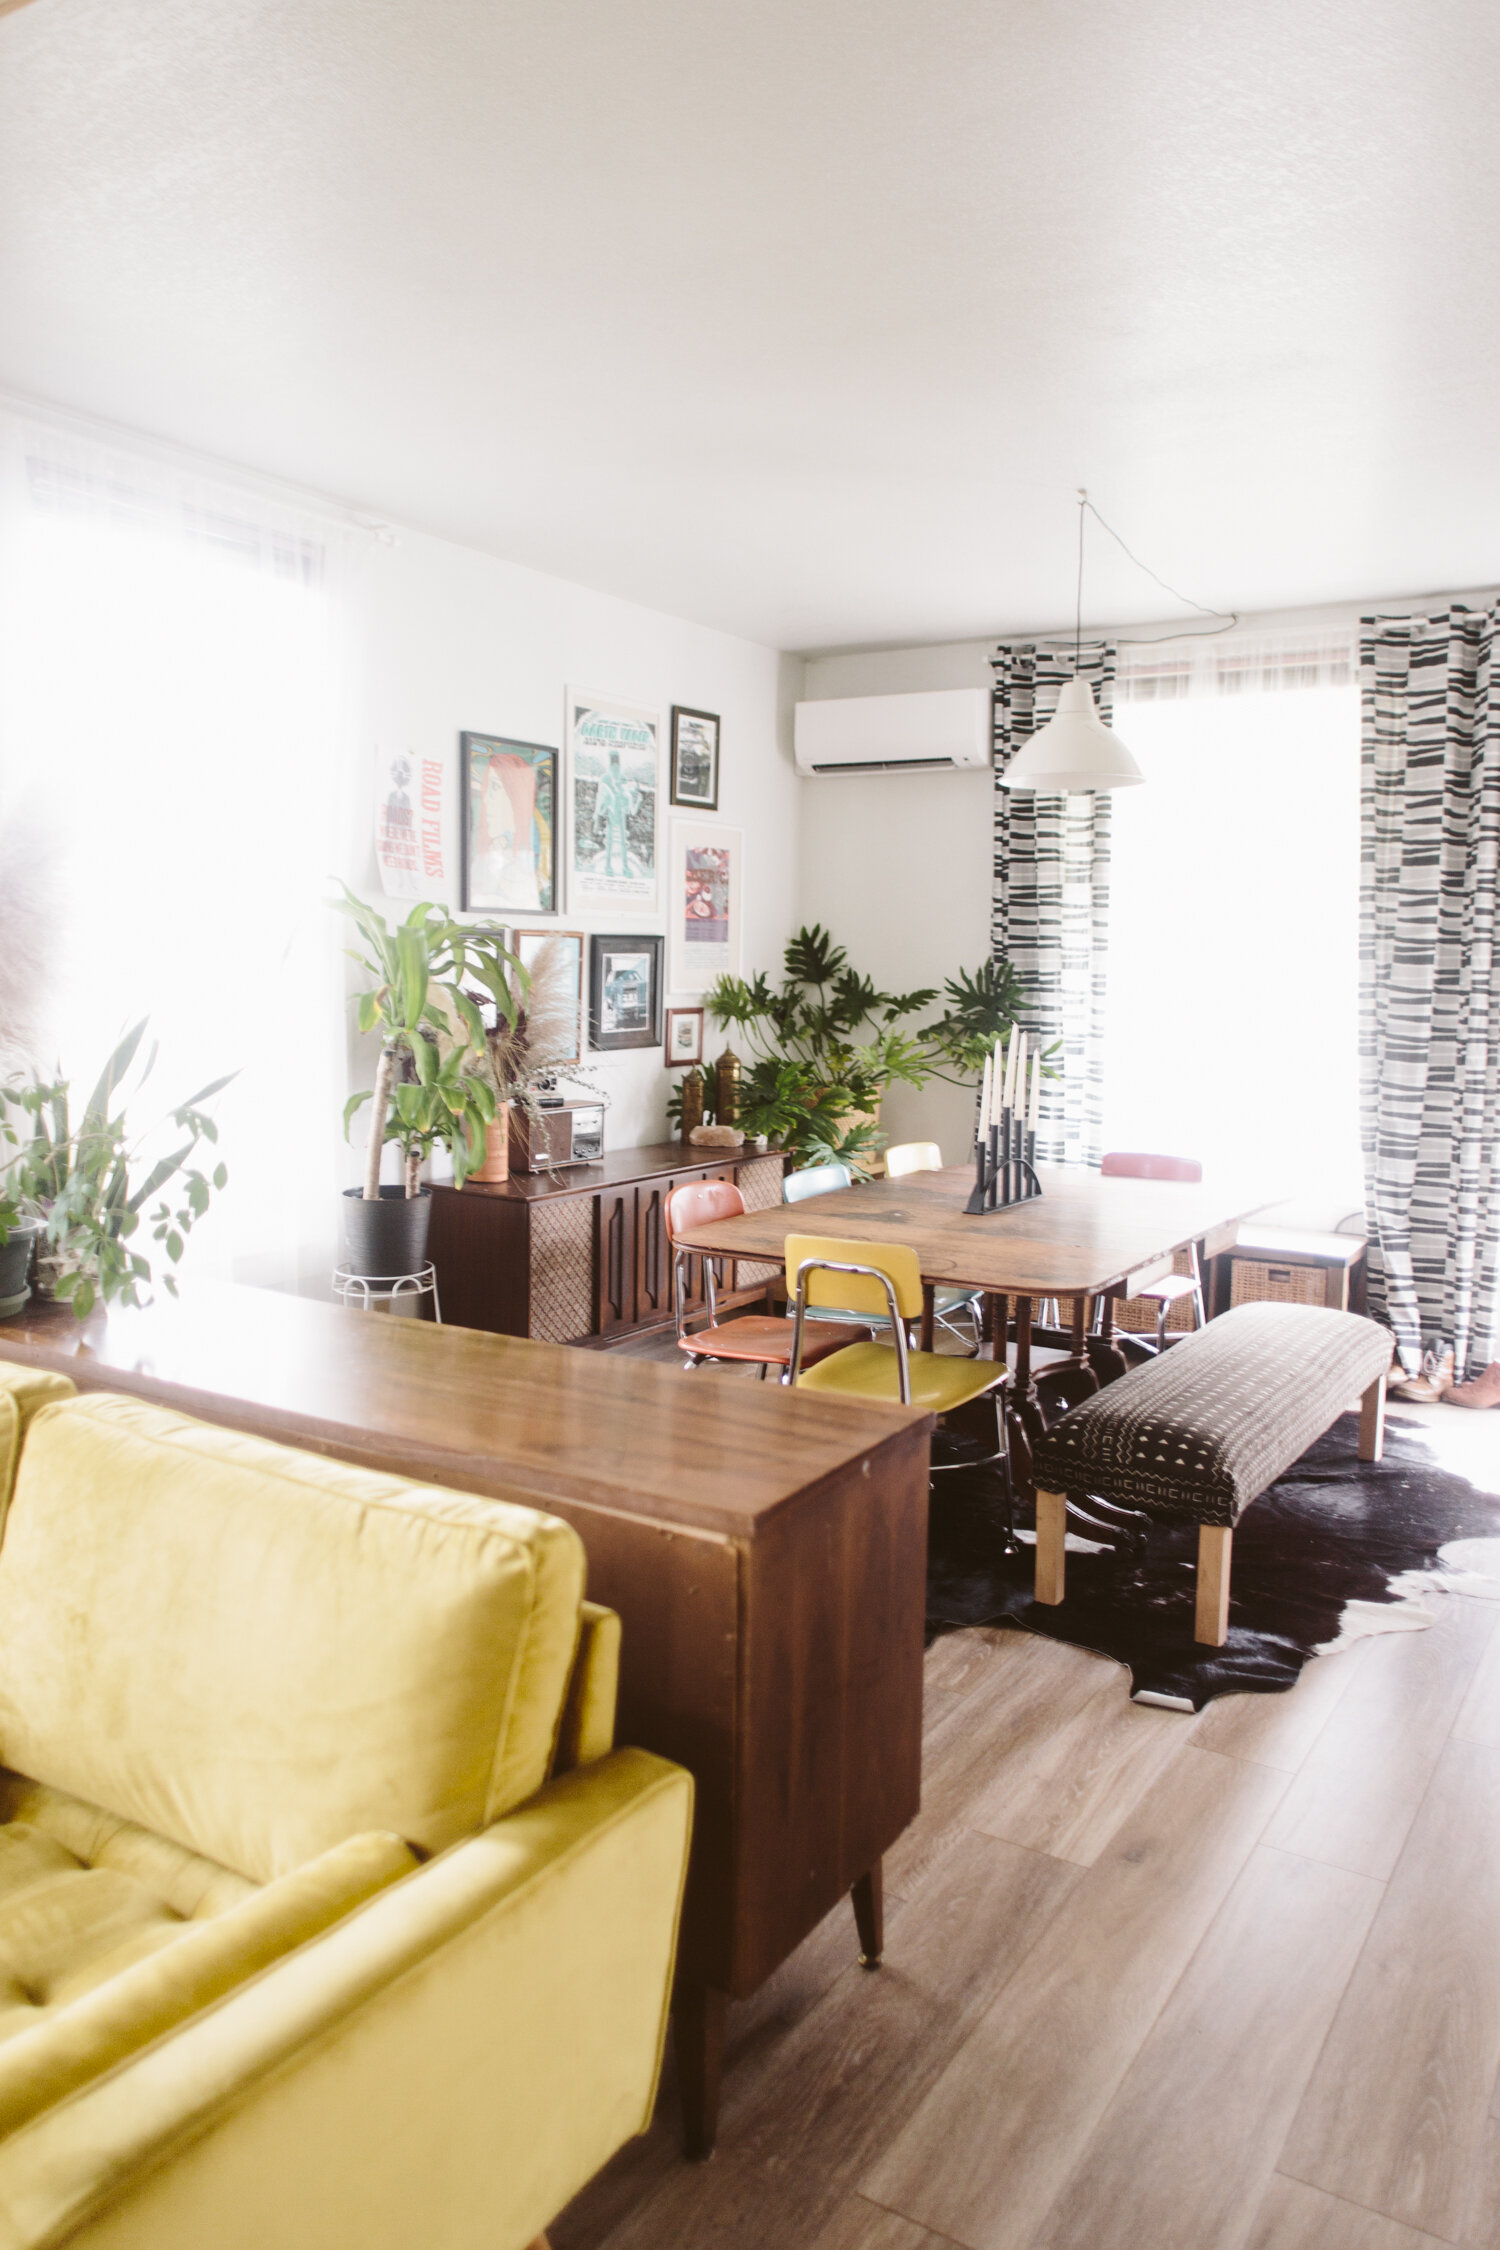
You can kind of tell, but the ceiling was sagging a bit, which is why the old faux beam they had up looks super weird and bent. We jacked the ceiling up and put up a lighter cedar faux beam. We also took out the pony wall that divided the two rooms, and another tiny pony wall that was right by the front door, which made that space extra claustrophobic.

The disgusting, dog scented, dog fur saturated carpet was the first thing to go. It was even more disgusting IRL, and yes, all the stuff in the house was left when we bought it as-is, so we had to fill a couple dumpsters with all that crap as well as the stuff we demoed.

IMG_0481.jpg
IMG_3342.jpg

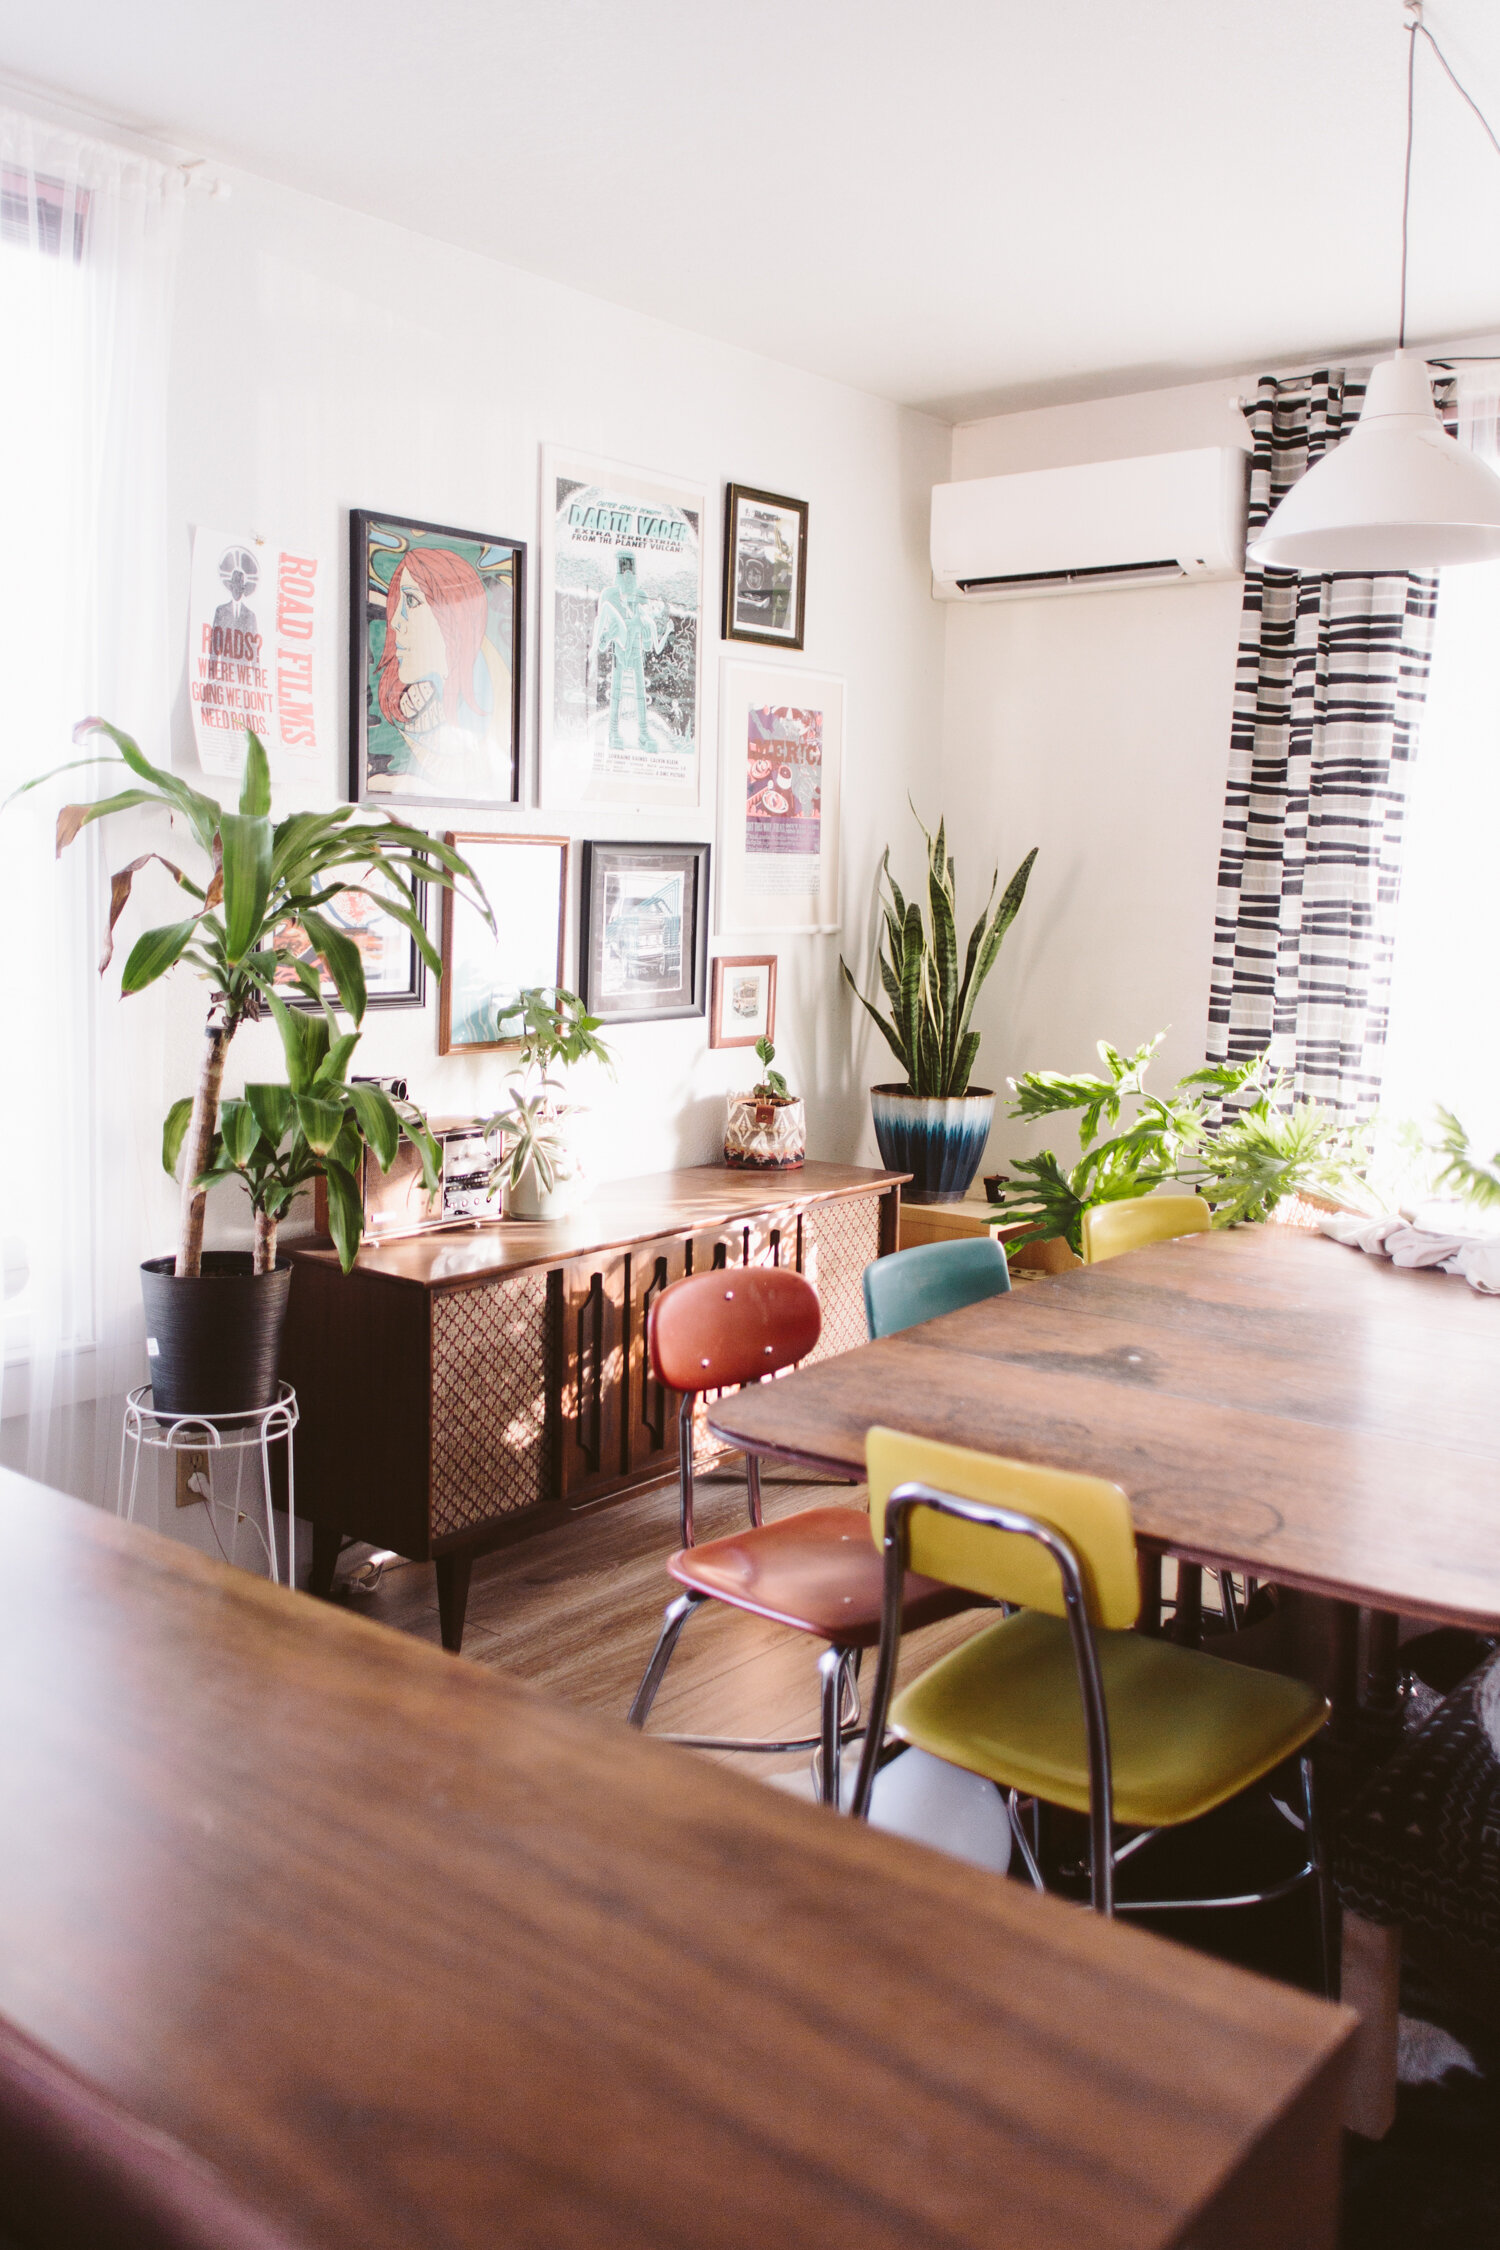
I’ve got more projects up my sleeves for the dining room, but those are on the back burner with some more pressing projects in line first, but I’m so happy with how far we’ve come since those photos on the first day!

IMG_1632.jpg

Bottle brush tree holiday tablescape

sisal tree tablescape

I love creating fun tablescapes and the holidays are a perfect time to bring together a bit of creativity and joy for entertaining. One of the best parts of this tablescape is that everything can be reused as regular Christmas decor, which I definitely did after hosting my annual Friendsgiving.

Another awesome thing is that I already had most of the elements and just brought them together! The base is actually a macrame wall hanging that I just folded up, I had thrifted all the candlesticks previously, I had most of the bottle brush trees from last year (and bought a few more from the Target dollar spot to fill it out), and the felt trees were a DIY craft project I did last Christmas season!

A few tips for putting together a stunning tablescape:

  • Don’t skimp on the candles, they bring such a warm glow and instantly create atmosphere. I always have lots of candles when I’m entertaining.

  • Vary heights and create levels. When you vary the heights of items in your tablescape, it allows the eye to keep moving. I made sure to spread out the different sizes of trees so there were different levels throughout the vignette.

  • Add texture! While the macrame base was mostly hidden, it still added a lot of texture and warmth. The felt trees have a wonderfully cozy texture, and the bottle brush trees had their own unique texture and sparkle that complimented the other softer textile elements.

  • Greenery! Okay so this table doesn’t technically have greenery like most of my designs, but I grabbed some sparkly white faux branches from Michaels to bring in that natural plant-based element. Even though they’re totally obviously fake, they still read as a plant element. A super easy way to add real plants without breaking the bank or having to learn floral styling? Buy a bundle of eucalyptus branches and lay them in the middle of the table, interspersed with your other decor elements. It fills the space beautifully, adds a lovely touch of green, and bonus: you can dry it and keep it as year-round decor!

Transform your kitchen with DIY painted cabinets

DIY Painted Kitchen Cabinets

Painting kitchen cabinets can feel intimidating, or even sacreligious, but I believe that it’s one of the easiest, most affordable ways to completely transform your kitchen. I lived in our kitchen for years wanting to paint the cabinets, but felt bad painting them because they looked relatively new and were perfectly fine. But here’s the thing, I LOVE our kitchen after painting the cabinets. It feels so much more “us,” it feels modernized, and custom (vs. basic builder grade).

I’ve painted cabinets in three different kitchens now and I love each transformation. In some, I’ve replaced the upper cabinets with new ones, to freshen up the look (like in the before/after below), or put in open shelving, and in others I’ve painted both the lower and upper cabinets.

DIY%2BPainted%2BKitchen%2BCabinets%2Bbefore
DIY Painted kitchen cabinets after

01/ Remove doors and hardware

This one is kind of optional. Removing drawer pulls and knobs is not: you’re definitely gonna want to remove those, it only takes a couple minutes and a screwdriver. But removing doors is up to you. It’s definitely easier to prep and paint them separately, but I have painted cabinets with the doors on and it works too! If you don’t have a garage or somewhere that you can set up a painting area, leaving the doors on is workable!

02/ Clean + degrease your cabinets

You’ll want to make sure you have a clean surface to paint, free from kitchen gunk and grease. Lower cabinets that aren’t near the oven don’t tend to have as much grease, but cabinets over the stove can have grease build-up that will definitely need to be removed in order for the paint to stick well. Use TSP or a similar cleaner to clean your cabinets first. Do all the surfaces you plan on painting. I have never painted the interior of cabinets, mostly because it seems like a pain and I don’t mind the insides having the original wood, but you’d follow the same steps laid out here.

03/ Sand and/or degloss your cabinets

Next, you’ll want to remove some of the glossiness on the cabinets so the paint will stick well. I use Liquid Sandpaper first, and then if I feel like I still need to rough up the surface a bit more, I’ll hit it with a fine grit sandpaper like 220 grit.

04/ Prime!

There are tons of primers out there, some specially designed for furniture and some that say they’ll stick to basically anything. I use Kilz for basically everything, so that’s what I’ve used on all my cabinet painting jobs, as well as to paint metal file cabinets and it seems to work really well.

With primer and paint, you have a couple options. I’d say the best option for a smooth surface is using a paint sprayer. We have a pretty heavy duty sprayer because we bought it to do the exterior of our house, but there are smaller, more affordable ones available that would work for painting cabinets. For spraying, I would recommend just doing the doors and setting up a spray booth in a garage or other workspace with plastic sheeting and drop cloth, unless you feel like masking off your entire kitchen and spraying the whole cabinet. We sprayed the doors, then used brushes and 4-in smooth rollers for the cabinets themselves. One coat of primer should do the trick.

kitchen before.jpg
DIY Painted Kitchen Cabinets tutorial

05/ Paint!

Now the fun part! You’re gonna want to get a nice paint. I’ve used Behr Marquee for all my cabinets because it does a nice job of self leveling and the coverage is amazing. Behr also makes an Alkyd paint that is designed for cabinetry and was recommended, however they have limited paint colors available for that paint and I’m too picky with my colors. I’ve never had a problem with using the Marquee.

When it comes to picking a sheen, I’ve discovered that I prefer eggshell. I’ve used semi-gloss in the past thinking that the glossiness would be easier to wipe down, but I’ve found that semi-gloss and gloss paints tend to, like, not stick as well? I don’t know, they seem like they can be scratched easier, and for cabinets when there are fingernails scratching when you grab for drawer pulls, I’ve had the semi-gloss paint scratch off, but the eggshell doesn’t.

I’d recommend at least two coats, possibly three, depending on how it looks after two. Again, if you’re spraying, spray the doors and then roll + brush the cabinets. Allow the right dry time between coats based on what your paint recommends.

Also, I should note that I have not used a sealer or top coat on my painted cabinets yet, but with my most recent cabinet painting project I’m thinking of finding one so I can see if it’s something I recommend. For some reason I just never thought to put a top coat on, so I’m going to do some research and testing to see if there’s something I like and I’ll update this accordingly!

Adventures in DIY tiling

DIY kitchen floor tile

There’s not much I won’t DIY, and I’m usually pretty spot on in my assessment of how difficult a project will be but this kitchen floor has turned into a huge pain. And to be fair, I’m not feeling the pain of how annoying the install process is— Dan is the one doing the mortar and laying the tiles. But what we planned on being a weekend project has now entered the second week of having no functional kitchen, and I’ll tell you what: not having a range is a lot harder than I thought. I finally broke down and bought a microwave yesterday so we could at least have some home cooked food.

We’re probably about halfway done with the kitchen and the same tile will continue into the bathroom and in the laundry closet, so I’m thinking we probably have at least another week of doing tile, though we thankfully have laid the tile where the range goes, which means it will be able to return to it’s home and functional status in the next day or two.

Next up, I’ll be grouting the tile, which is perfect because it’s a great project for me to do while Jack naps. Even though I hate working with it, I decided to go with the Fusion Pro grout again, just because I don’t have to seal it or anything. And I think it’ll be less annoying to work with this time simply because I’m not doing a contrasting grout (last time I did black grout with white hex tiles). Since I wanted a concrete floor, I’m doing the grout in as close to the same color as the tile to give it more of a seamless look. But you know I couldn’t make things easy, so we’re doing a herringbone pattern. It’ll be more subtle since the grout won’t be contrasting, but I still think it’ll add interest.

Photo Jun 30, 5 19 40 PM.jpg

Ooooh, and peep that new light fixture too! In the meantime, you know I couldn’t wait any longer to paint something chartreuse in this house. This color is Lemongrass by Behr and It feels so happy! Even with no trim.

Chartreuse door

That Airbnb Swiffer Life

Swiffer WetJet Wood

Now that the #thebravehouse is an Airbnb, I’m cleaning it a LOT more frequently.  Like, I wish I had cleaned it this often when we actually lived there! For the time being I’m the “cleaning lady” getting things all prettied up between guests, and with a very limited amount of time between reservations (usually just a few hours!), having a quick and easy process is absolutely essential.

Since I partnered up with Swiffer to try out their WetJet Wood, keeping my hardwood floors clean takes just a couple minutes, which is perfect for those whirlwind days when a guest checks out in the morning and another checks in later that afternoon. While my sheets are getting clean in the laundry, I can easily give my floors a swipe with the Swiffer so they look clean and new for the next guest.

IMG_1013.jpg
IMG_0006 copy.jpg
IMG_1022.jpg

I’m pretty excited with how well our Airbnb bookings are going! I’ve definitely got my work cut out for me, acting as the cleaning service on top of managing bookings and such, so I might eventually hire out my cleaning to a professional. We initially just wanted to see if the house would even do well as a vacation rental and I figured I’d costs low by doing the cleaning myself.  I’m going to reevaluate at the end of the month (June is booked up at like 80%, so imma be buuusy cleanin!), and decide if I want to keep grinding at the cleaning myself, or get some help!

In the meantime, it’s me and my trusty Swiffer gettin’ her done! Check out the Swiffer WetJet Wood on Amazon here!

Swiffer WetJet Wood