entertaining

A DIY Minecraft Birthday Party

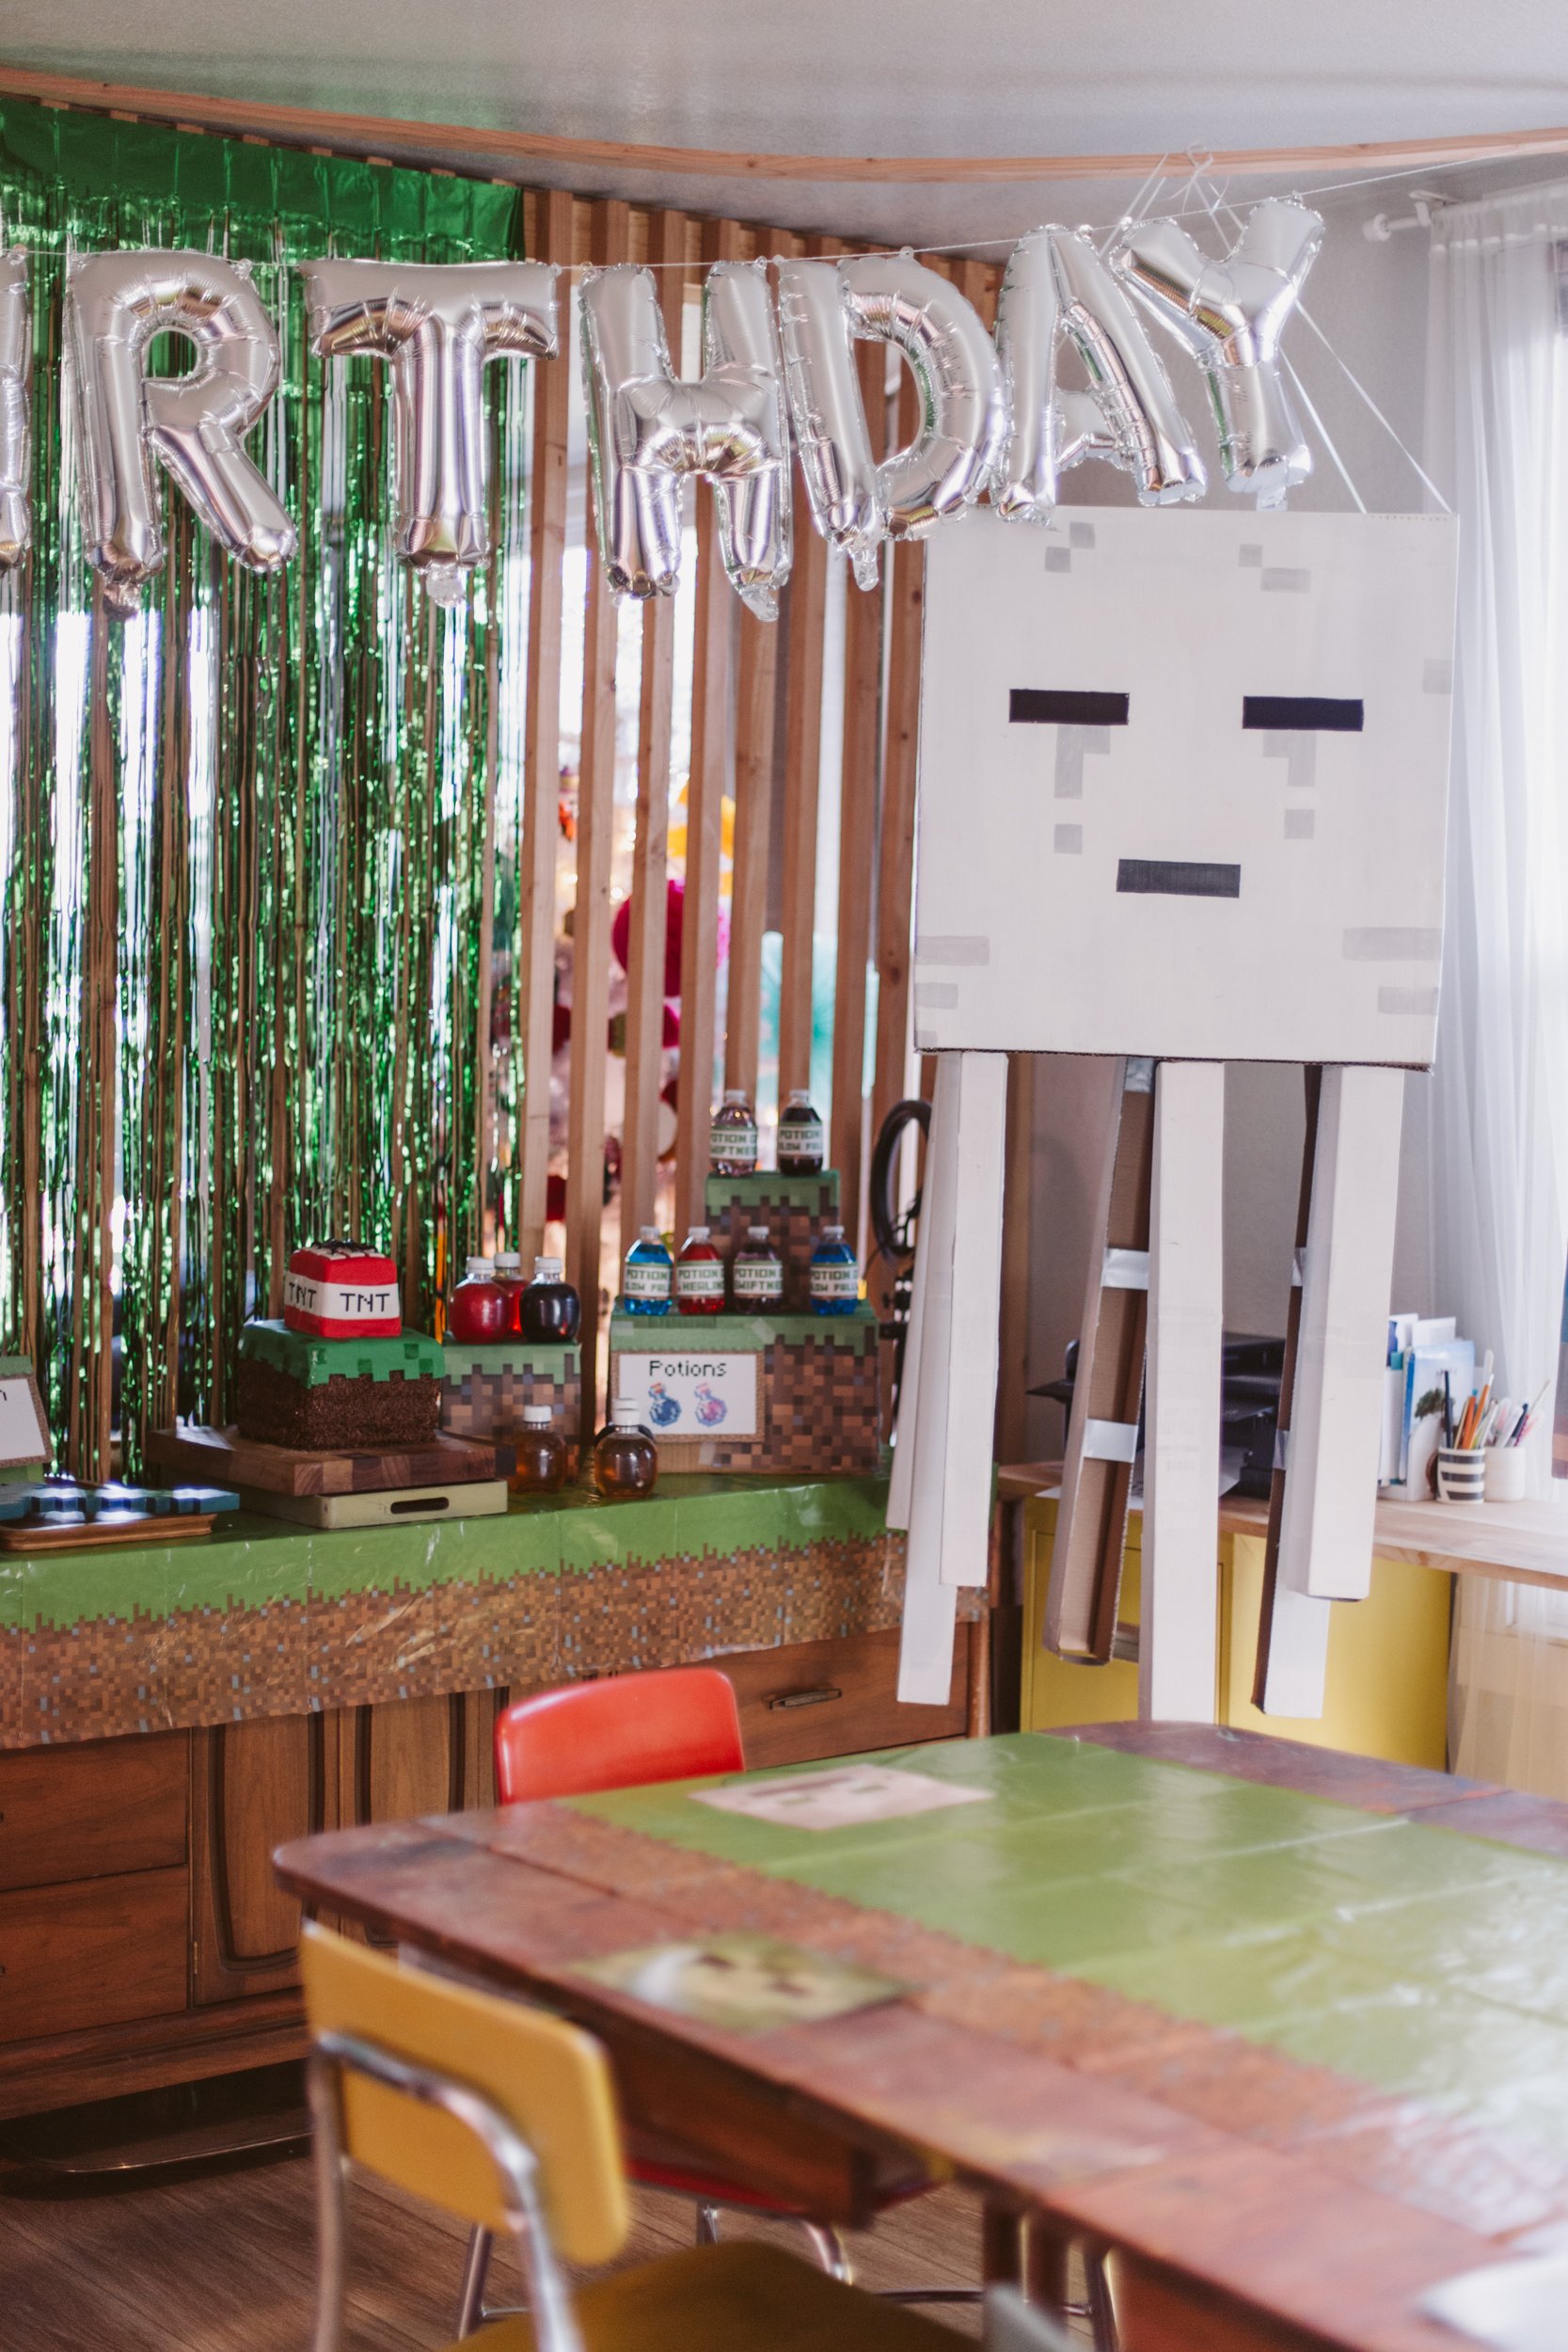
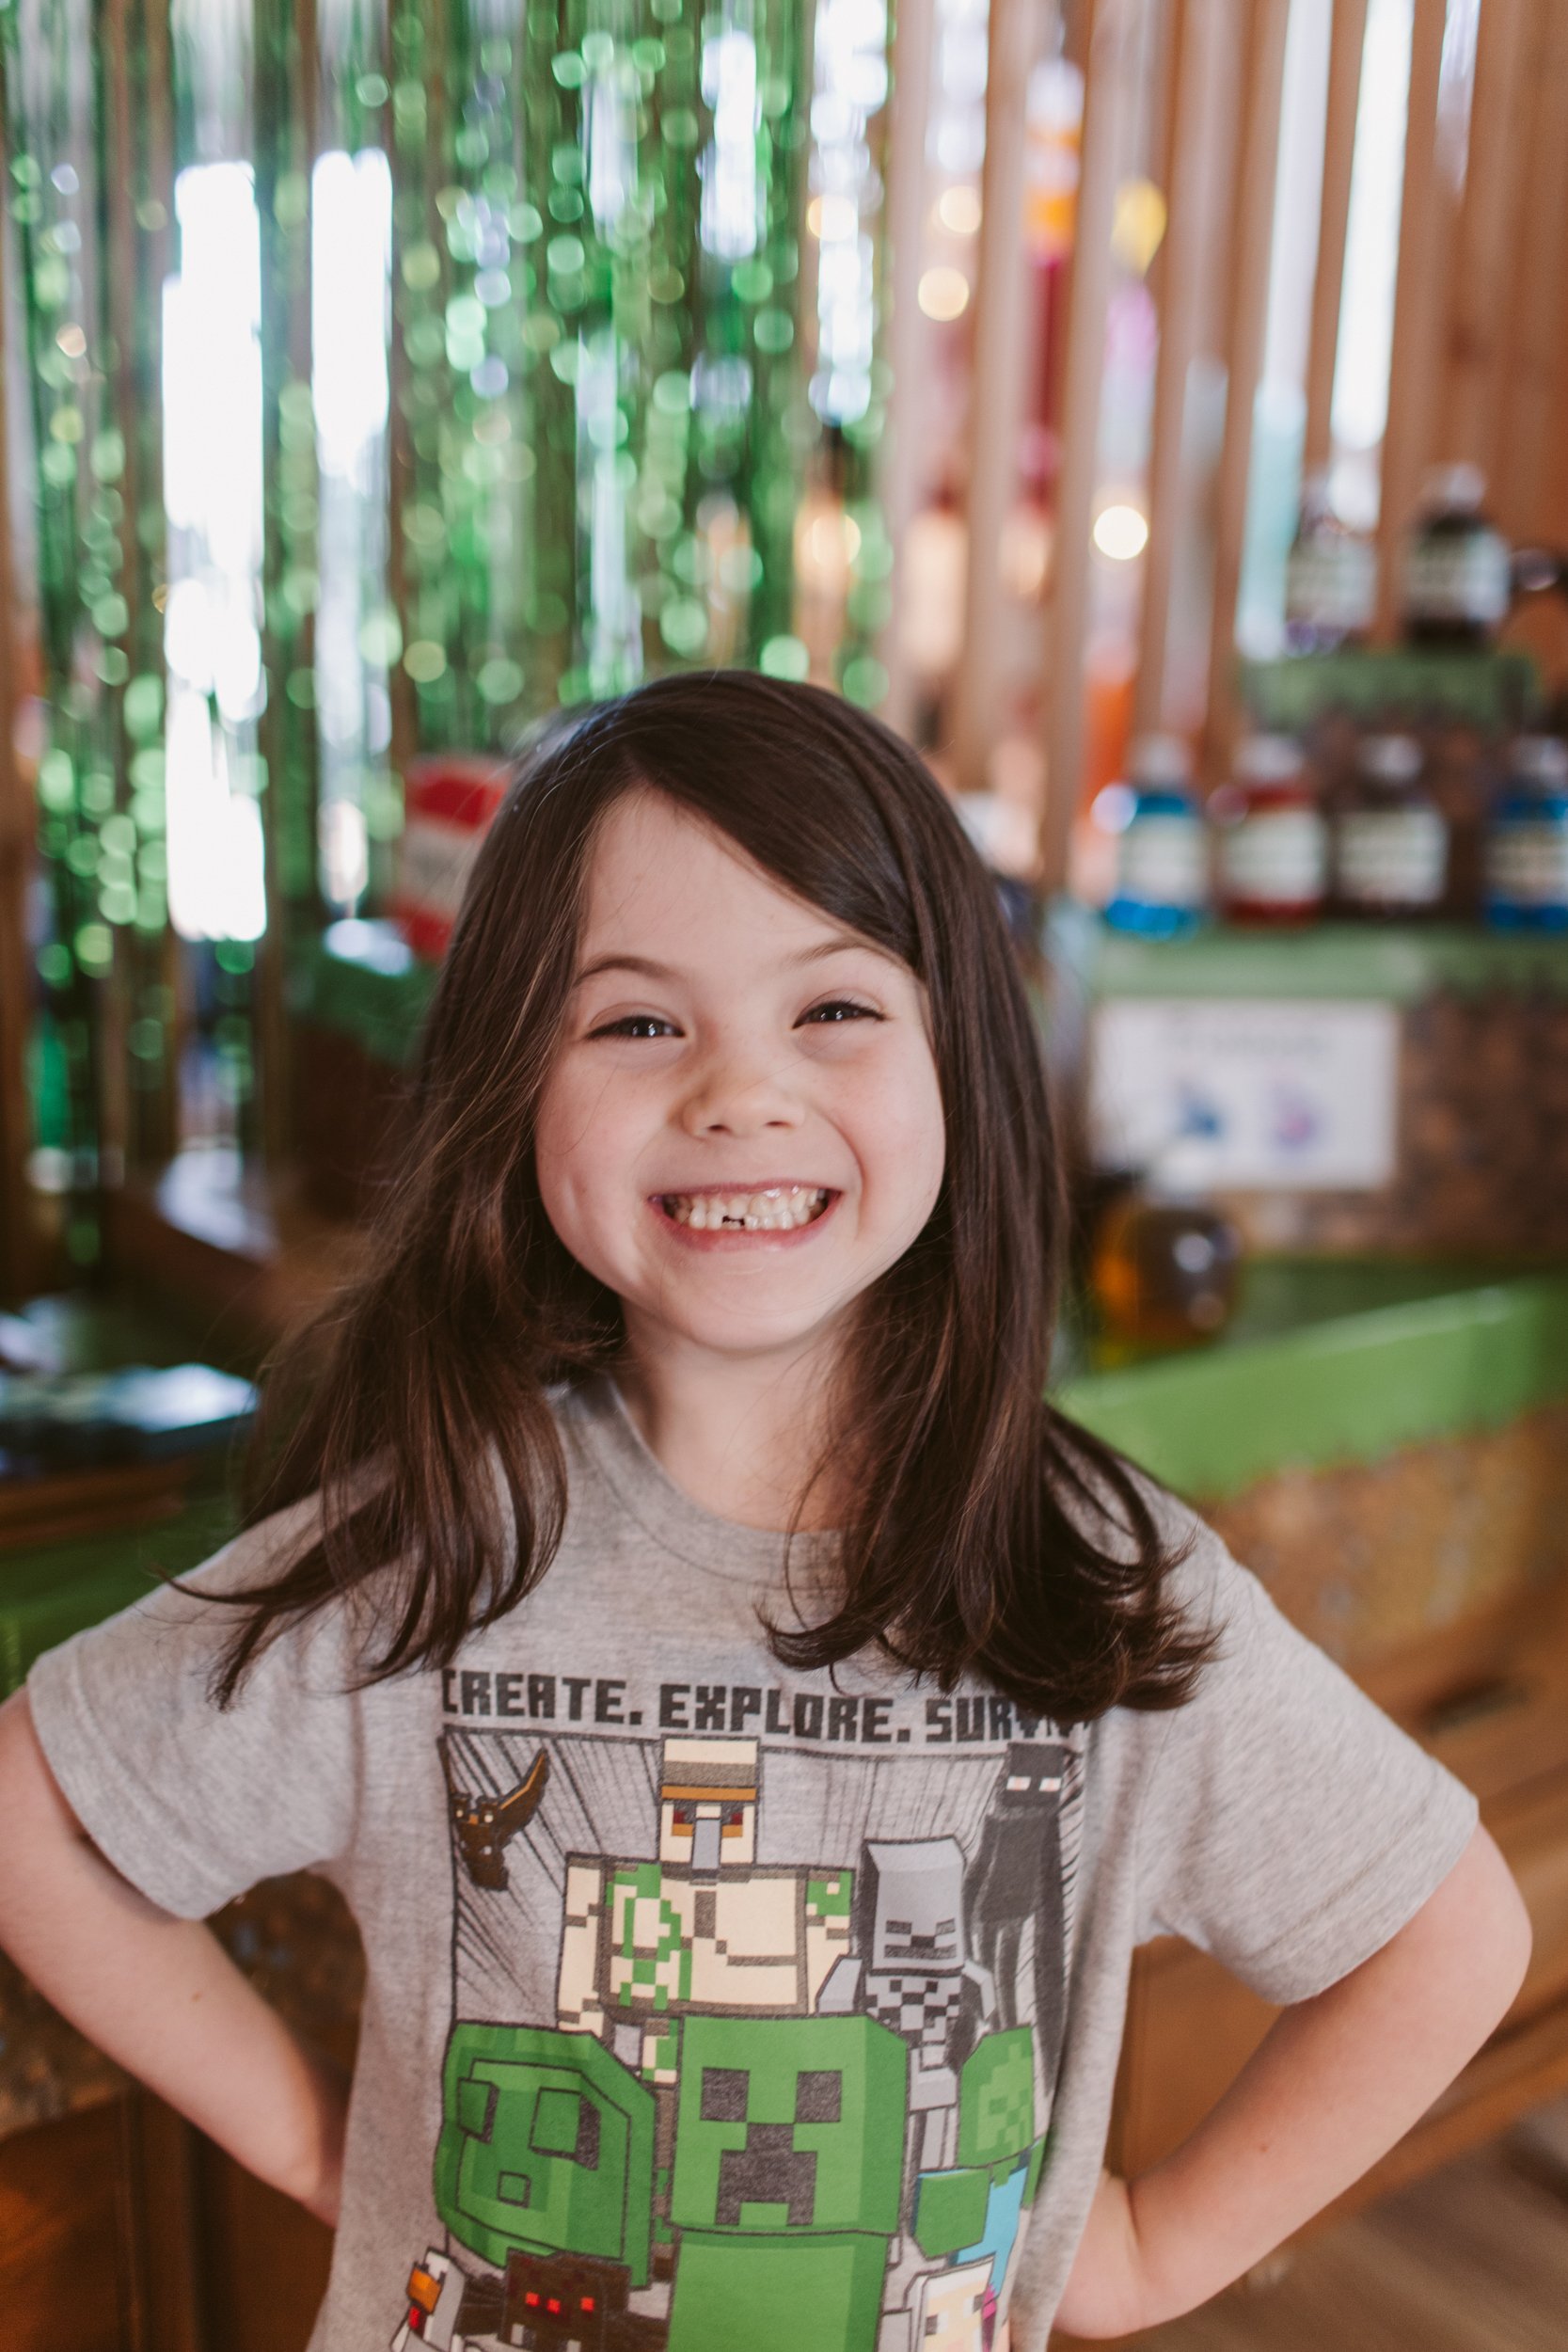
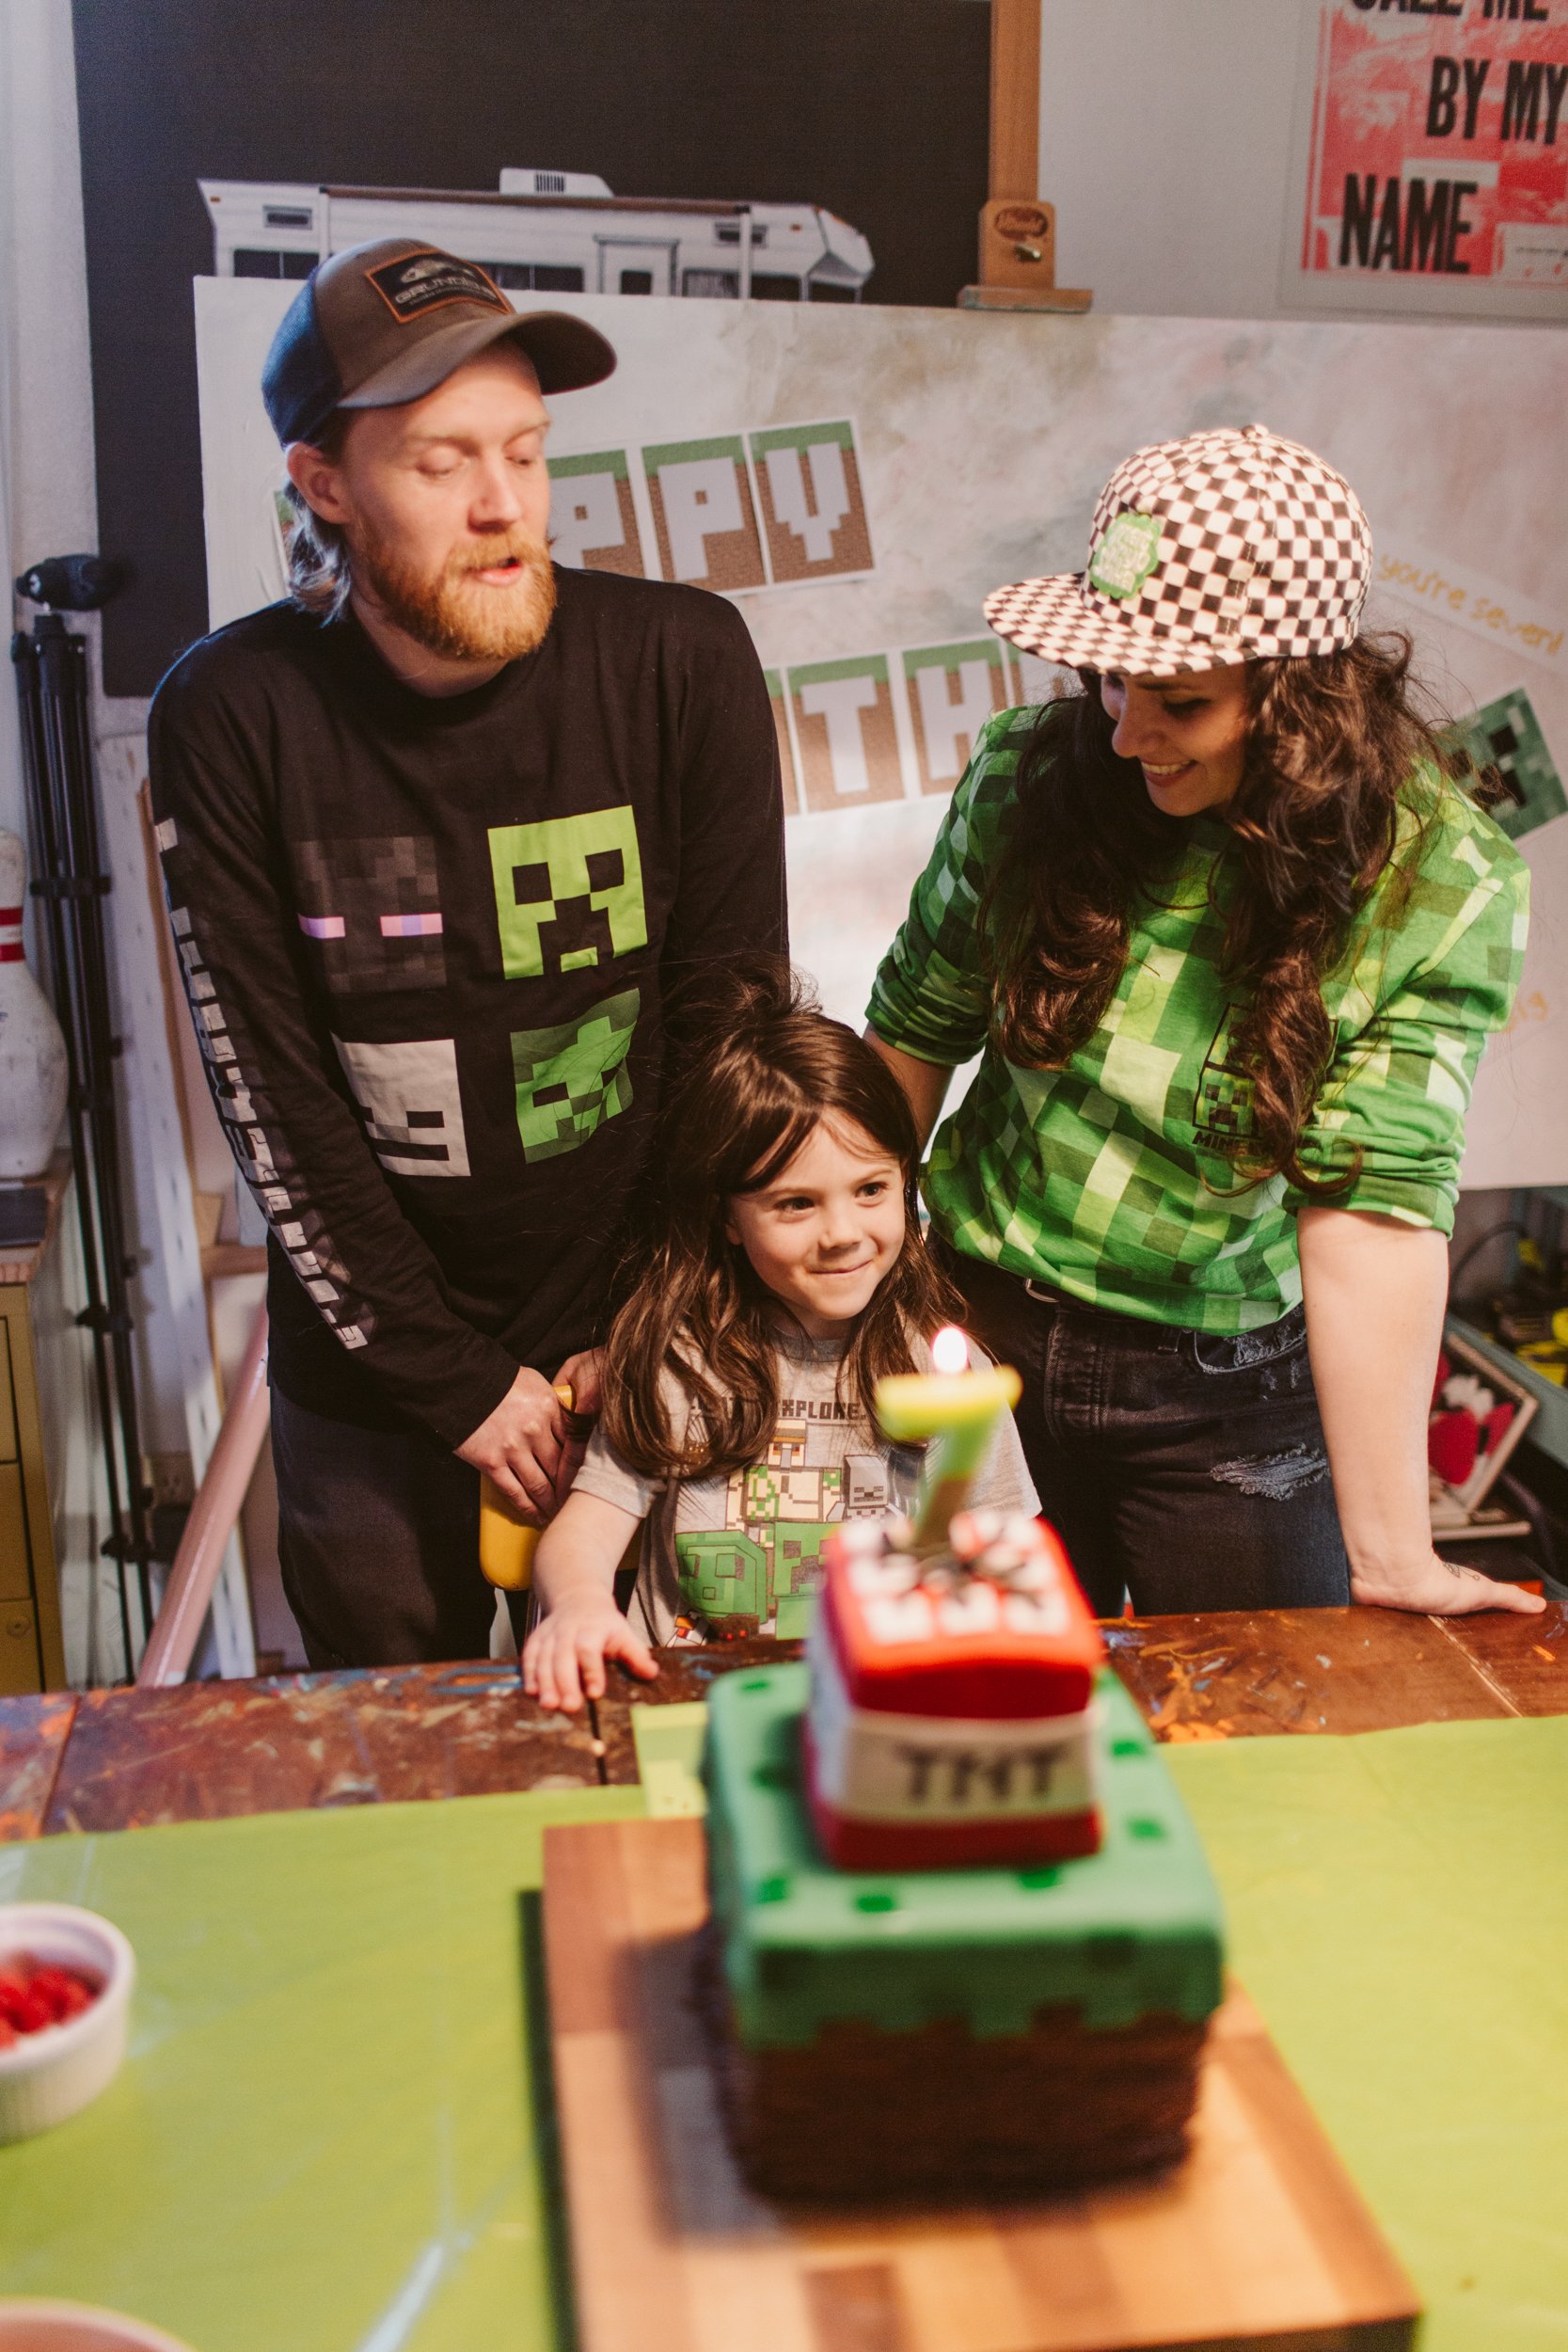
The two weeks before Christmas are always a little bit of a mad dash since Jack’s birthday is in that time period. Every year I try my best to create a really fun party for him to help ensure his birthday doesn’t get rolled into the busy-ness of the holiday season. This past year he’s gotten super into Minecraft (and TBH our whole family has, which has been a blast), so we obviously had to do a Minecraft themed birthday party.

All three of us were Minecraft characters for Halloween, so I saved those costumes to use as decor for the party (the Ghast below was Dan’s costume). Some of the decor was just Minecraft party decor from Target, like the table cloth, but most of it was DIY! I grabbed some of the printable decor from the Jennifer Maker blog, and then I tweaked some of her downloads in photoshop to add more things.

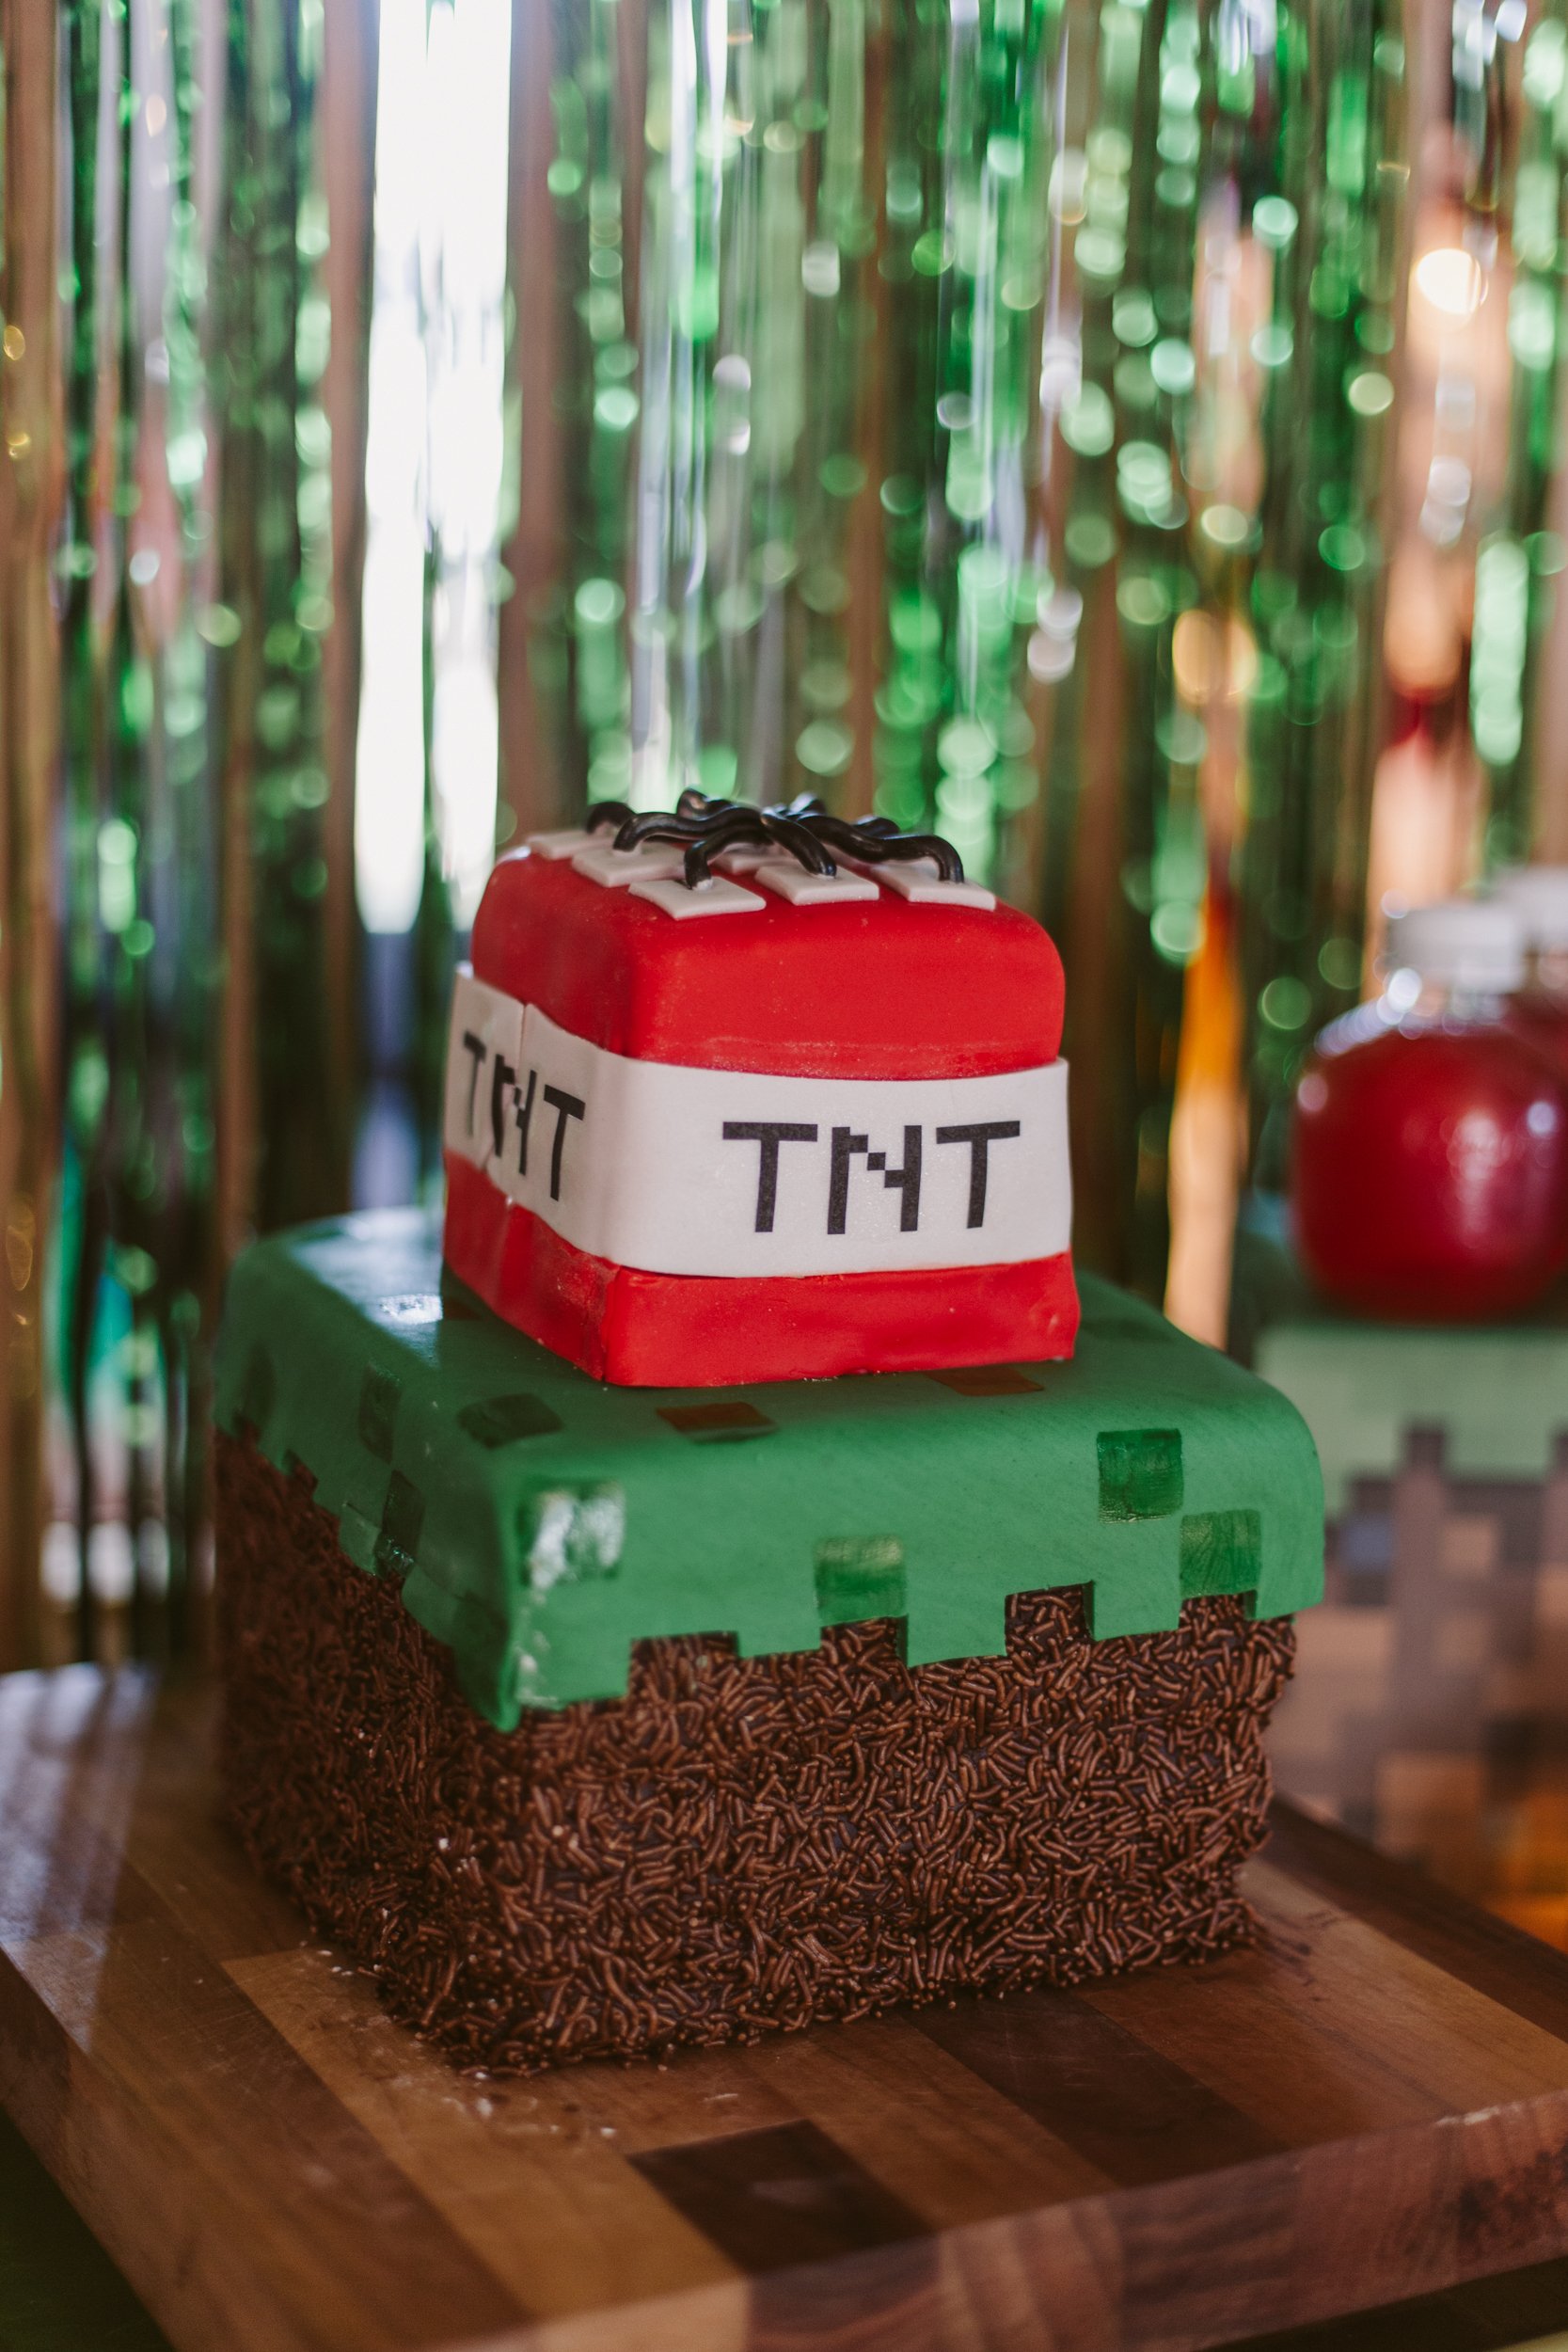
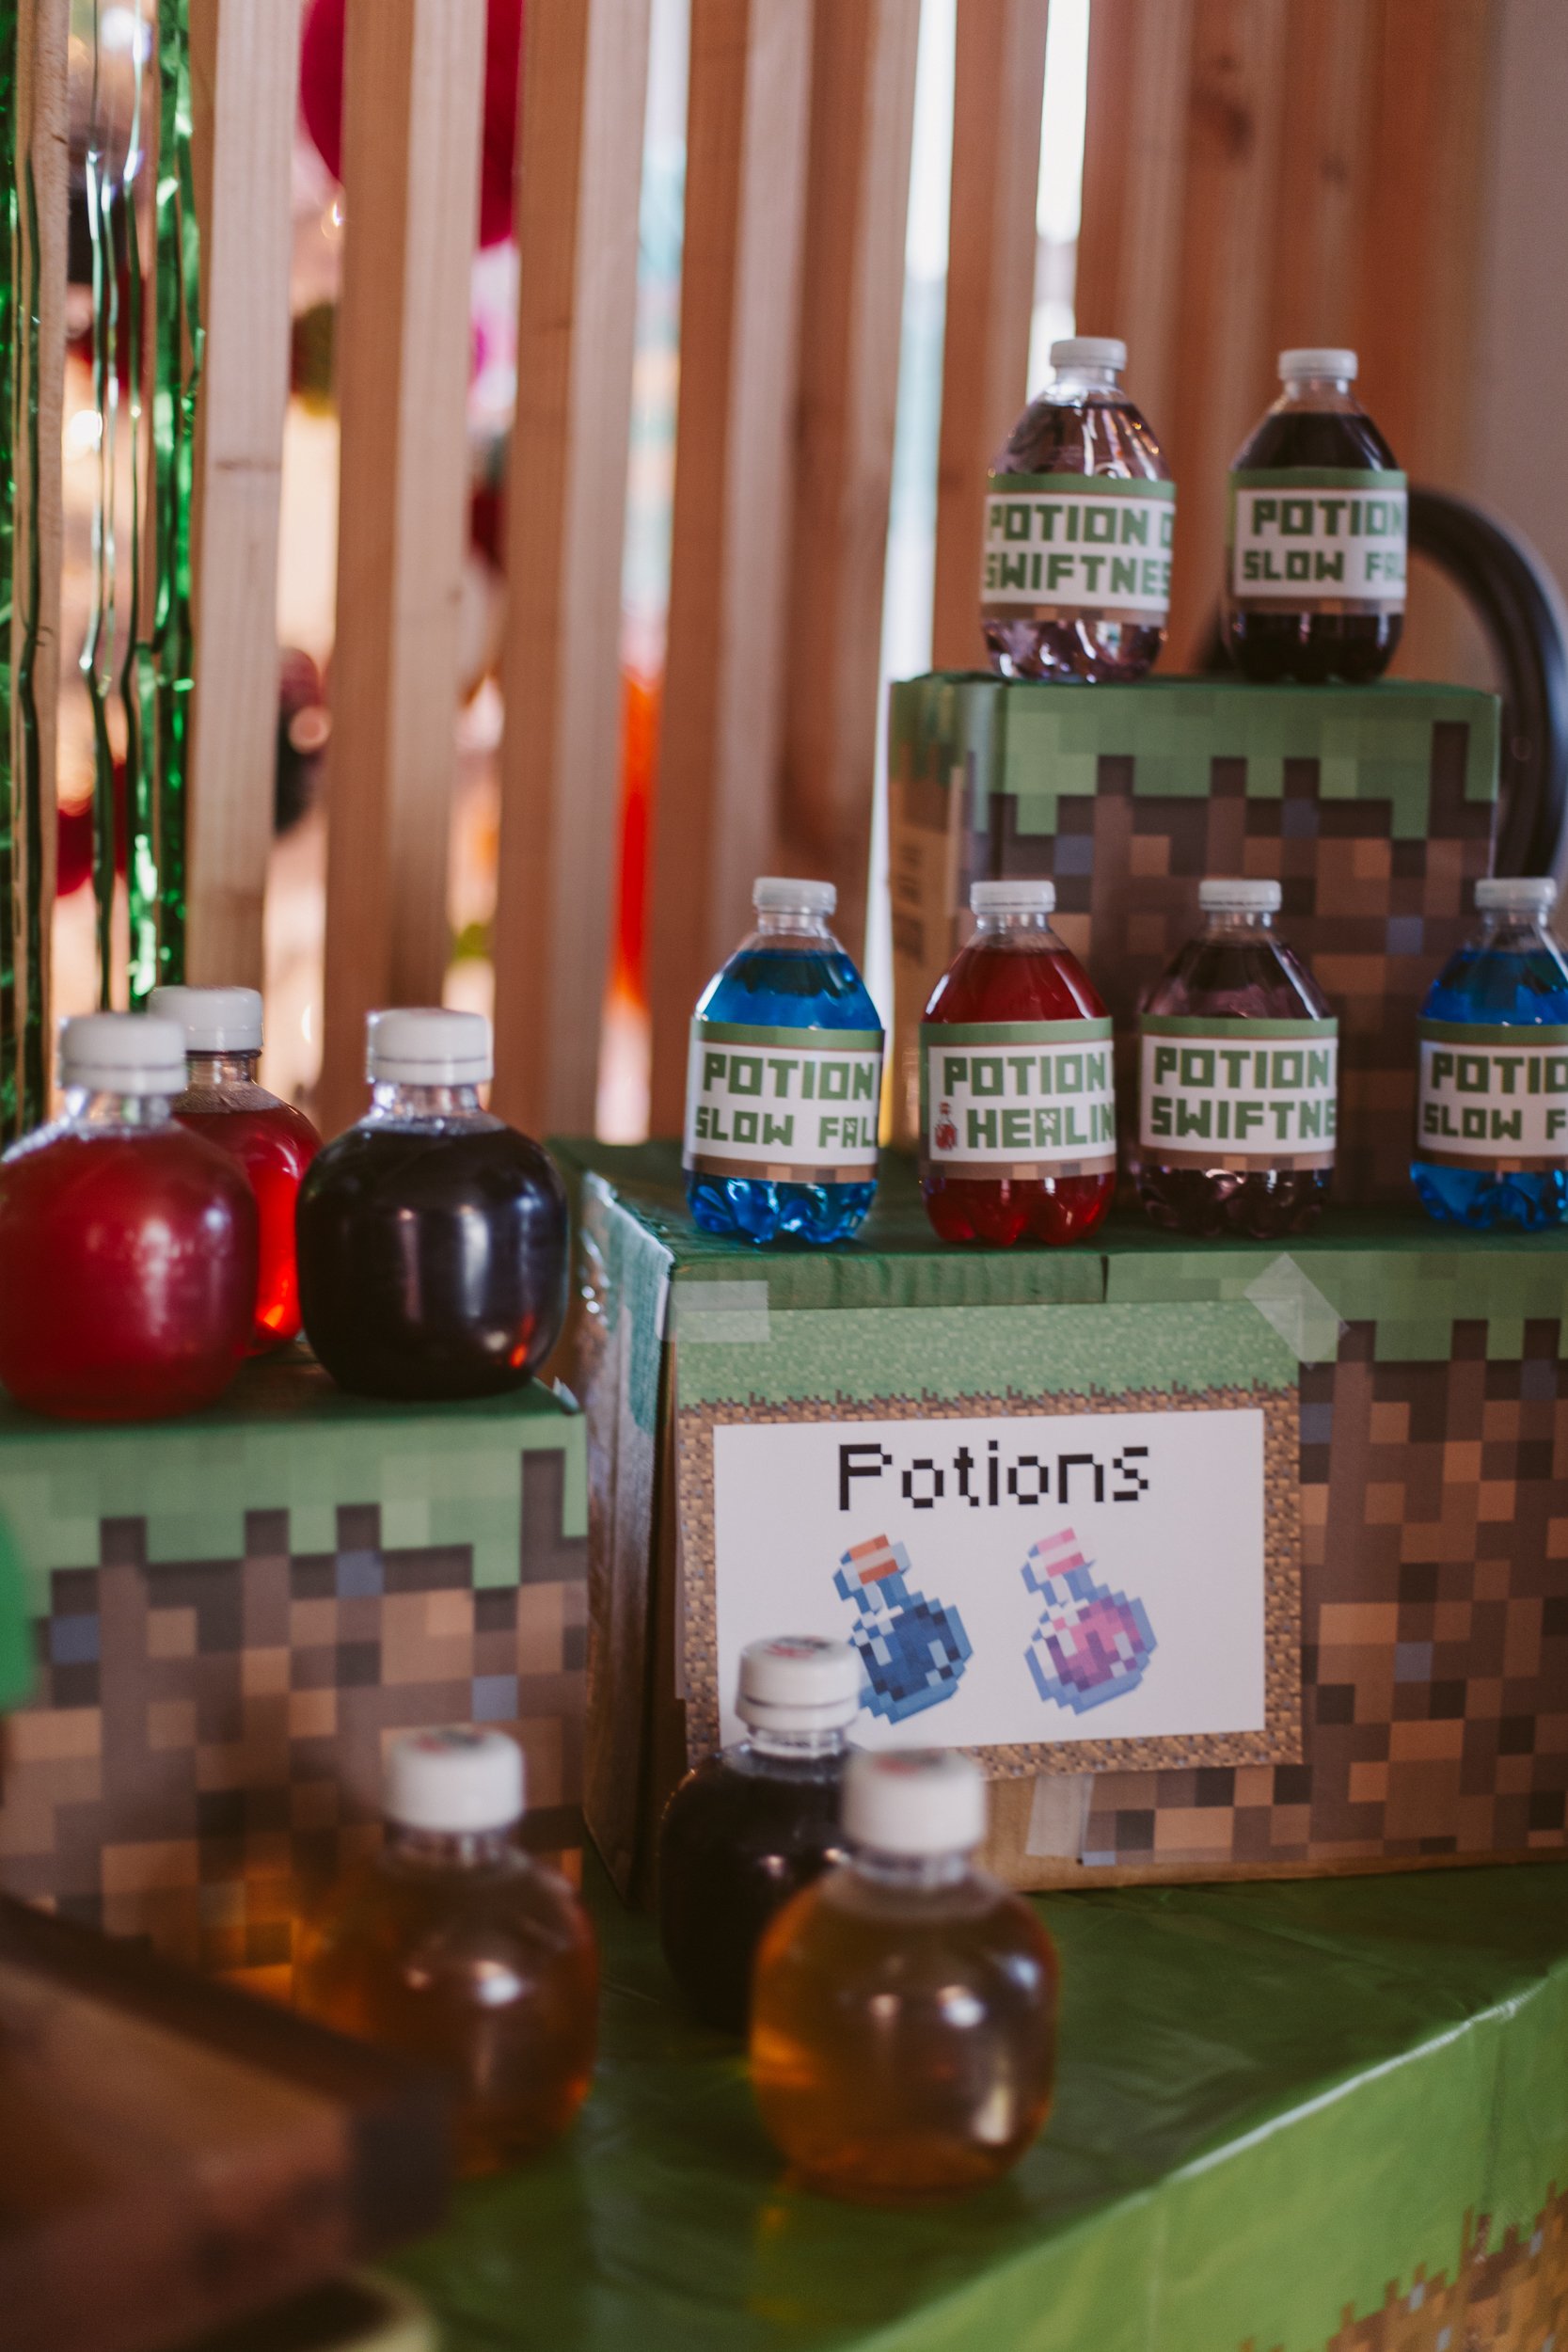
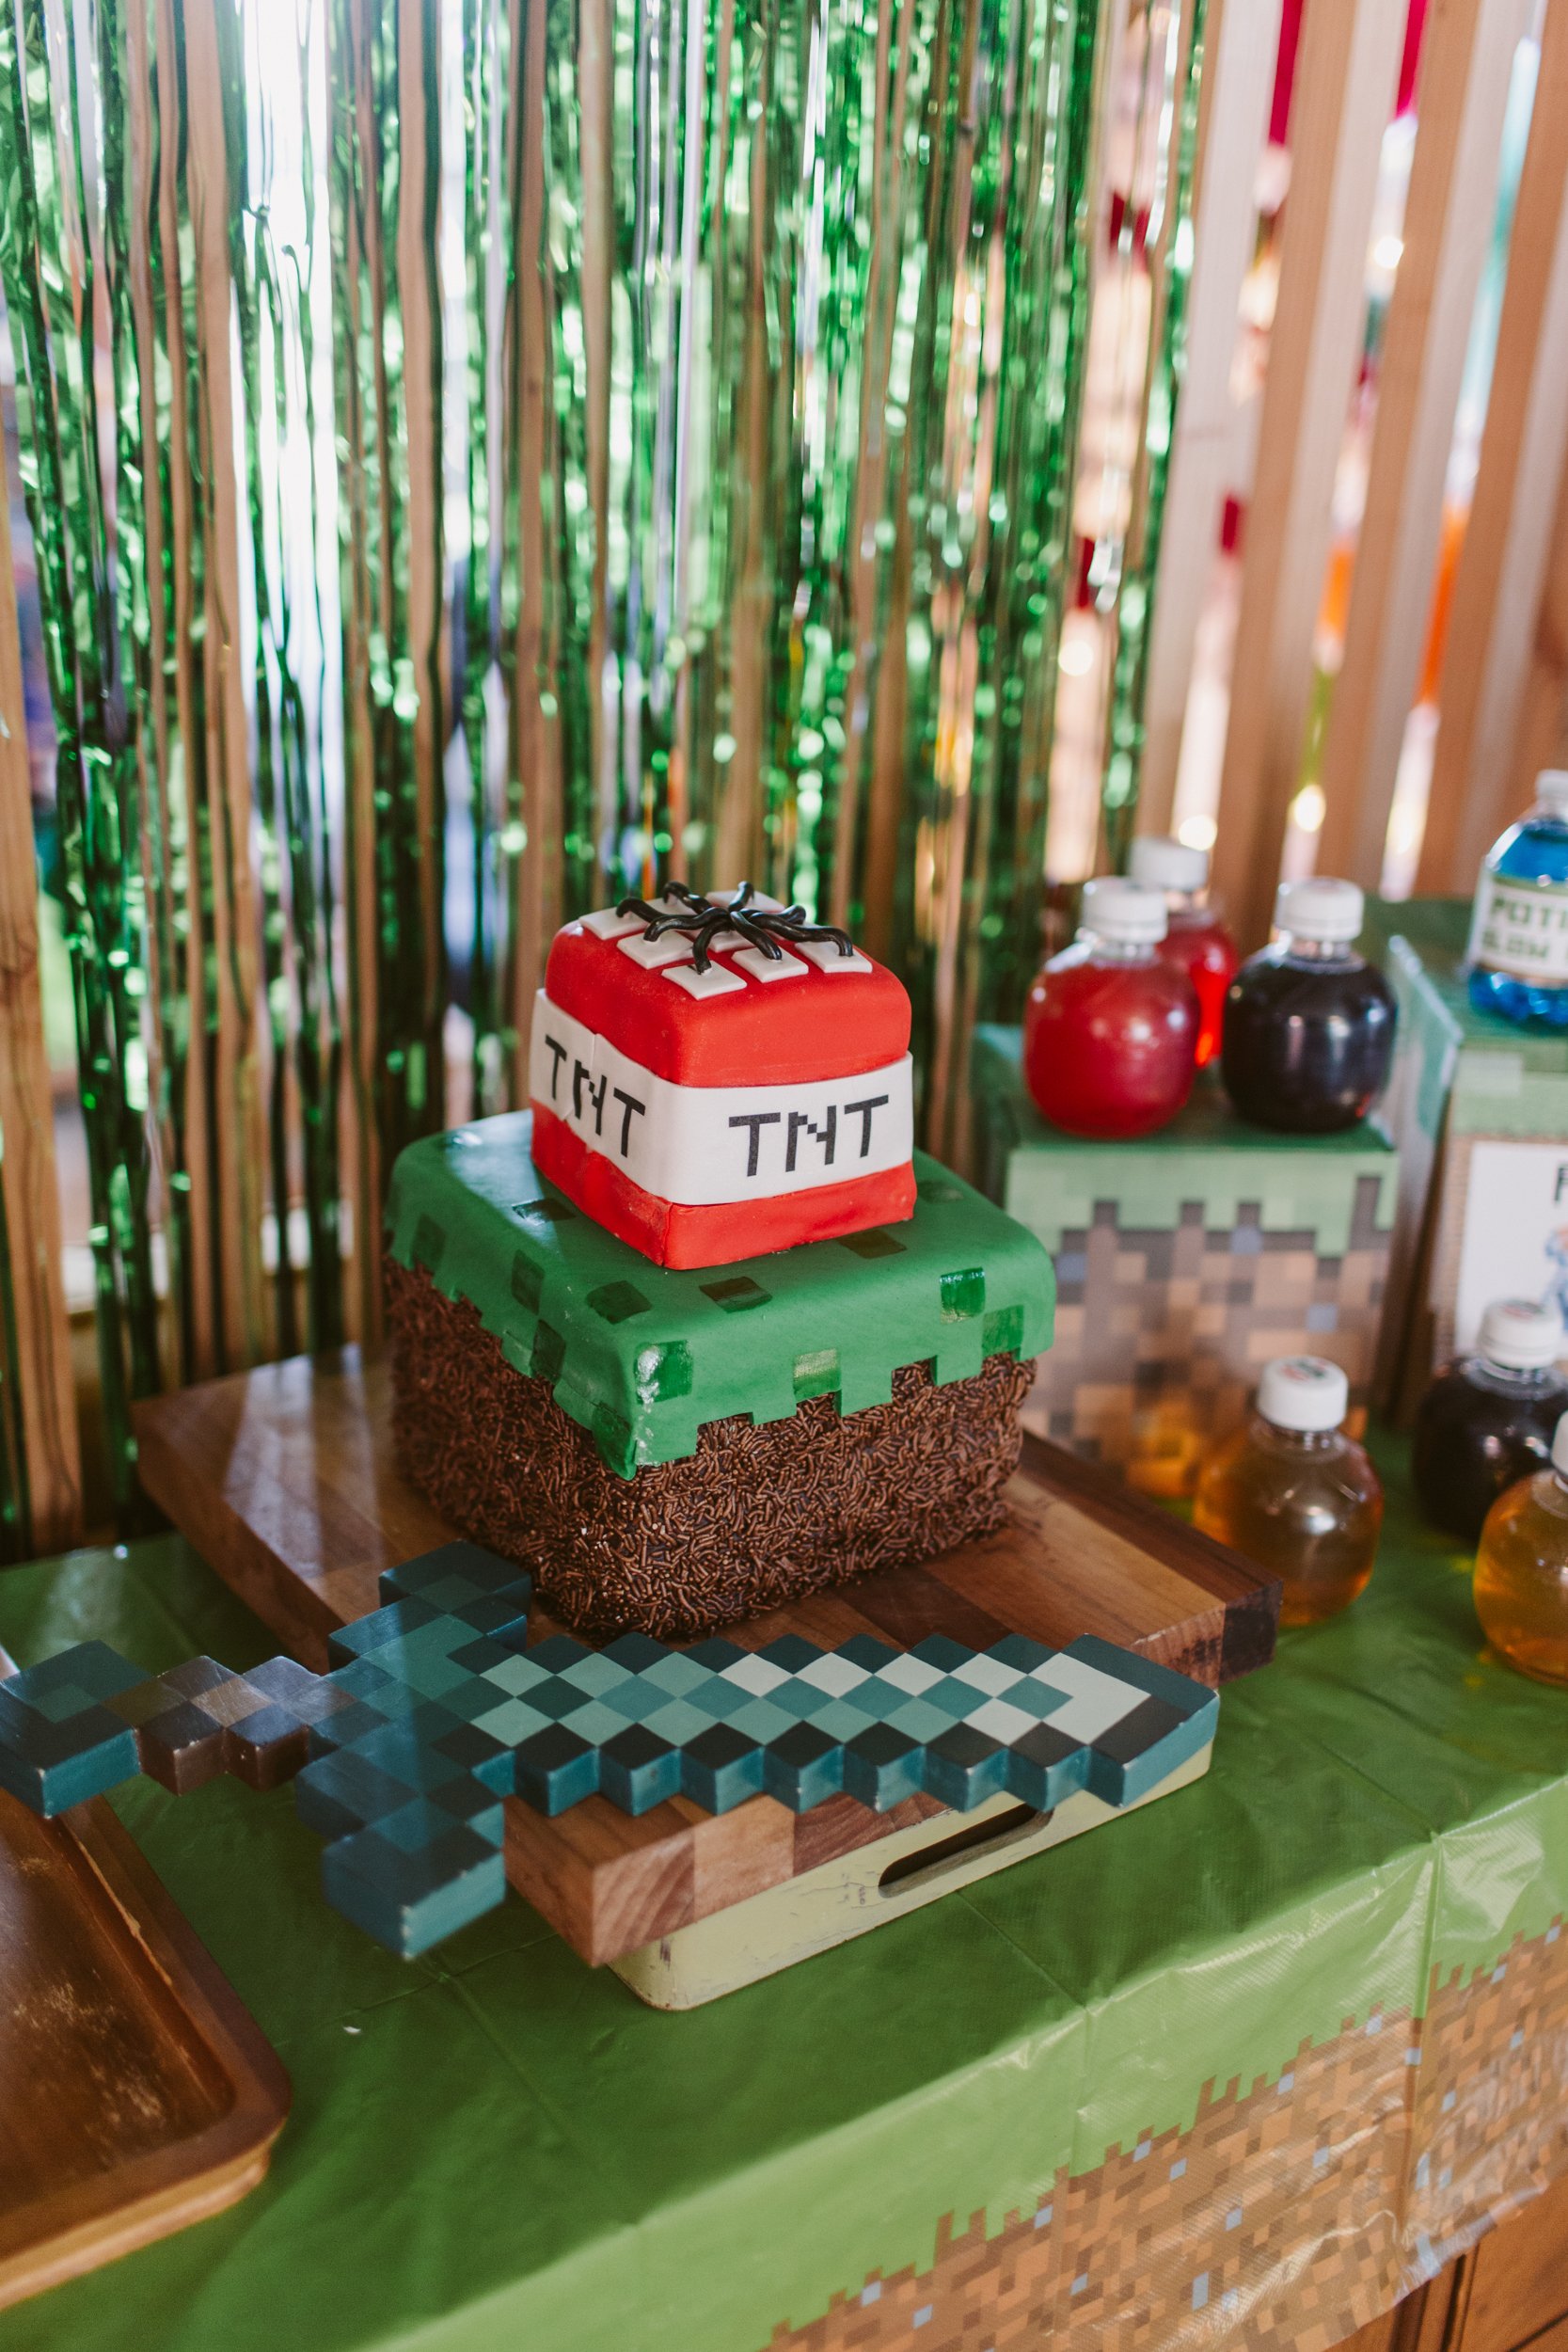
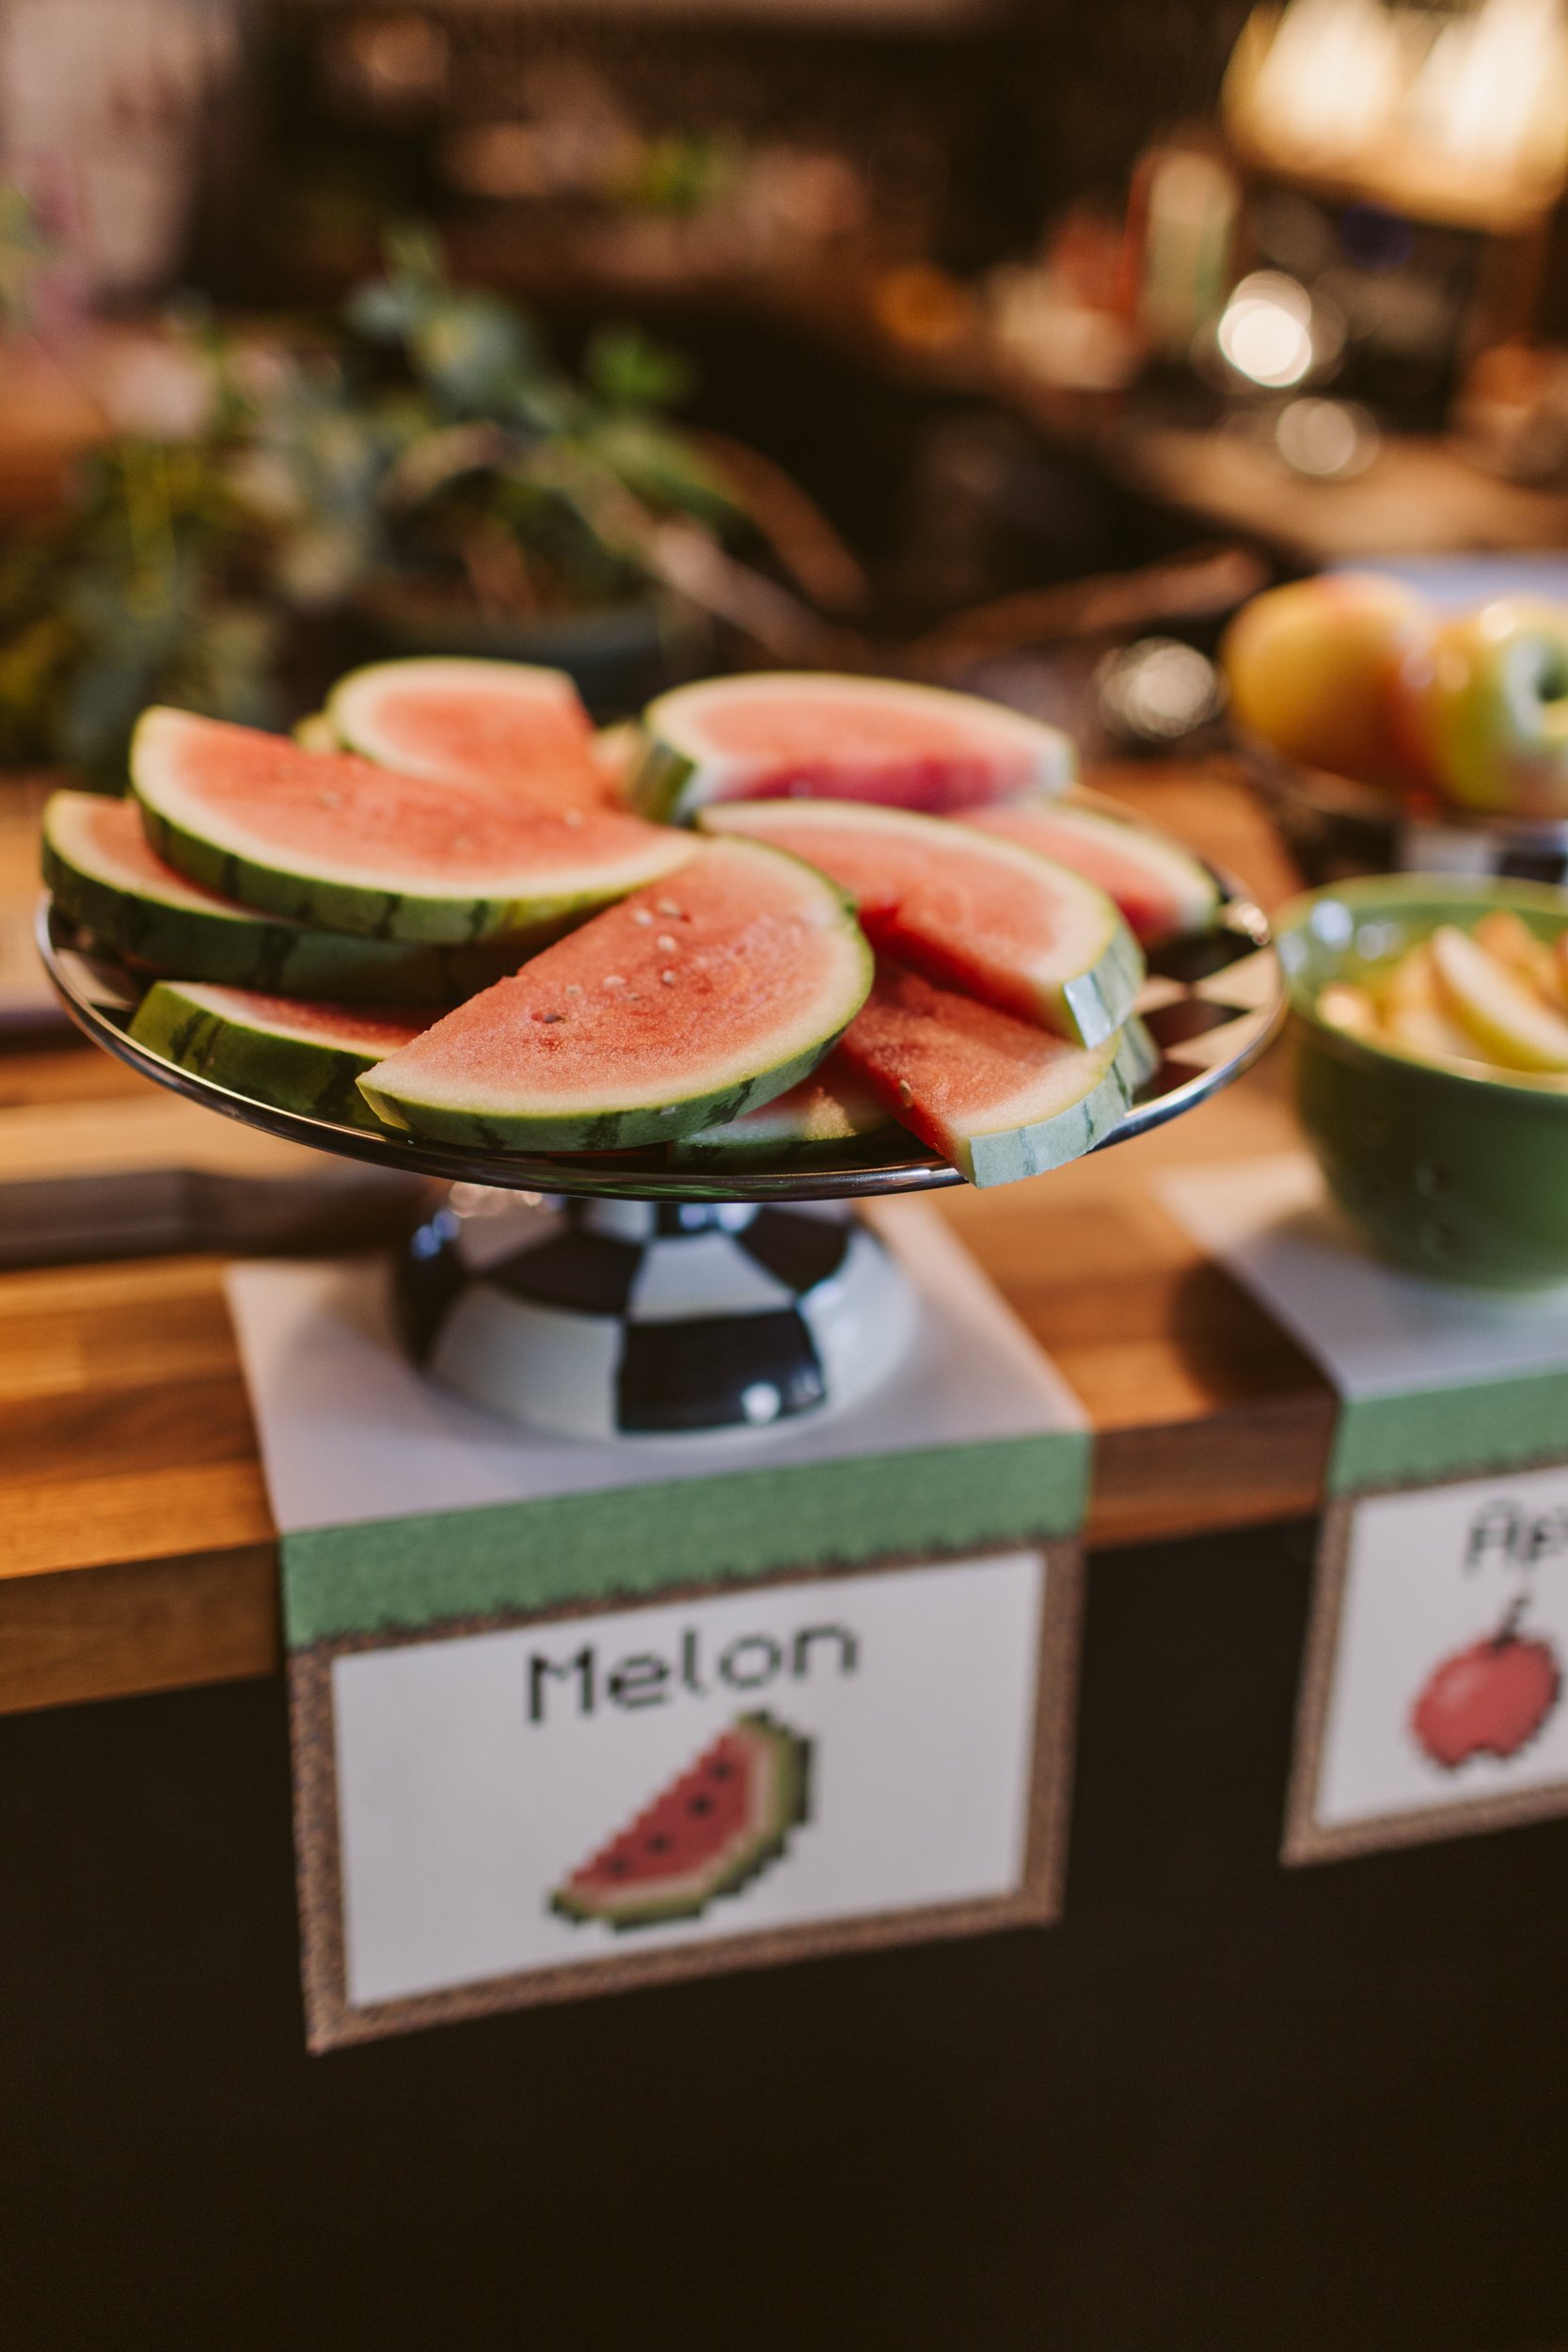
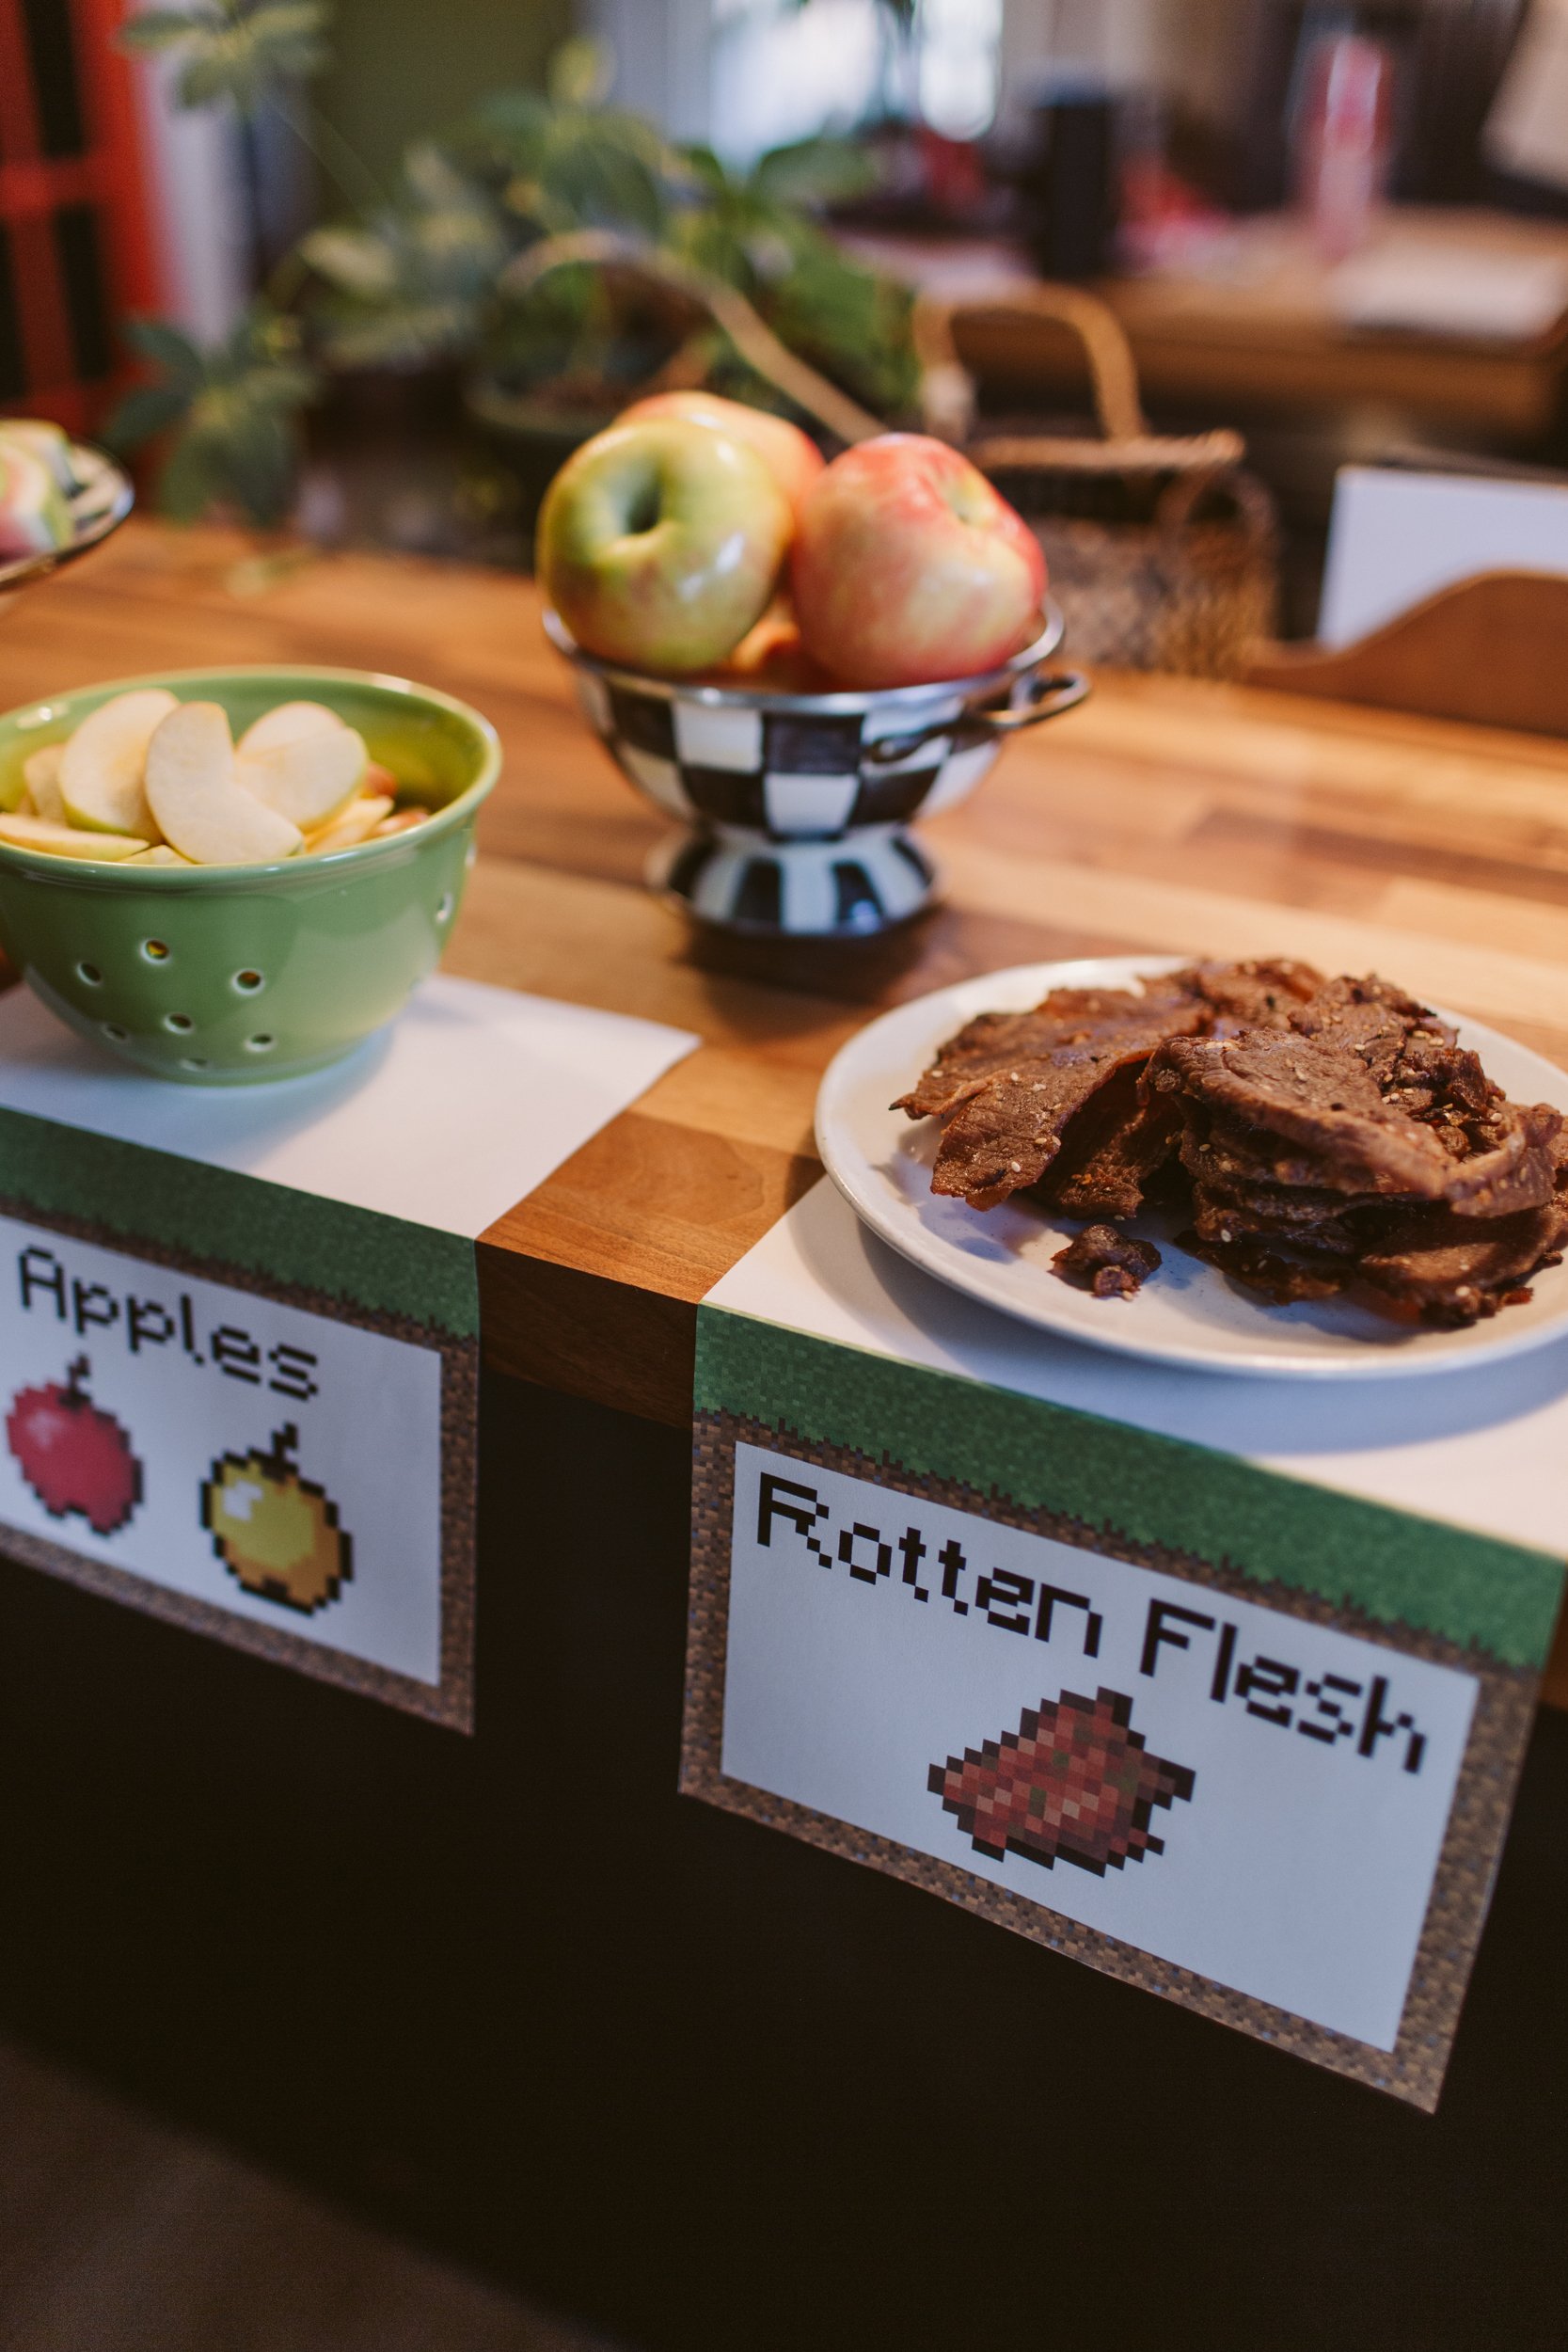
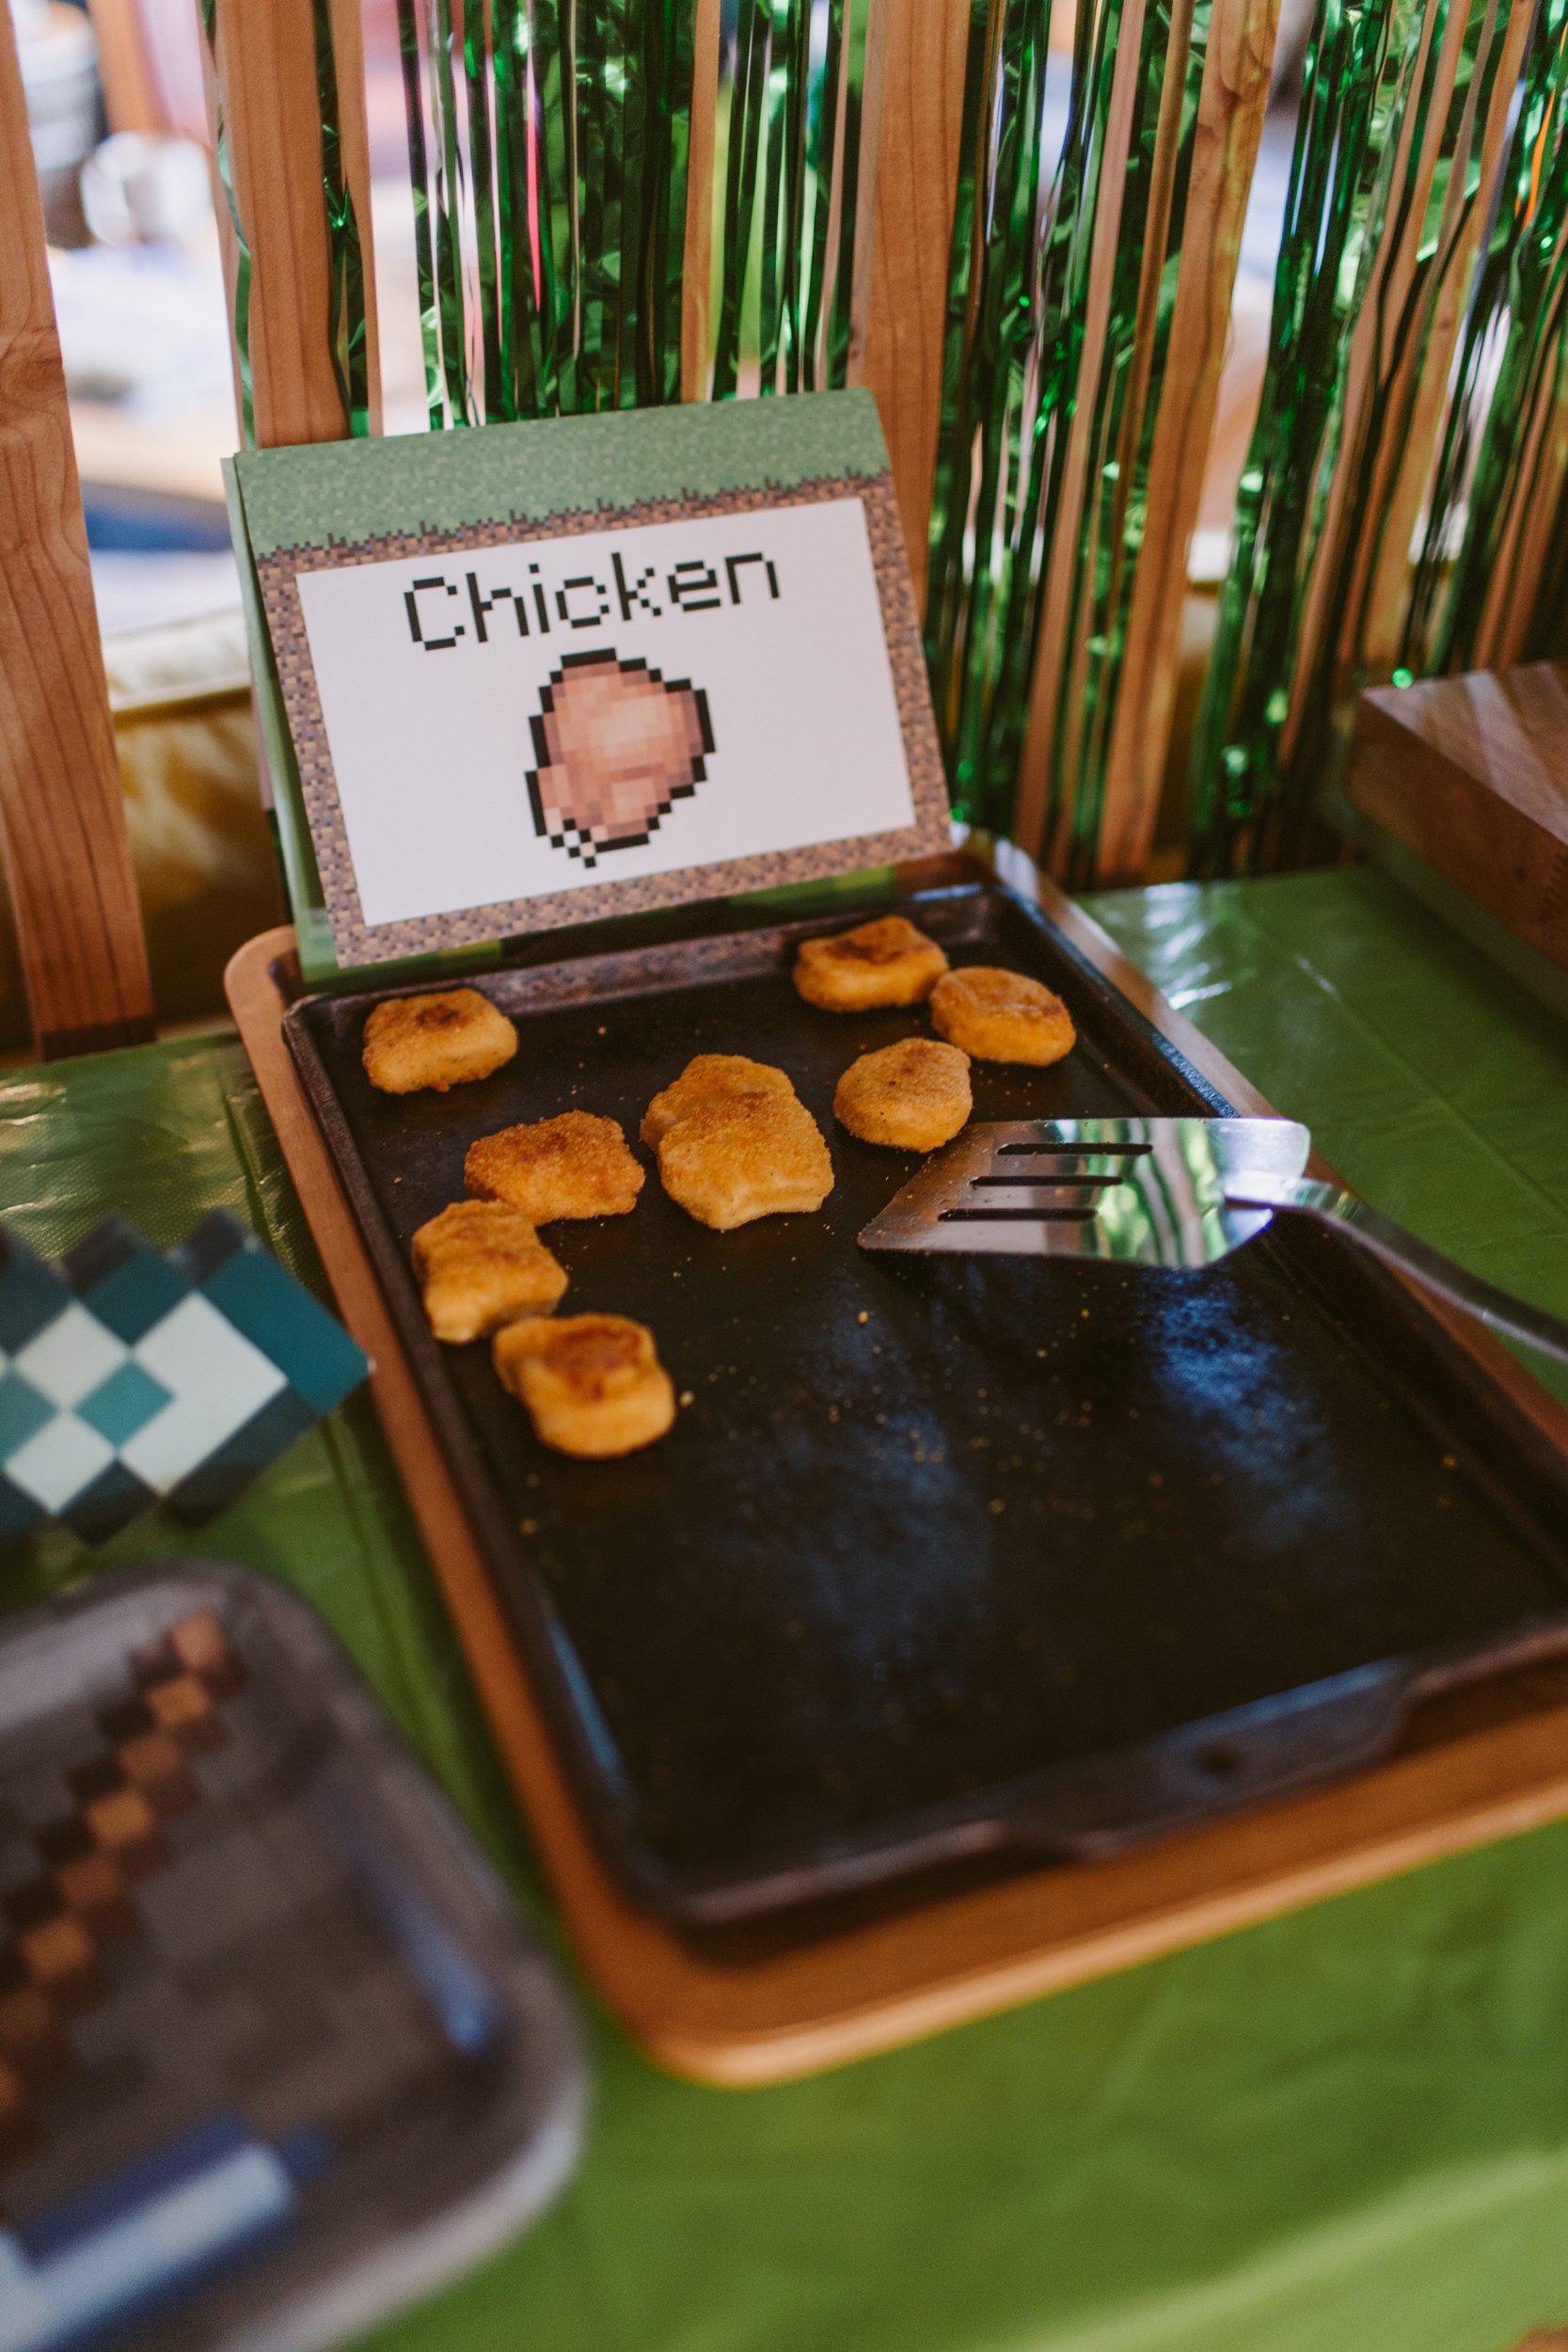
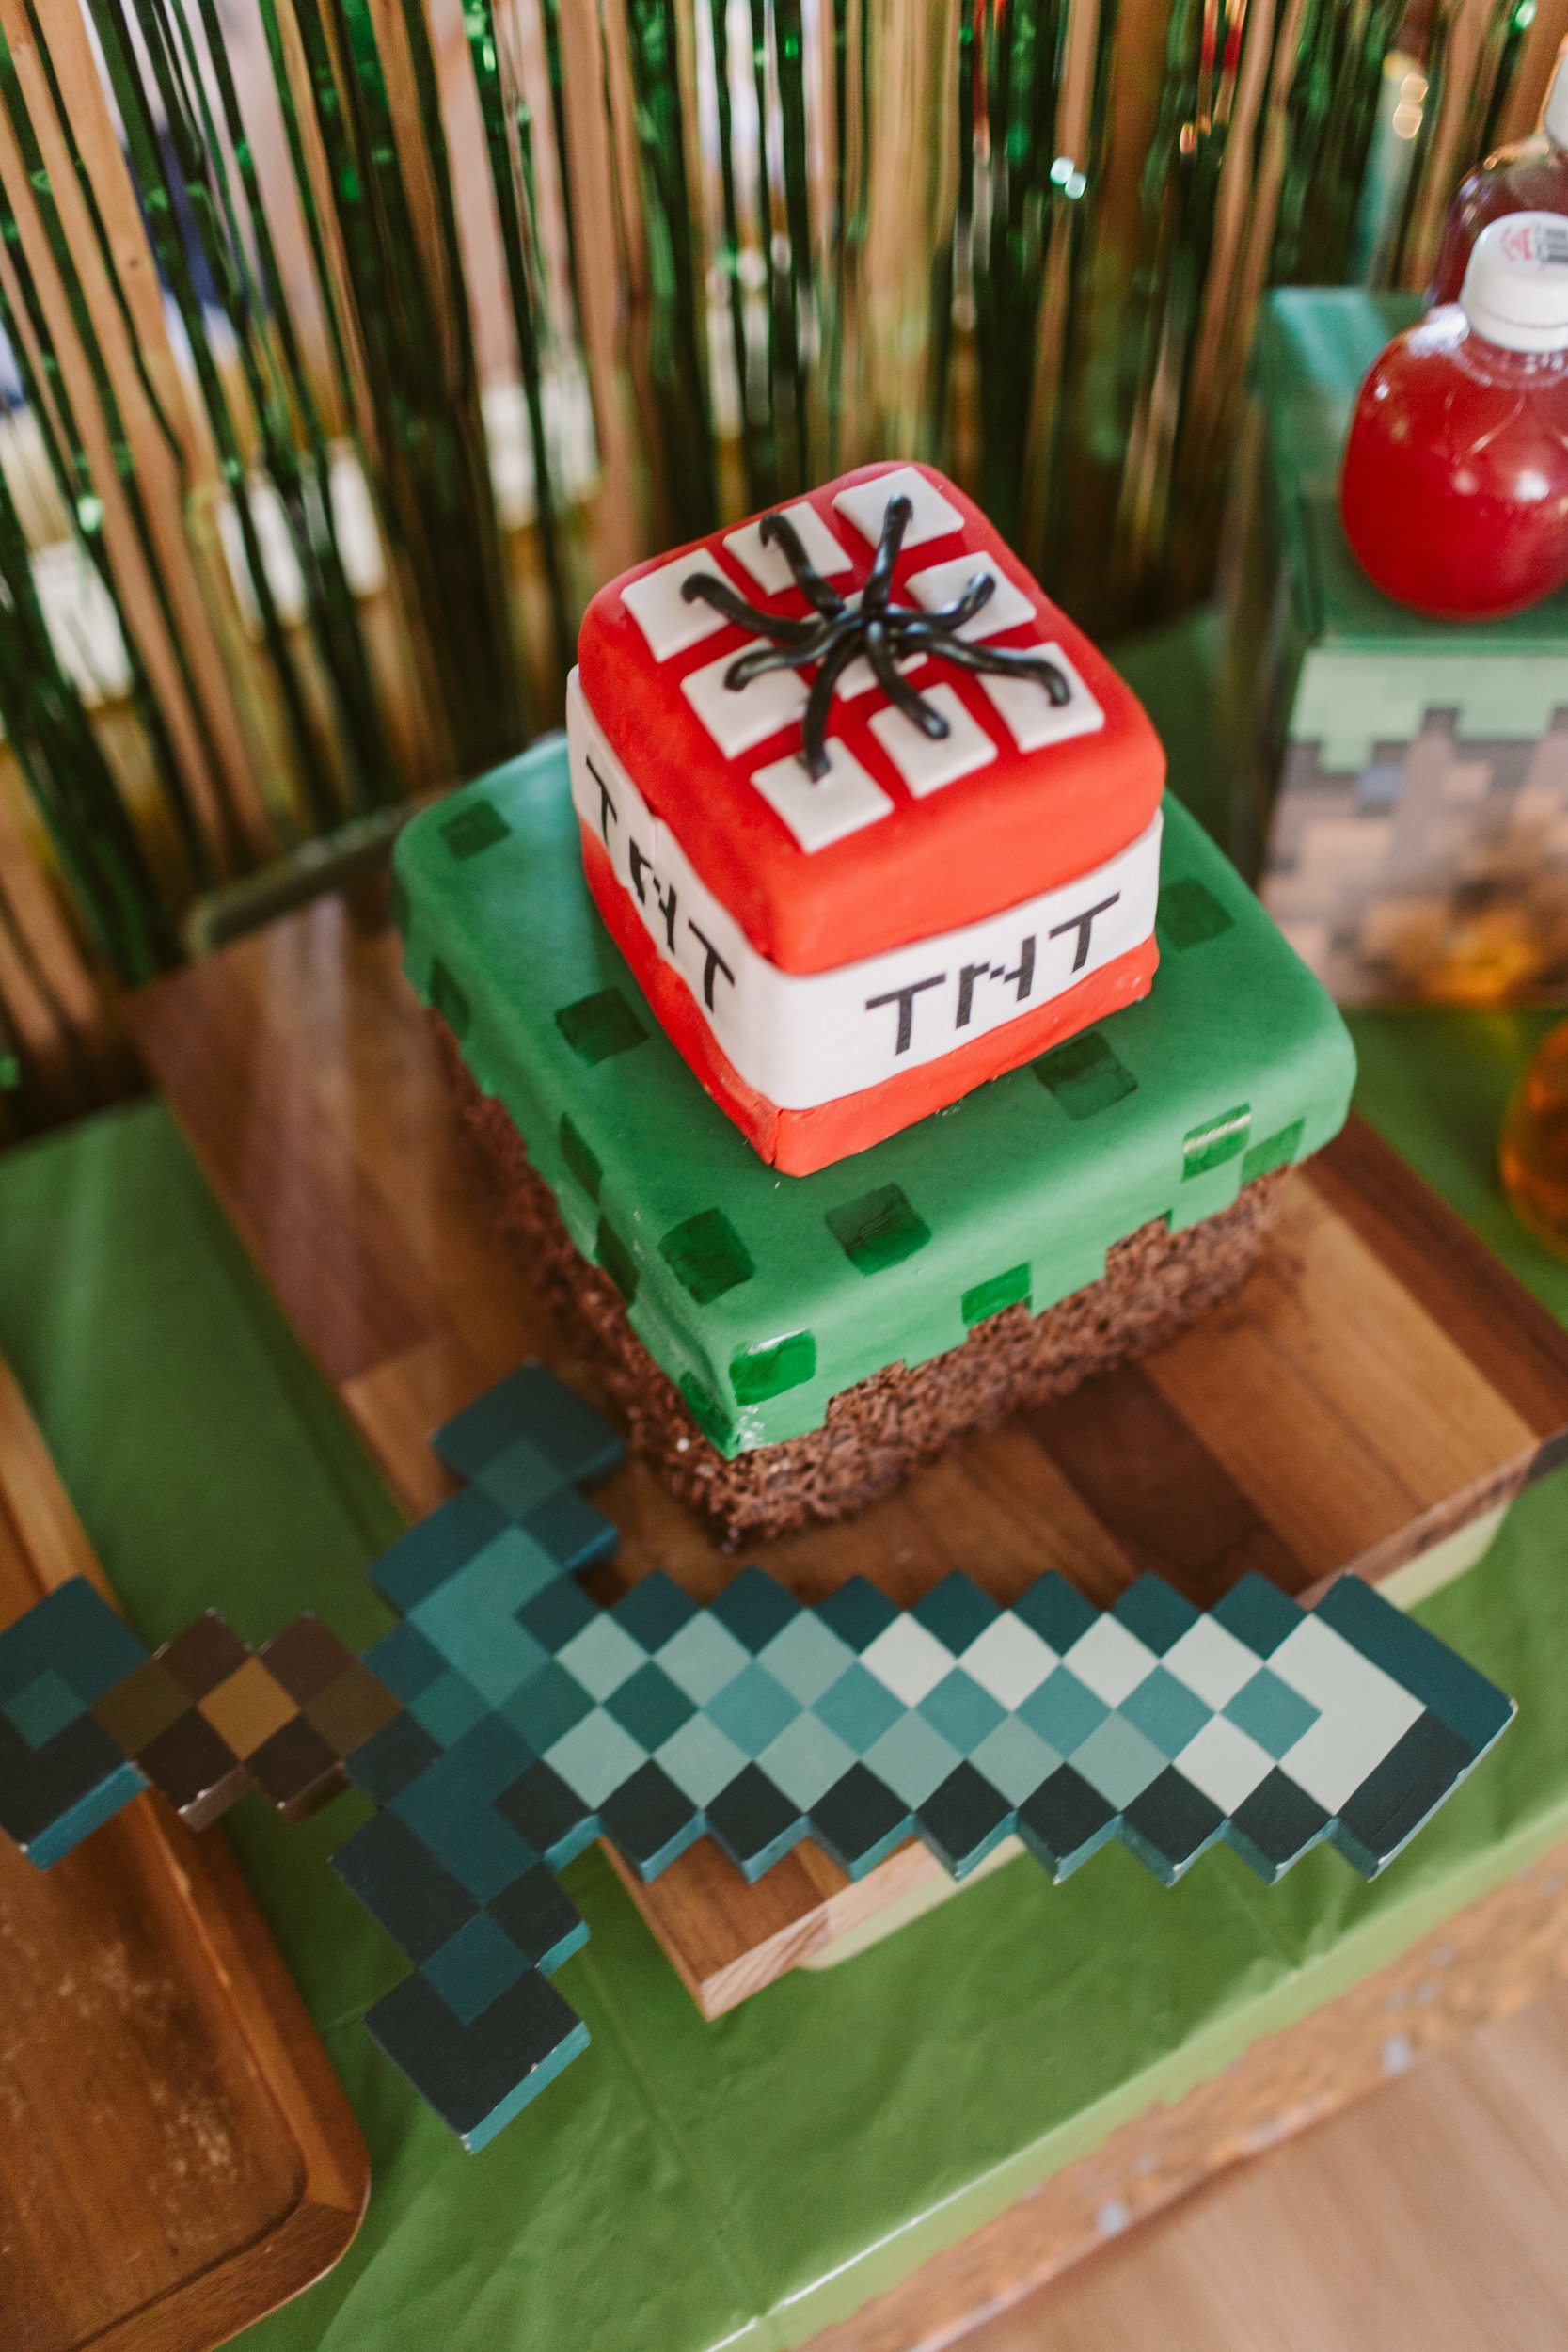
One of the fun ideas I got from her blog was to incorporate the in-game food as the party food. So we had melon (watermelon), apples, carrots, sticks (chocolate pocky), chicken (chicken nuggets), rotten flesh (beef jerky), and potions (apple juice and koolaid). I usually do a pretty fancy cake and this year’s was one of the harder ones I’ve done, simply because fondant is way harder to apply to a square cake, but we made it work. I did a grass block for the base layer and did green fondant with green food coloring painted squares for the grass, and then brown sprinkles stuck to chocolate frosting for the dirt part. Then the top layer was all fondant frosting and I printed the TNT on paper, cut the letters out, and stuck them on with water.

We made Minecraft themed perler bead patterns as a craft, which is definitely a 7/8 year old and older activity, but it was super fun.

I have a feeling this obsession might continue far into the future so this might not be my last Minecraft birthday party, but it was for sure a fun one!

The Impact Driver Cocktail (and Mocktail!)

At the DIY Awards Bash this year we’ll be serving up a signature cocktail to our attendees, but if you’re tuning in at home and unable to be at the event IRL, you can still treat yourself to the same bev, and we even have a non-alcoholic version as well!

Since this is the DIY Awards signature cocktail, going with a screwdriver was an obvious choice, but TBH I think a screwdriver is a somewhat gross cocktail. So instead, I decided to come up with something with a bit more kick to it, while still maintaining its OJ and Vodka roots. We punched things up by adding some ginger and pumped up the orange with Cointreau.

Because not all of you are drinkers, I put together a mocktail version too, which gives you that orange and ginger flavor with none of the alcohol!

Peep the videos below for the tutorial!

Impact Driver Cocktail

What you’ll need (makes 2 drinks):

1.5 Tbsp Fresh Ginger - chopped
2 oz Simple Syrup
2 oz Vodka
2 oz Cointreau or Triple Sec
3 oz fresh squeeze Orange Juice
1 egg white (optional)
Cocktail shaker
Muddler
Ice
Candied Ginger
Orange Slice
Skewer
Coupe glass

1/ Muddle the fresh ginger in the bottom of the cocktail shaker

2/ Add your simple syrup, vodka, Cointreau, Orange Juice, and egg white. Add ice and shake!

3/ Divide equally between two coupe glasses

4/ Garnish with a skewered orange slice and candied ginger

Impact Driver Mocktail

What you’ll need (makes 1 drink):

1 oz Orgeat Syrup
1 oz Lime Juice
1 oz fresh squeeze Orange Juice
Ginger Beer
Big Ice
Lowball glass

1/ Rub the rim of your glass with an orange slice, then dip it in cane sugar for the sugar rim

2/ Add the big ice to the glass (a few cubes of regular ice work too!). Pour in your orange and lime juice as well as the Orgeat Syrup. Give it a spin to mix.

3/ Top with Ginger beer (we used 1/2 bottle of Cock + Bull Ginger Beer for each drink)

4/ If you’d like, you can add the same skewer garnish as the cocktail version!

Enjoy!

Halloween Party Time!

In early October Jack begged me to have a halloween party and being one who loves putting a party together I said “of course!” and then as October 31st approached I was like ehhhhhhhhh. And then a couple days before Halloween my friends were like, “hey, didn’t you say you were having a Halloween party? We were planning on coming!” and so then I pulled a party together in two days.

A few of these snack ideas I’d had pinned for close to a decade, so it was fun to finally make them! I have appx 20 ghost bananas leftover so I think banana bread and banana smoothies are in my future, lol. I still can’t get over how cute the tangerine/celery pumpkins are. I think pretty much all of these snacks are over on my Autumn Pinterest board so if you want those details head over there!

DIY Coffin Charcuterie board

I was perusing halloween decor at Target and spotted a coffin shaped charcuterie board and immediately got the bug to make one for myself. Could I have bought it at target? Sure, but why buy something for 25 bucks when you can spend a week making one with scrap wood you have in your garage?

I had some nice Birch plywood leftover from a previous project sitting in my garage, so I started by cutting that into the shape of a coffin using my circular saw. The shape of a cofffin is just an elongated hexagon, and I sketched out one side of it till the shape felt right, then reflected that to the other side so that it was a symmetrical shape. The overall dimensions are shown below so you can replicate the exact measurements if you’d like. The size felt pretty ideal for a charcuterie board, but you could always make it smaller or bigger if you’re making your own!

Once It was cut out I gave it a quick sand, then finished it with edge banding. I wasn’t originally going to do this (I was planning to just paint the whole thing, but I need to test the edge banding out for another project, and it actually ended up making it look very nice and finished).

I then used my router to create little rounded channels as handles. I had planned on using some drawer pulls to make handles, but when I realized that the grain on one side made a very spooky looking face, I didn’t want the handle to get in the way of the spooky face, so I ended up using my router and a round bit to create the groove “handles”

I had planned on painting in black, but with the discovery of the face in the wood grain I pivoted and instead stained that side ebony so the spooky face remained. I painted the underside black, that way I could have it black or stained- best of both worlds. Since this isn’t something like a bowl, or something that knives will be used on, I finished it with Lacquer. Based on what I could find online, for this application that sounded like a fine food-safe finish once it’s dried and cured. (it’s also what I had on hand). But if you’re concerned about food safety, do you own research on what feels like the safest finish for you.

Once it was all dry and finished, it was time to load her up with tasty things! This is, of course, up to your own taste. You can make it a sweet-things board, a savory things board, whatever the heck you fancy. Since it’s a coffin shape, I made a simple skeleton shape out of the food (though I’ve see this done with a little plastic skeleton surrounded by the food, which is also super cute).

I filled my charcuterie board with:

Brie (cut into the shape of a skull)
Goat Cheese (sliced into a “spine”)
Candied Mango slices
Pear Slices
Blueberries
Blackberries
Figs
Meringue Cookies
Yogurt covered pretzels
Crackers
Pistachios
Salami
Prociutto
Tiny White pumpkins

There you go! If you don’t feel like tackling the DIY project, but still want to do a charcuterie board like this, there are a bunch of fun coffin-shaped boards out there like these ones on Etsy, or these ones on Amazon.

8 Favorite Summer Recipes

Summer is all about backyard barbecues and fresh fruits, and summer recipes are some of my favorites.  With fall approaching I'm sure I'll start to crave baked things and soups again, but I'm still craving the fresh tastes of summer cuisine.   

I've been wanting to try some new summer inspired recipes lately, but here are some of my favorite recipes from the past perfect for the sunny, long days of summer!

above: Taco Salad with Cilantro Lime Cauliflower Rice