


When we were trying to decide what to do with our counters for our kitchen renovation, we knew we didn't want to spend a ton of money. First, we live in basically a little mother-in-law apartment above the garage of my parent's house, so it's not a fancy joint or anything. We didn't want to put real marble in or anything, and even faux marble was pretty spendy, so we figured we'd try painting the existing formica countertops and if it turned out awful, then we'd rip them out and just shell out for new, faux marble formica counters. After stalking Pinterest for a bit and looking at various countertop painting DIYs I decided on using Giani's Faux Granite DIY countertop paint in White Diamond to create a faux marble look.
The kit comes with a black primer, a pearl mica paint, two cans of white limestone paint, a metallic gold paint which I didn't use, and a clear top coat. I would recommend buying two extra white limestone cans if you're going to use the kit to make a white marble look. I didn't and I ended up just using some regular paint to finish it off (I had a time crunch and couldn't wait for more white limestone to ship) and it worked fine I think, but I wouldn't recommend doing that. The paint in the kit is more of an enamel type paint (I had a really hard time getting it off my fingernails, whereas the regular paint scrubbed right off), so I think it probably hardens and sticks better.
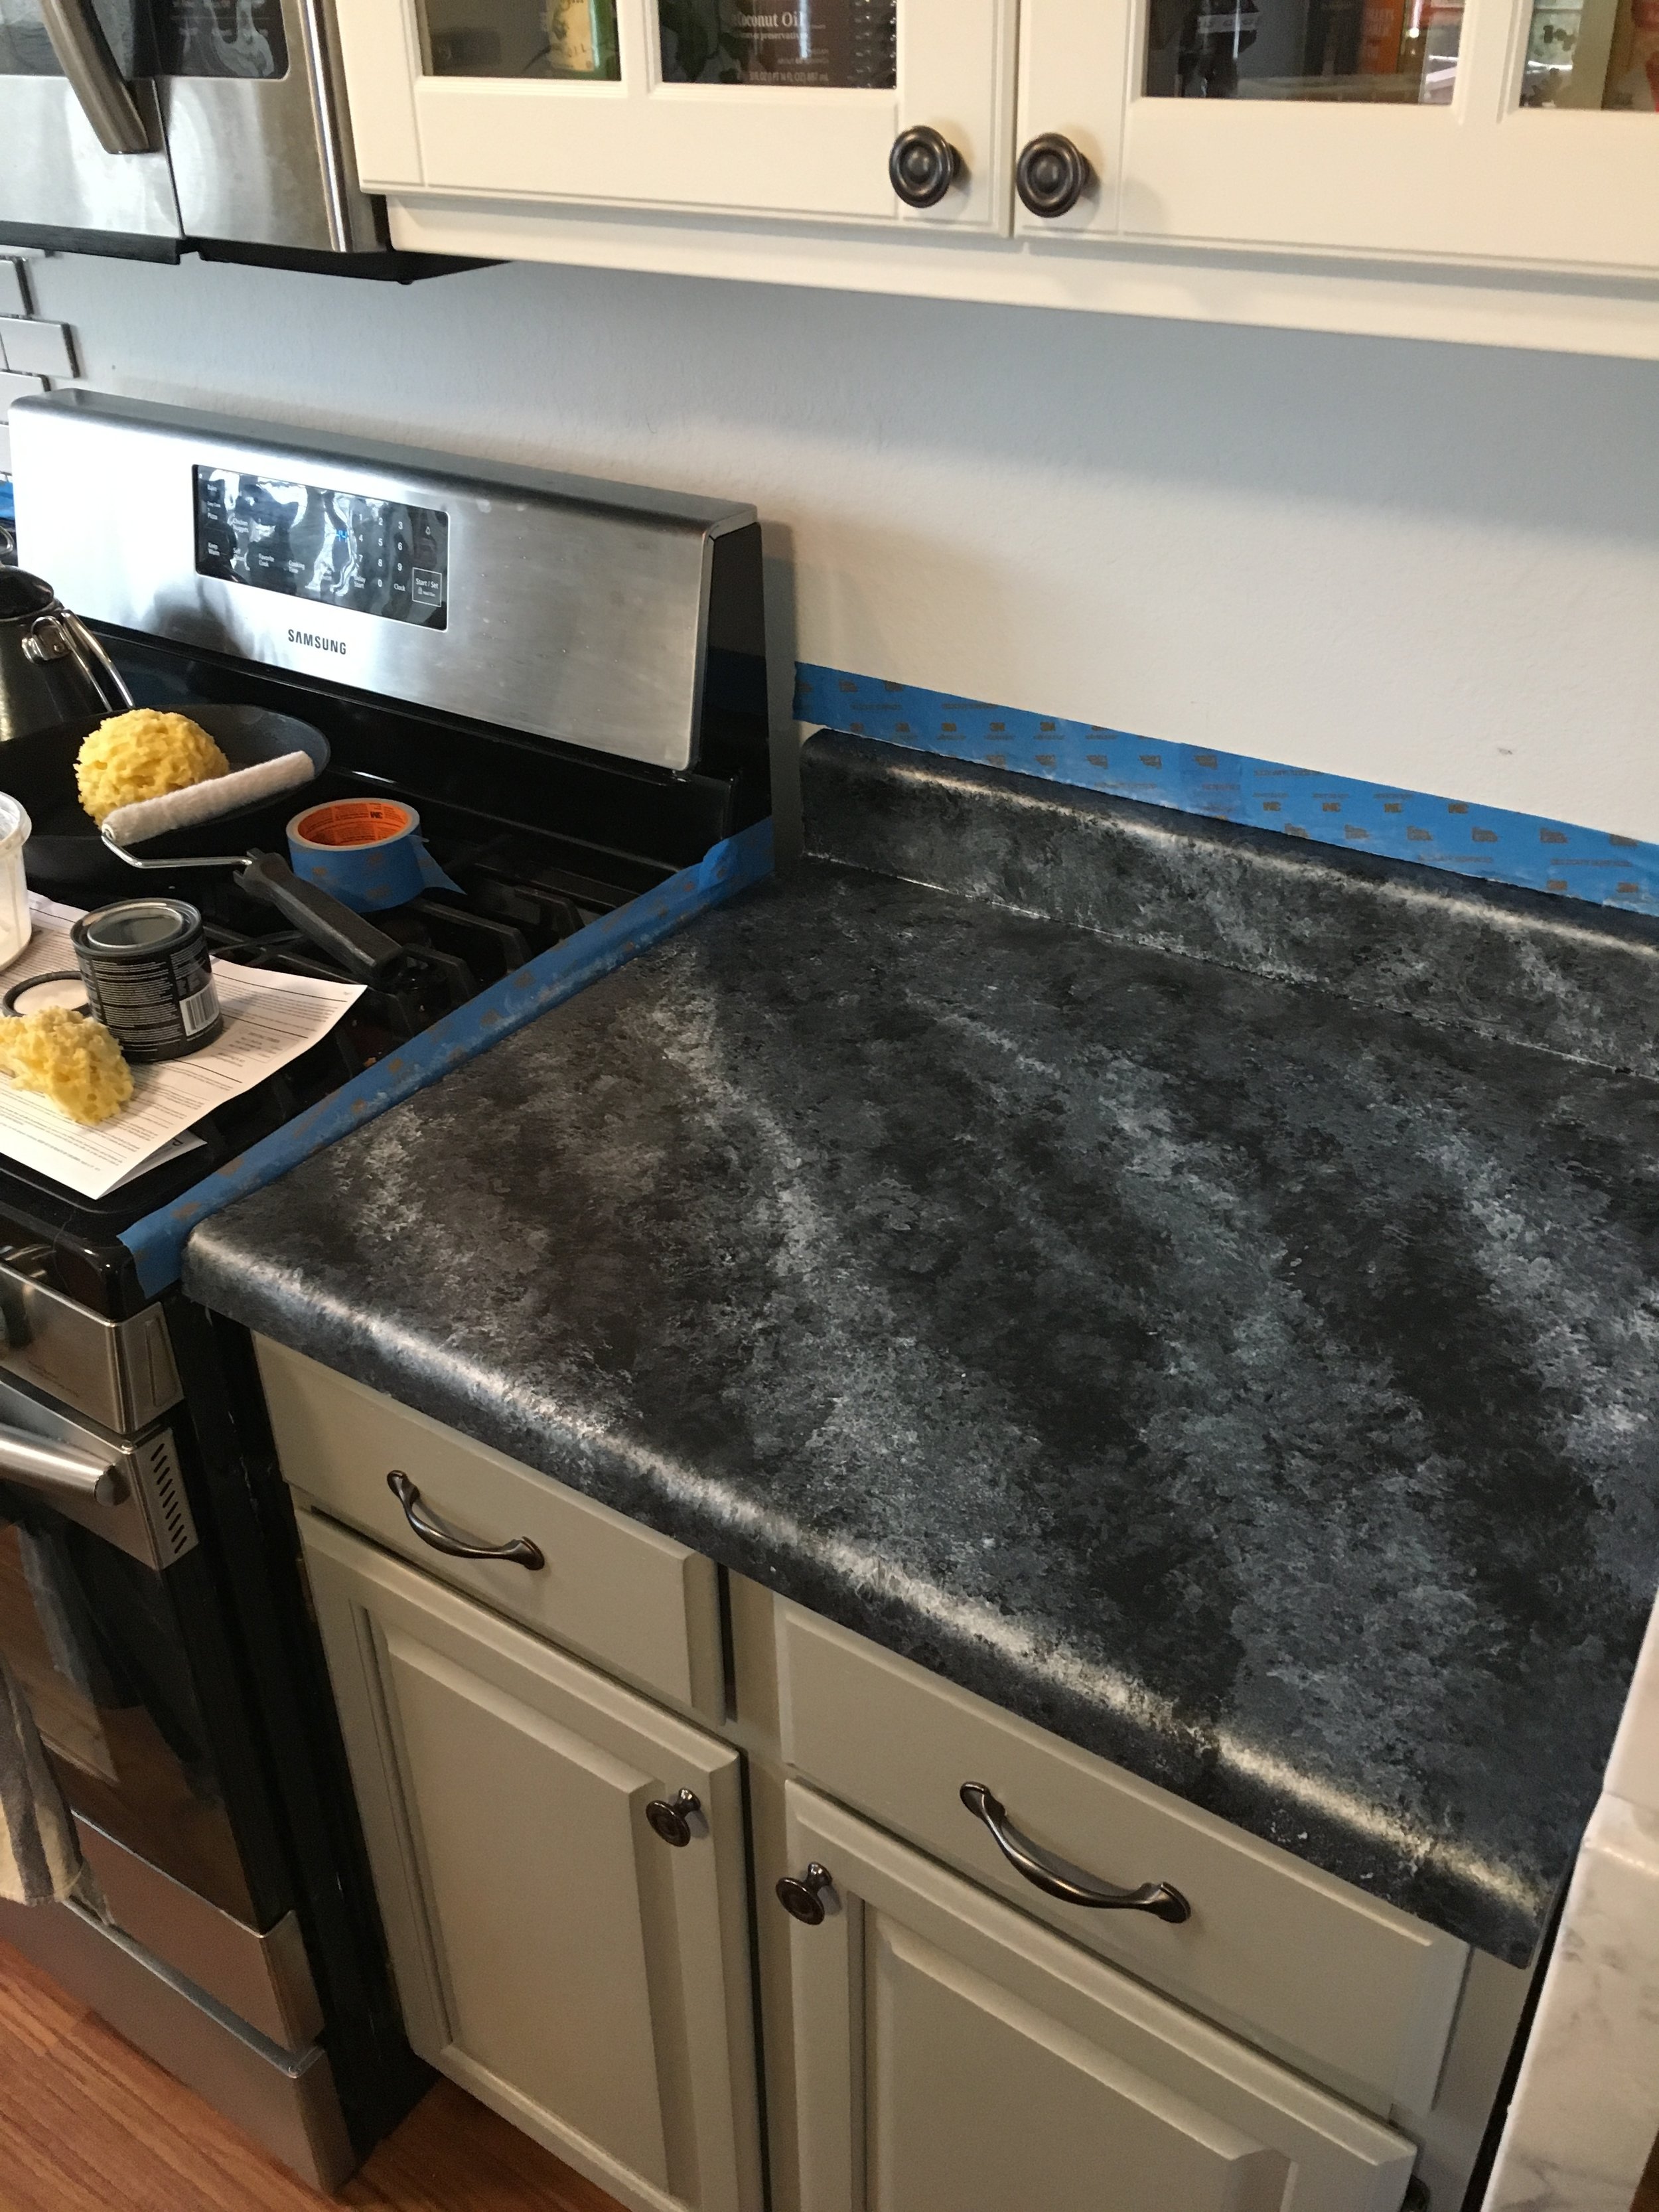
You start by rolling the black primer on to a very well cleaned counter. My counter had a little bit of texture to it so I didn't really sand the existing counters first, but if your counter is super shiny and slick, it'd be a good idea to give it some texture with some sand paper before putting down the primer. I just did one coat and then touched up a couple spots where it was a little thin.
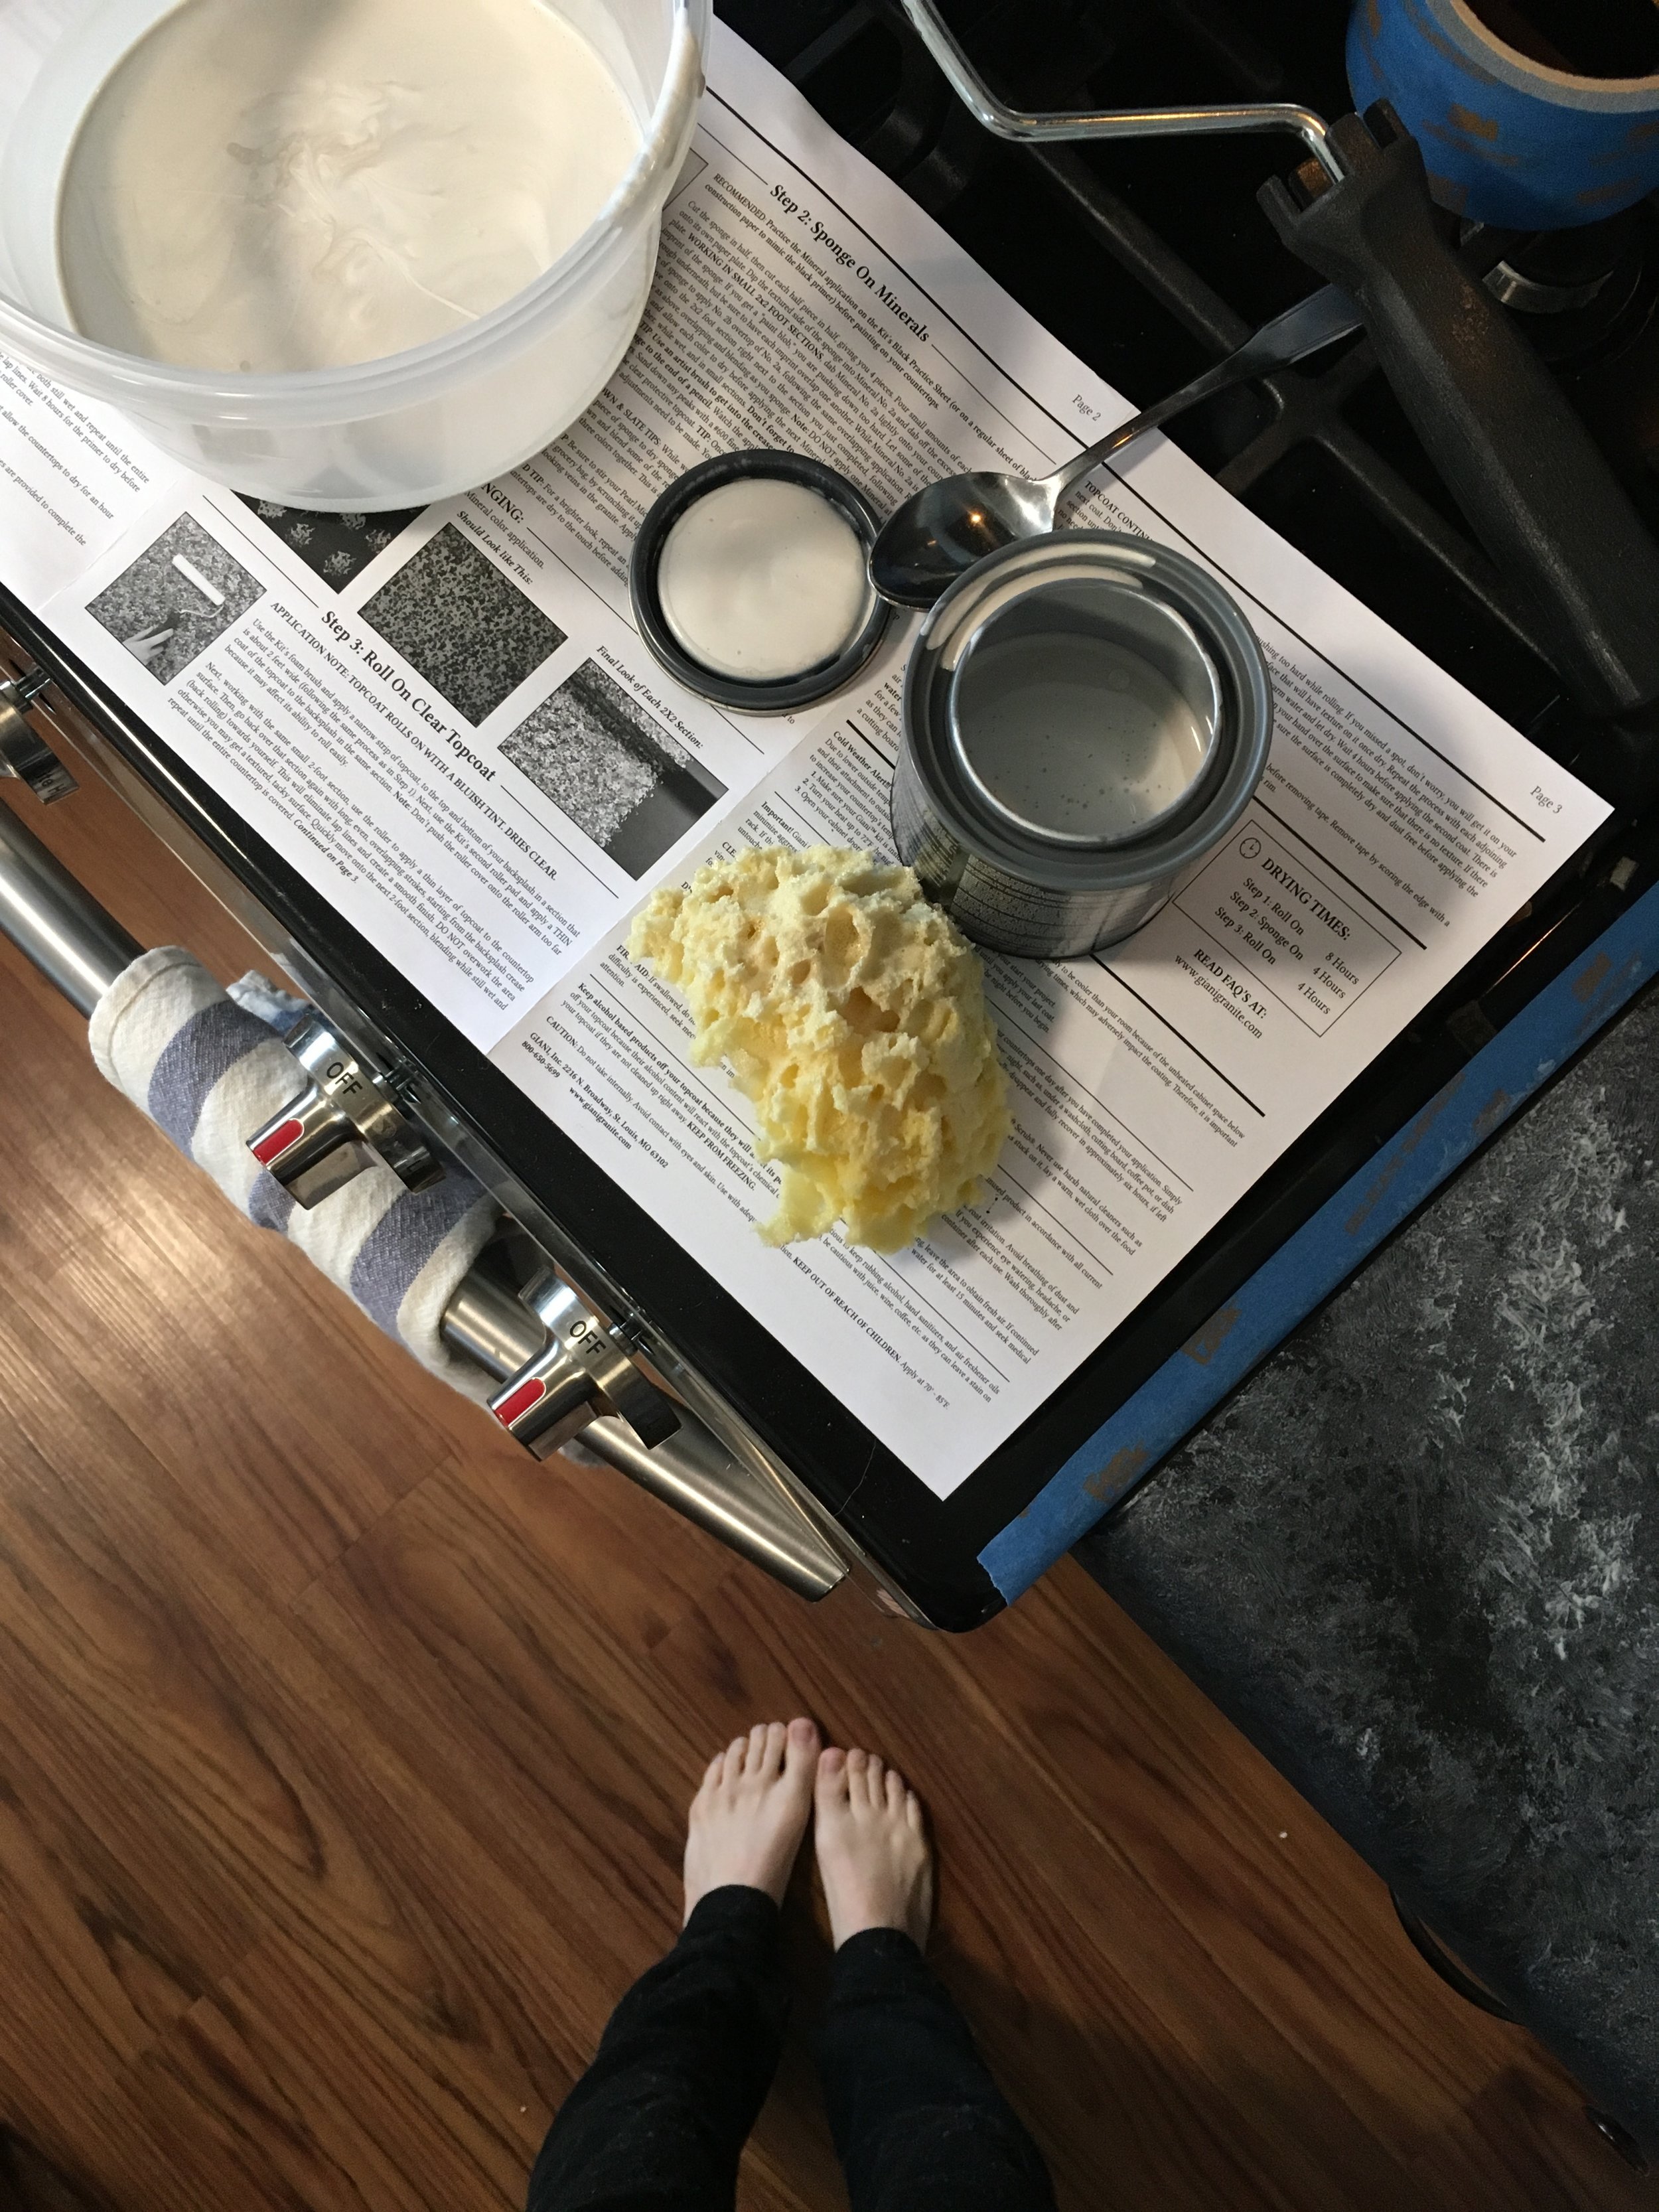

Next, you start layering on the paint. The kit comes with a sponge you can cut into pieces to sponge on the paint. I started with the pearl mica. I started creating the flow of my veining from the beginning, doing a kind of diagonal veining pattern. After the pearl mica I started the white limestone layers and then you basically do as many layers of the white limestone as you want to achieve the lightness of marble you want. I think I did about 4, maybe 5 layers. I sort of got lost in a haze of sponging and didn't keep track after like 3 layers.
To do the veining, mix a little of the black primer with the white limestone and use a small brush. Keep some white limestone handy with your sponge to go over top the veining if you don't like the vein you put in, and also to fade them a bit so they blend. I google searched for marble slabs and found one that I used as a reference for my veining look.
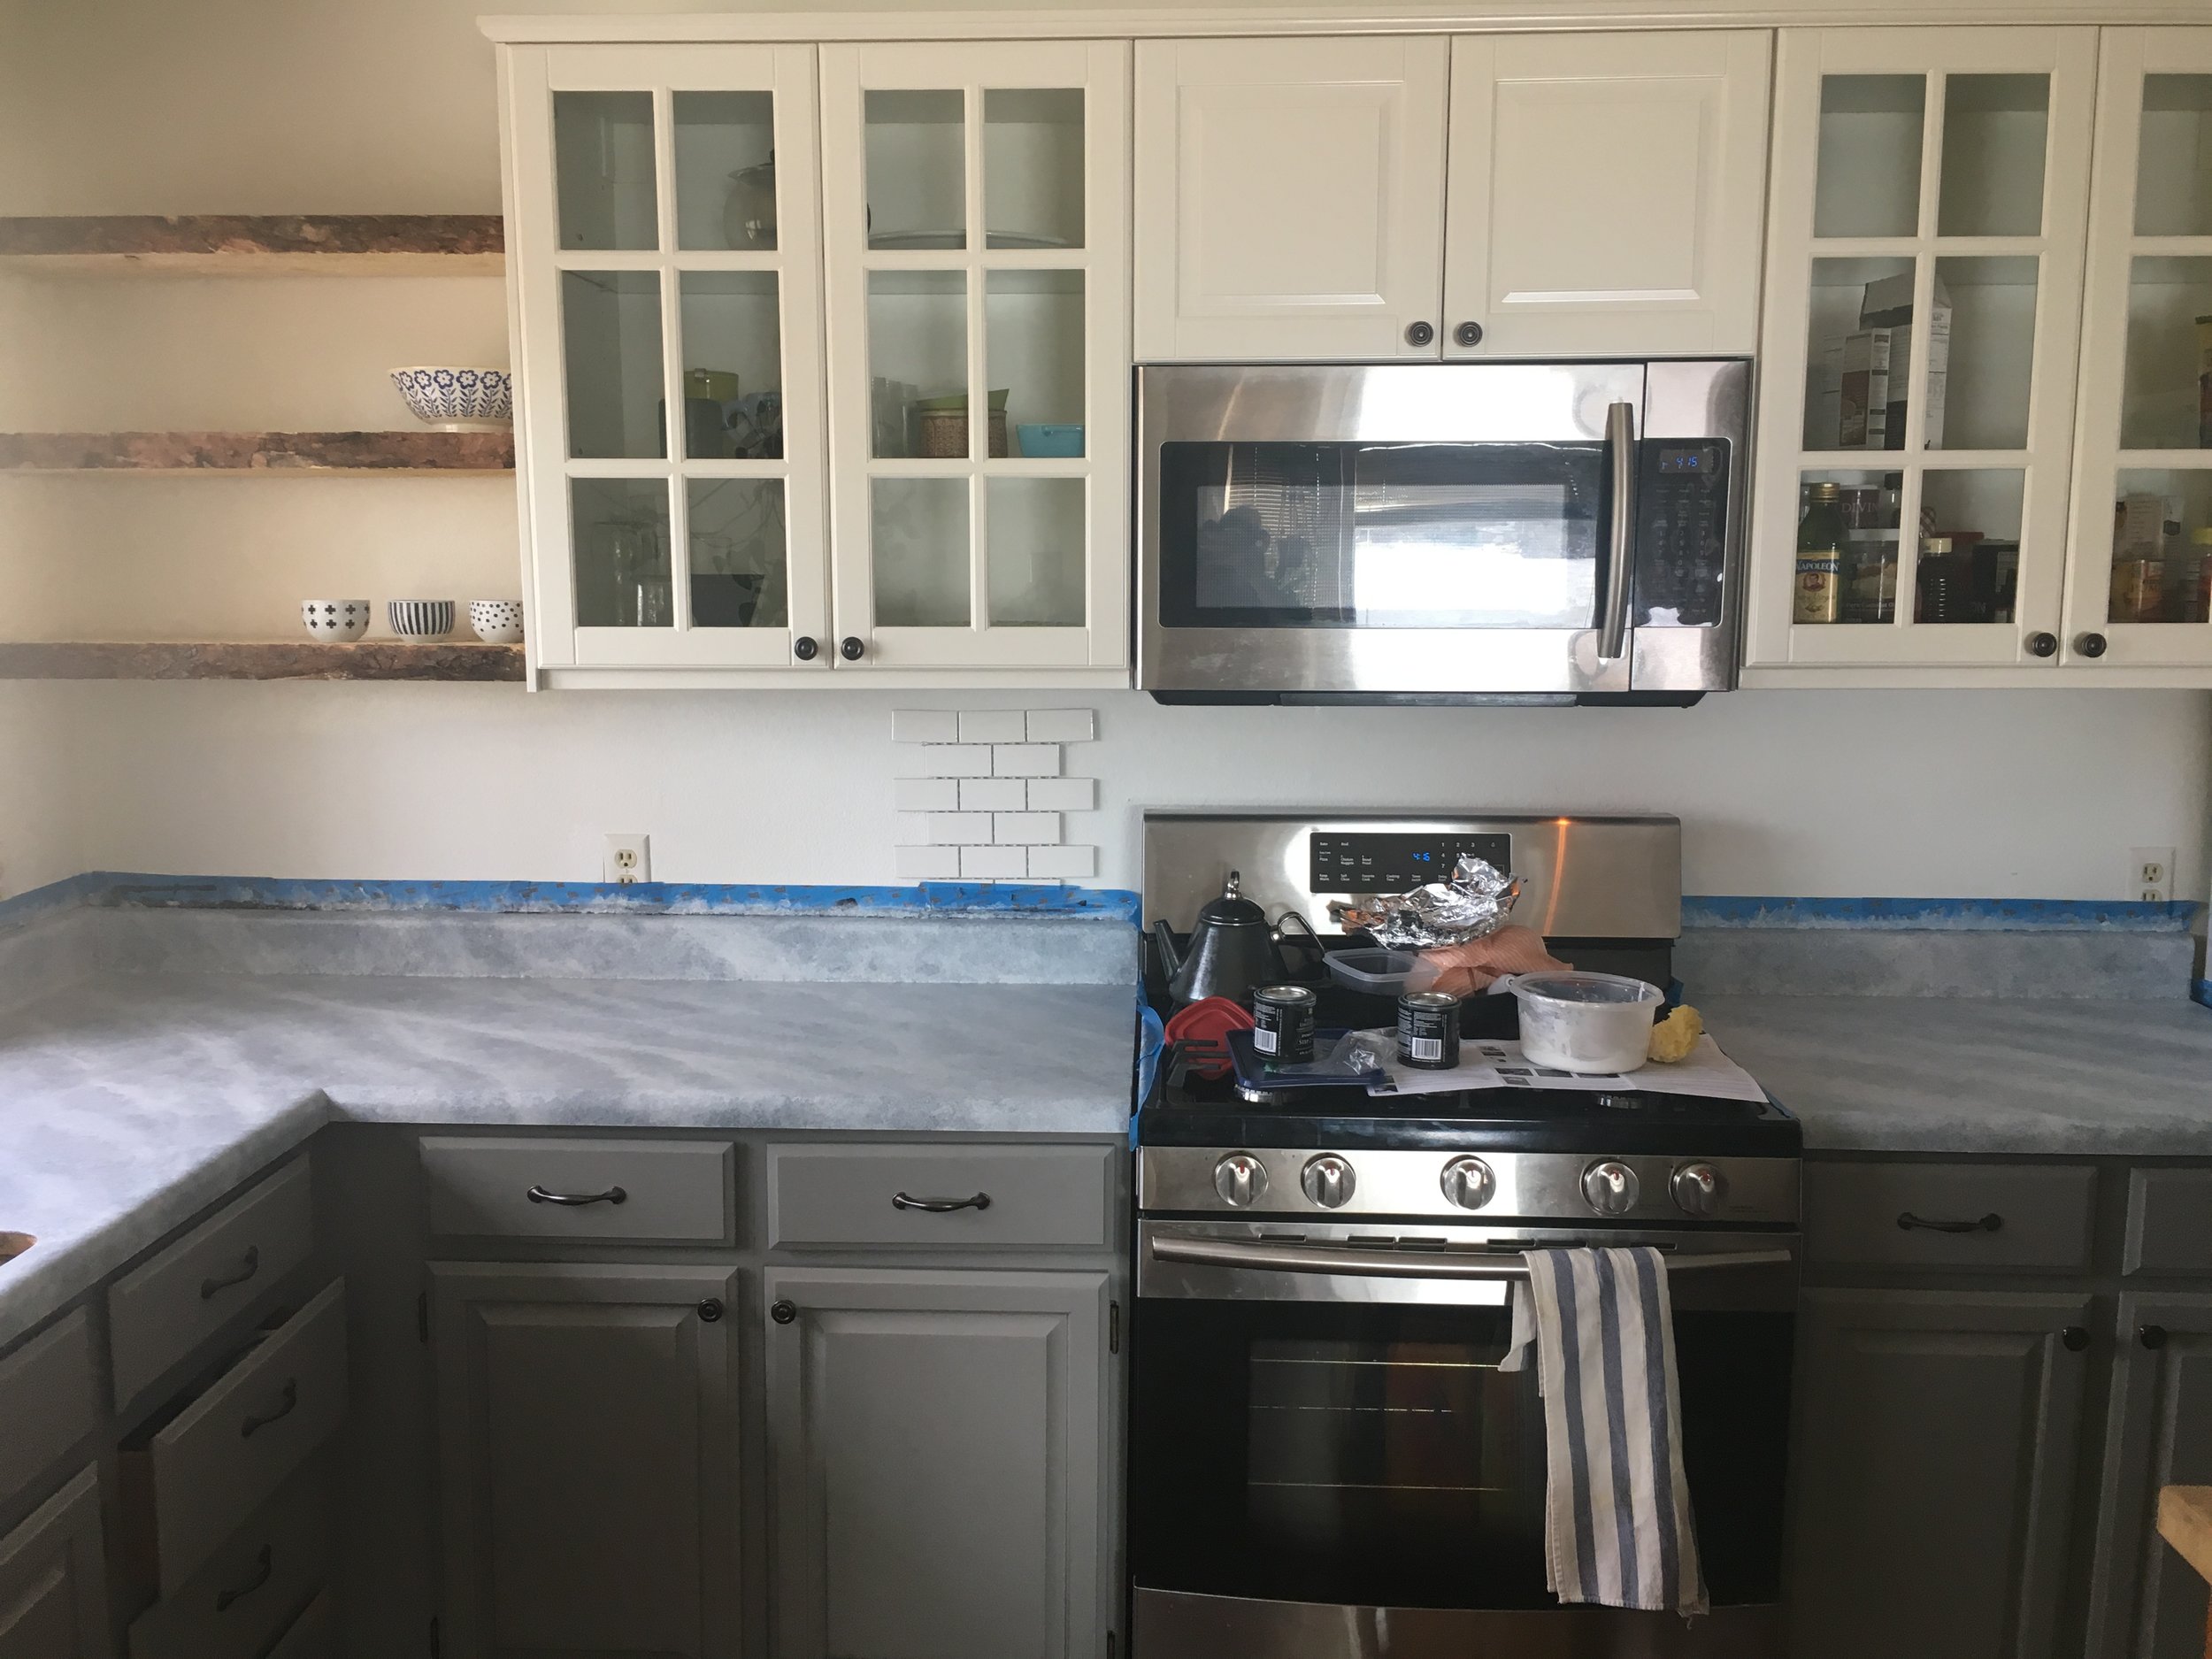


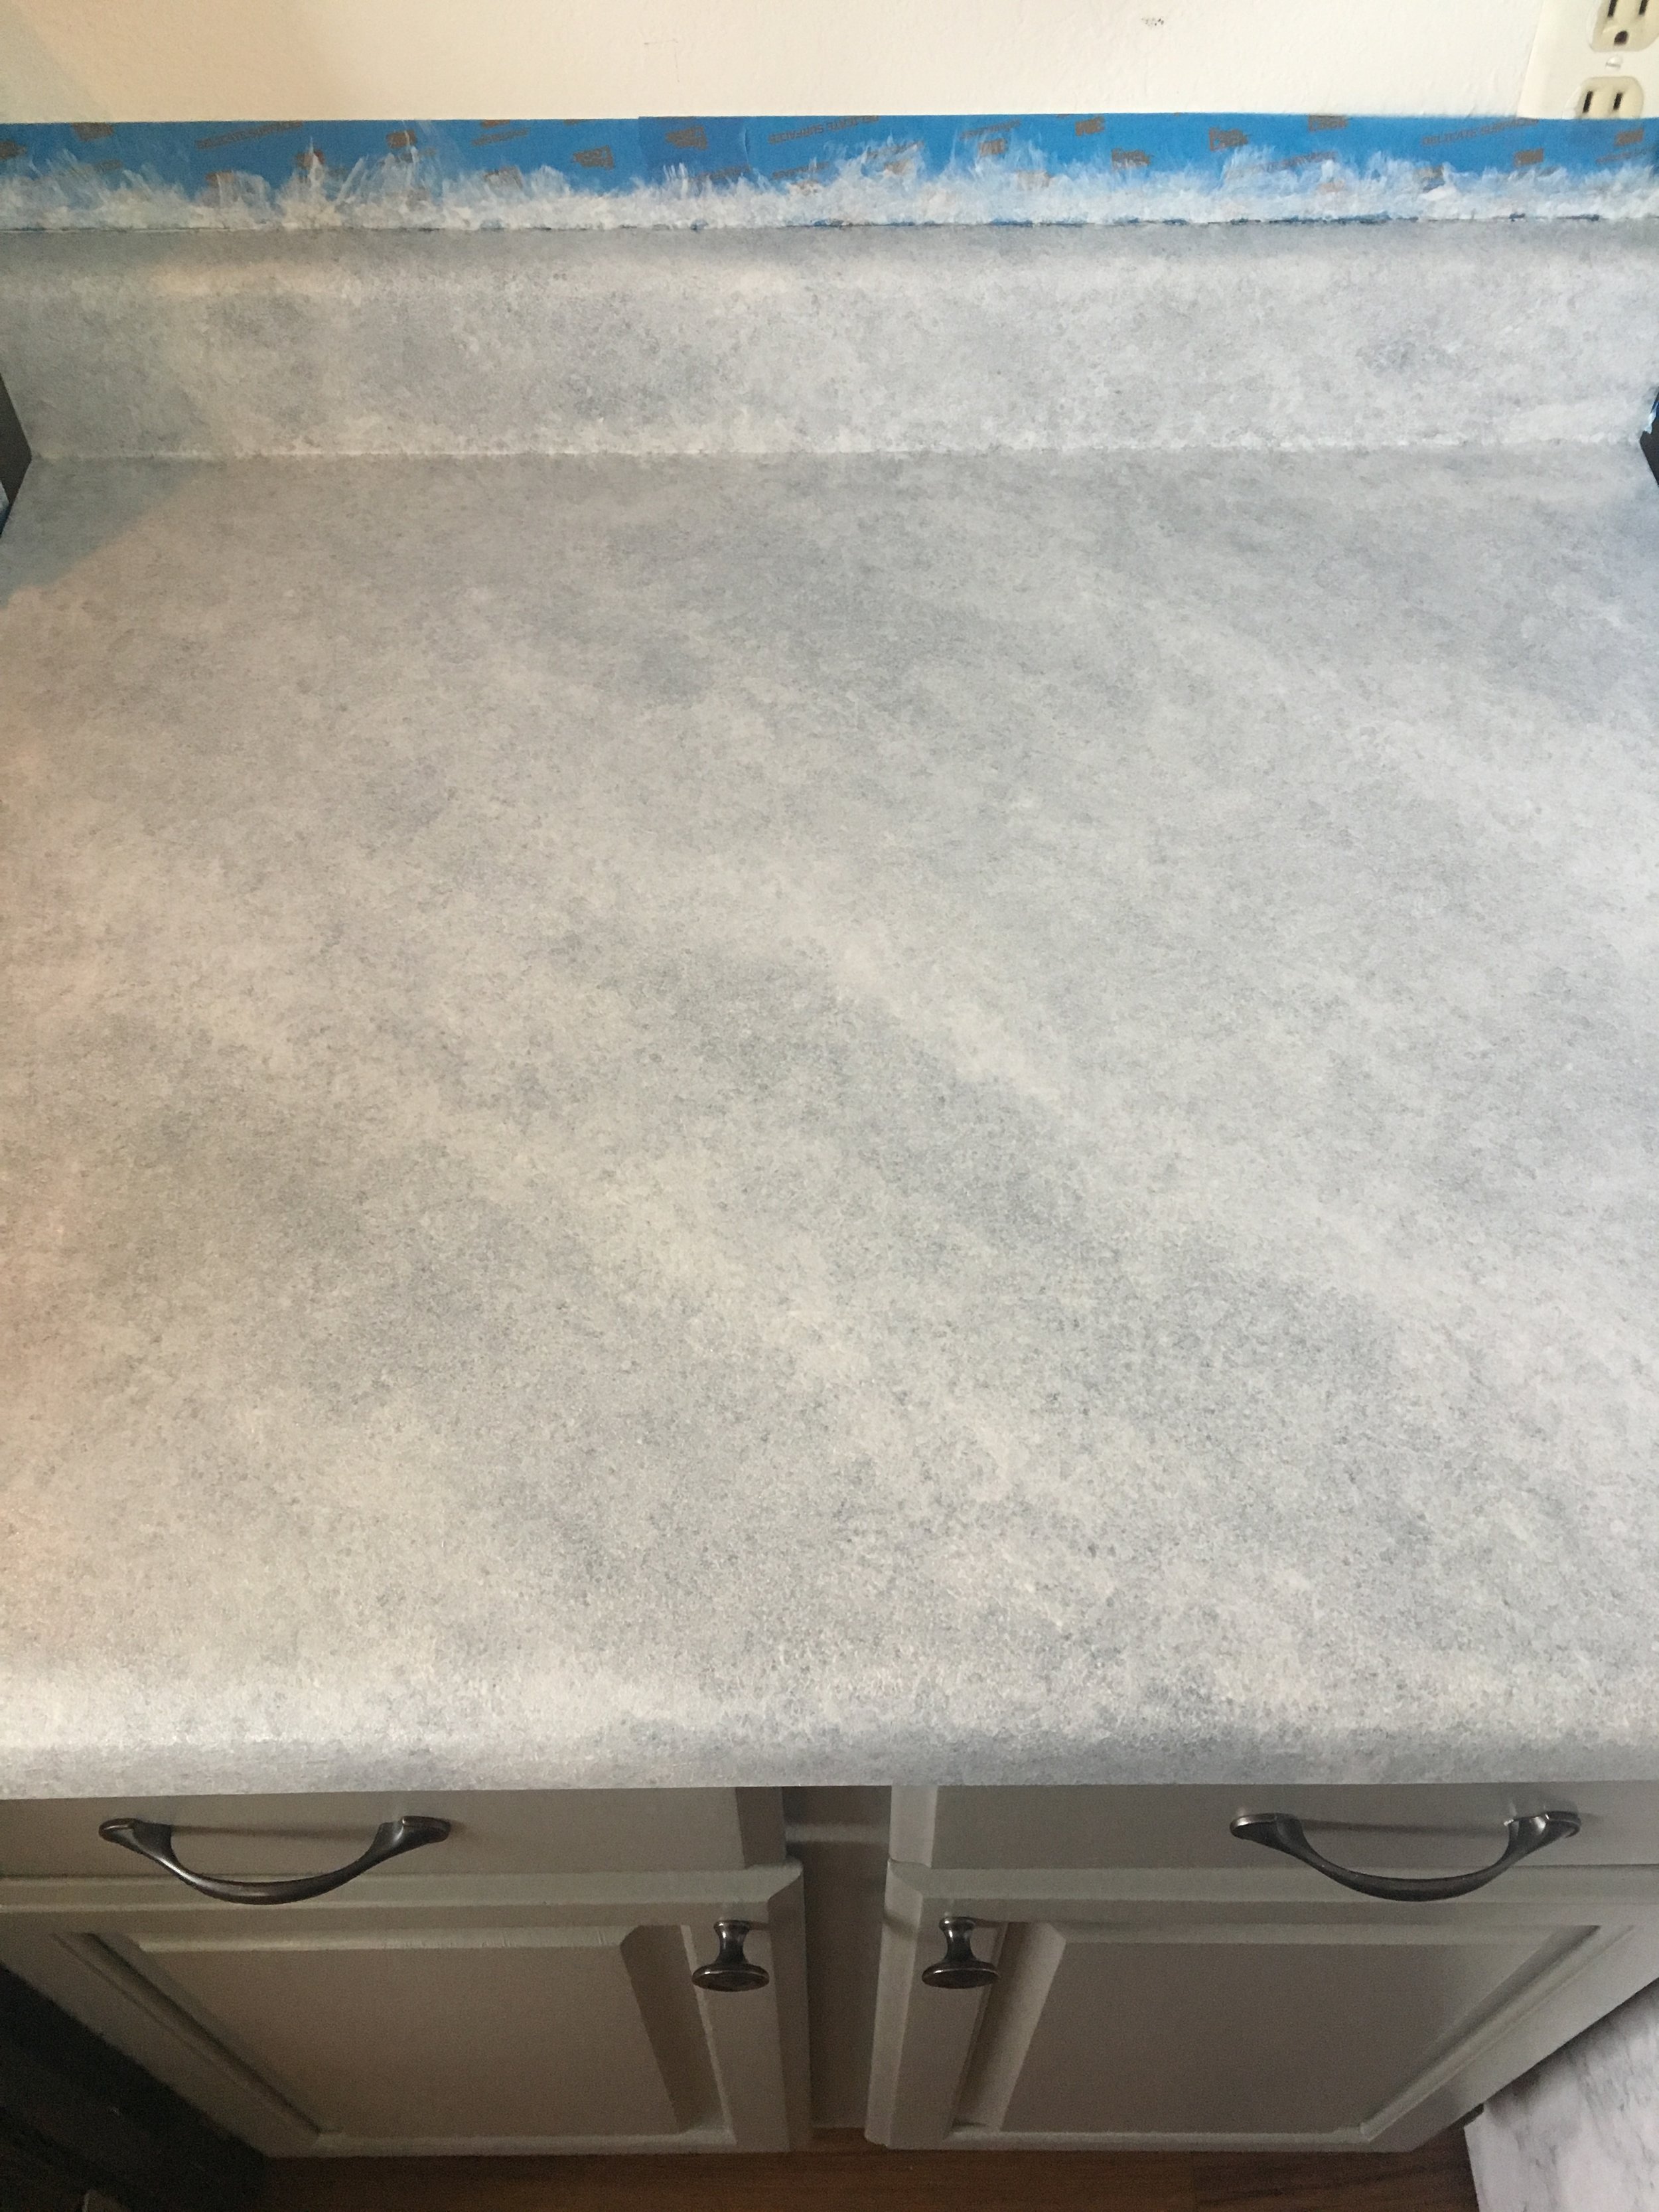

The top coat gets rolled on and goes on in 2-3 layers. You don't want to put anything heavy on the counter for a couple days and it cures fully in 2 weeks. In terms of durability, it's not the greatest (that being said, I didn't use only the countertop paint, I did those top couple layers of white with non-countertop paint, so I'm not sure about what the durability would be if I only used the kit). I can tell that if I scratched it with something hard or metal, it'd probably put a gouge in the paint. We had an electrician come in to fix our outlets and he totally scratched through the paint somehow (I think he leaned against the counter with like tools on his belt or something), so that was a bummer, and it does stain if you're not careful. We have an espresso machine and over by that we already have a couple small yellow-ish coffee stains. I bet wine and certain spices would also stain it. We use our butcher block island for most food prep stuff that might be staining.
If you're looking for a stop-gap that's a cheap (but a bit time-consuming) way to get the look you want until you can afford getting real marble (or real faux marble) counters, this is definitely a way to do it. If you're super rough on your counters, this might not be a great solution. It'll work for us for the time being though! You can wipe them down easily, they just recommend not using any harsh chemicals and not scrubbing super hard.
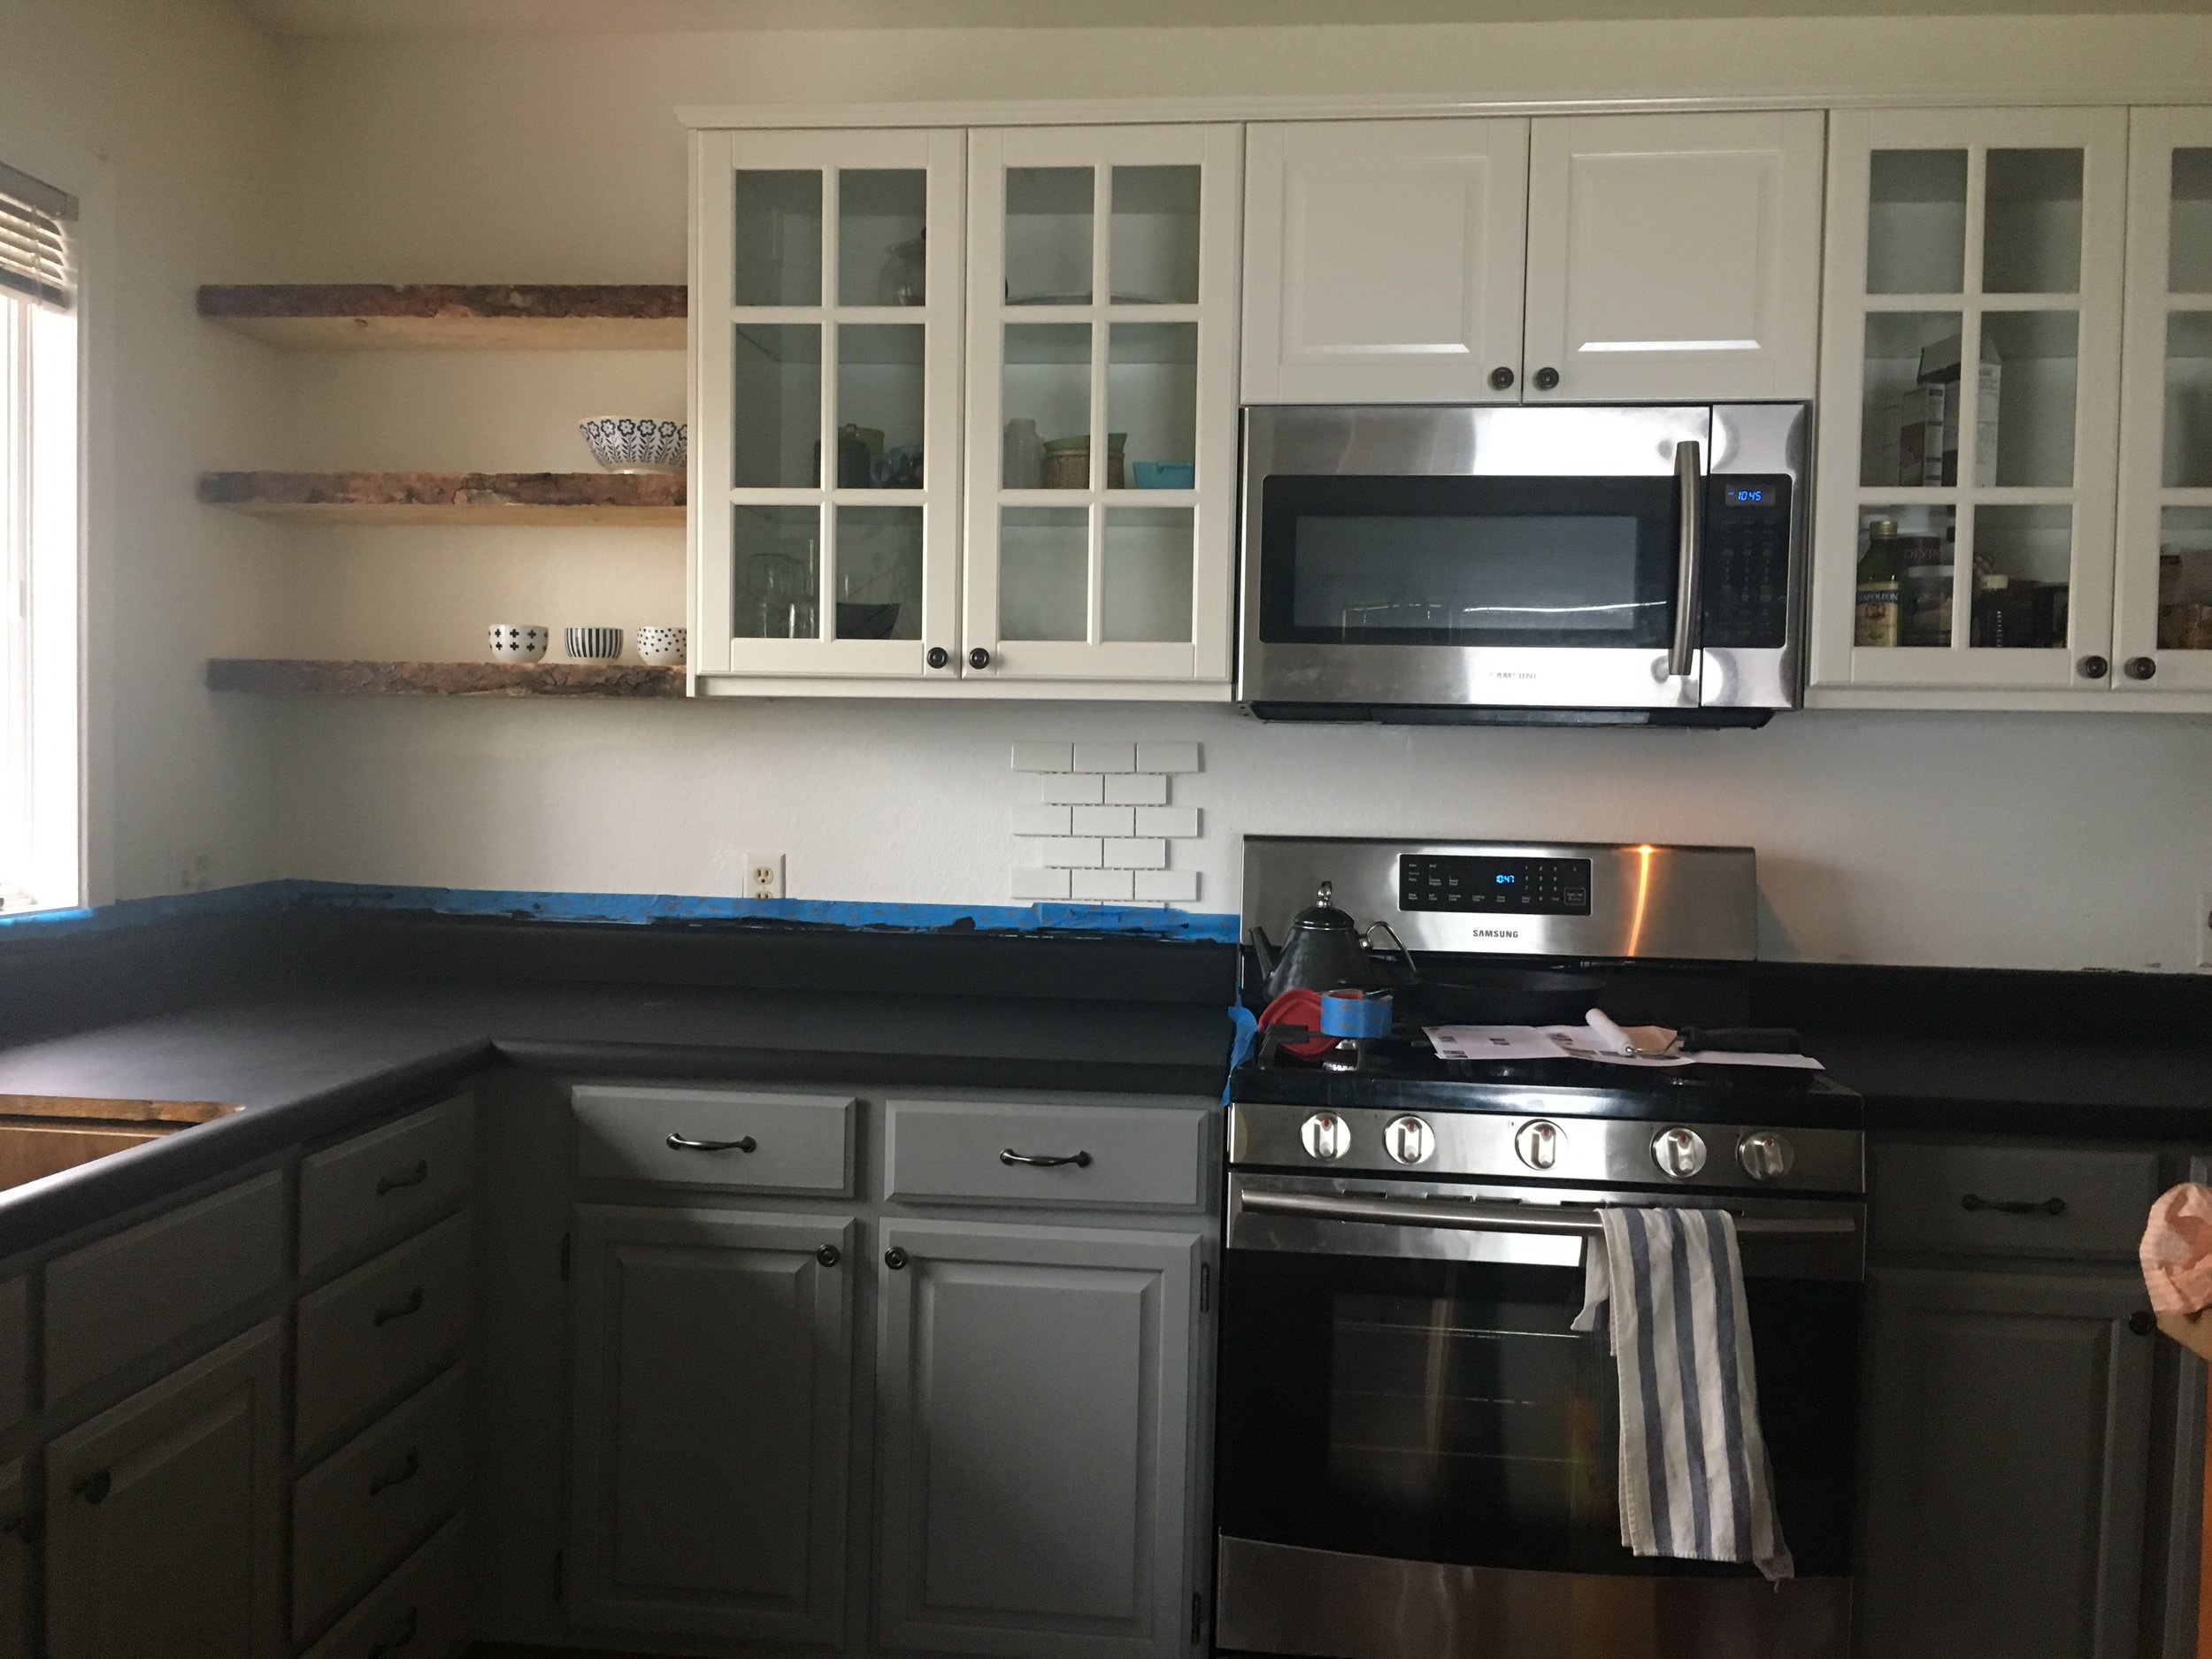
I used one whole kit (plus 2 extra white limestone cans) and we have about 15 feet of counters. Here's what she looks like before. Kind of dingy, off-white, ivory:

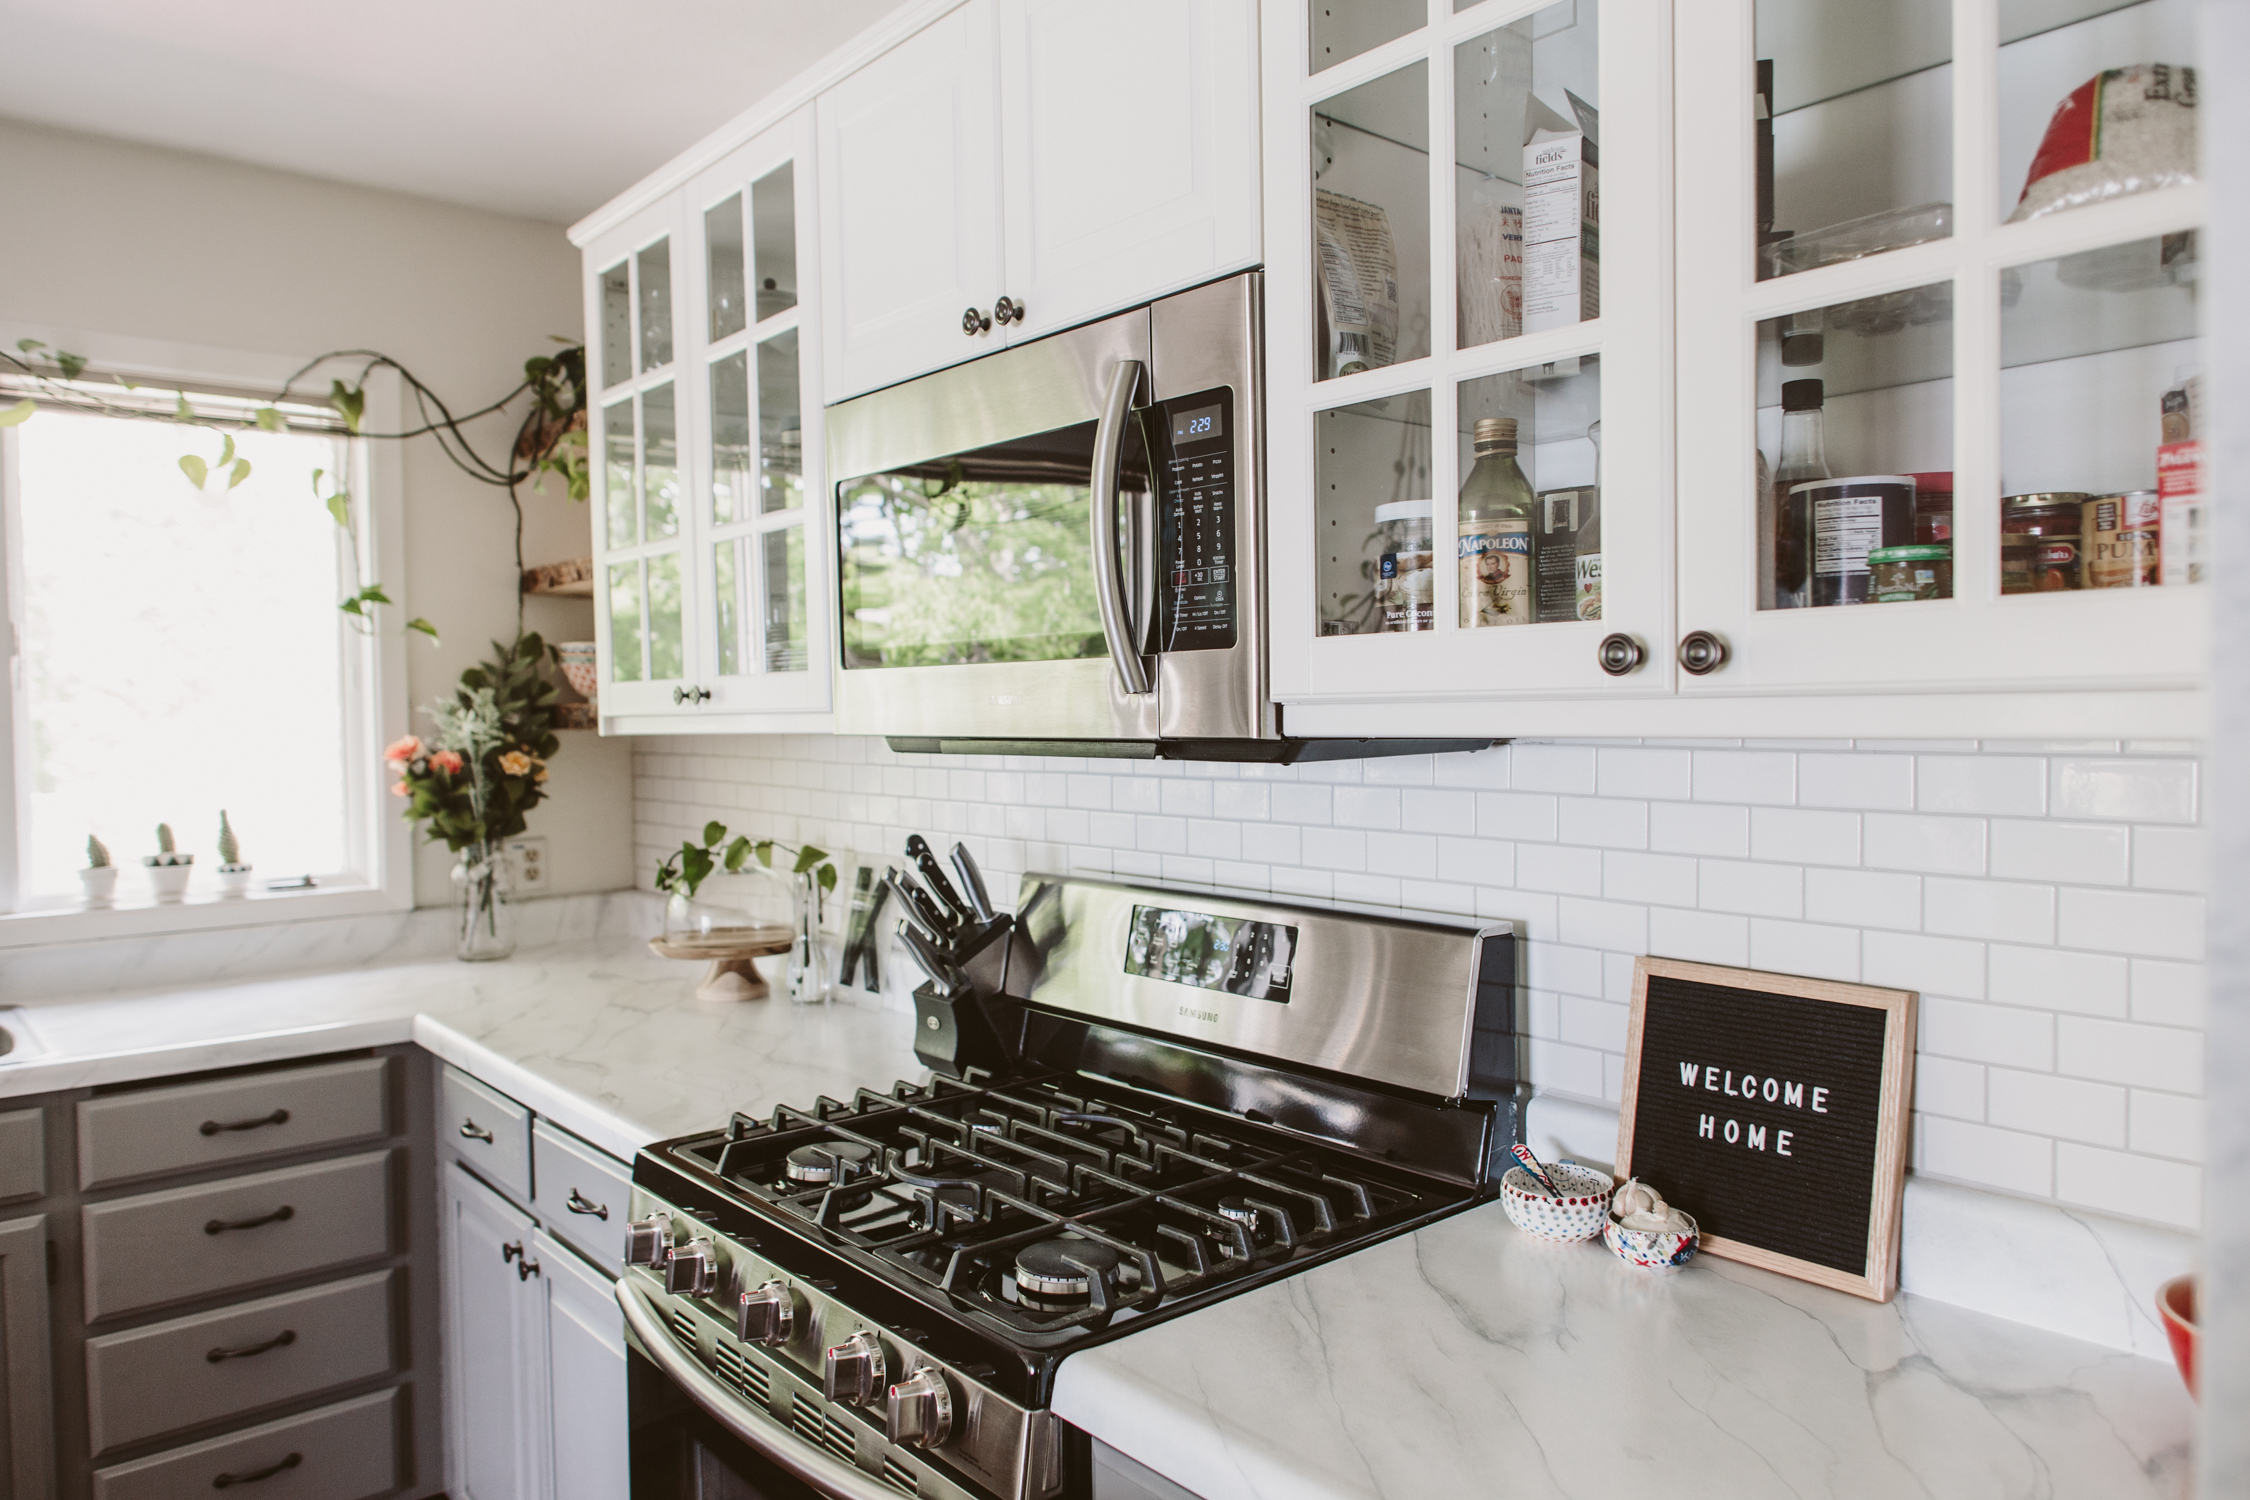
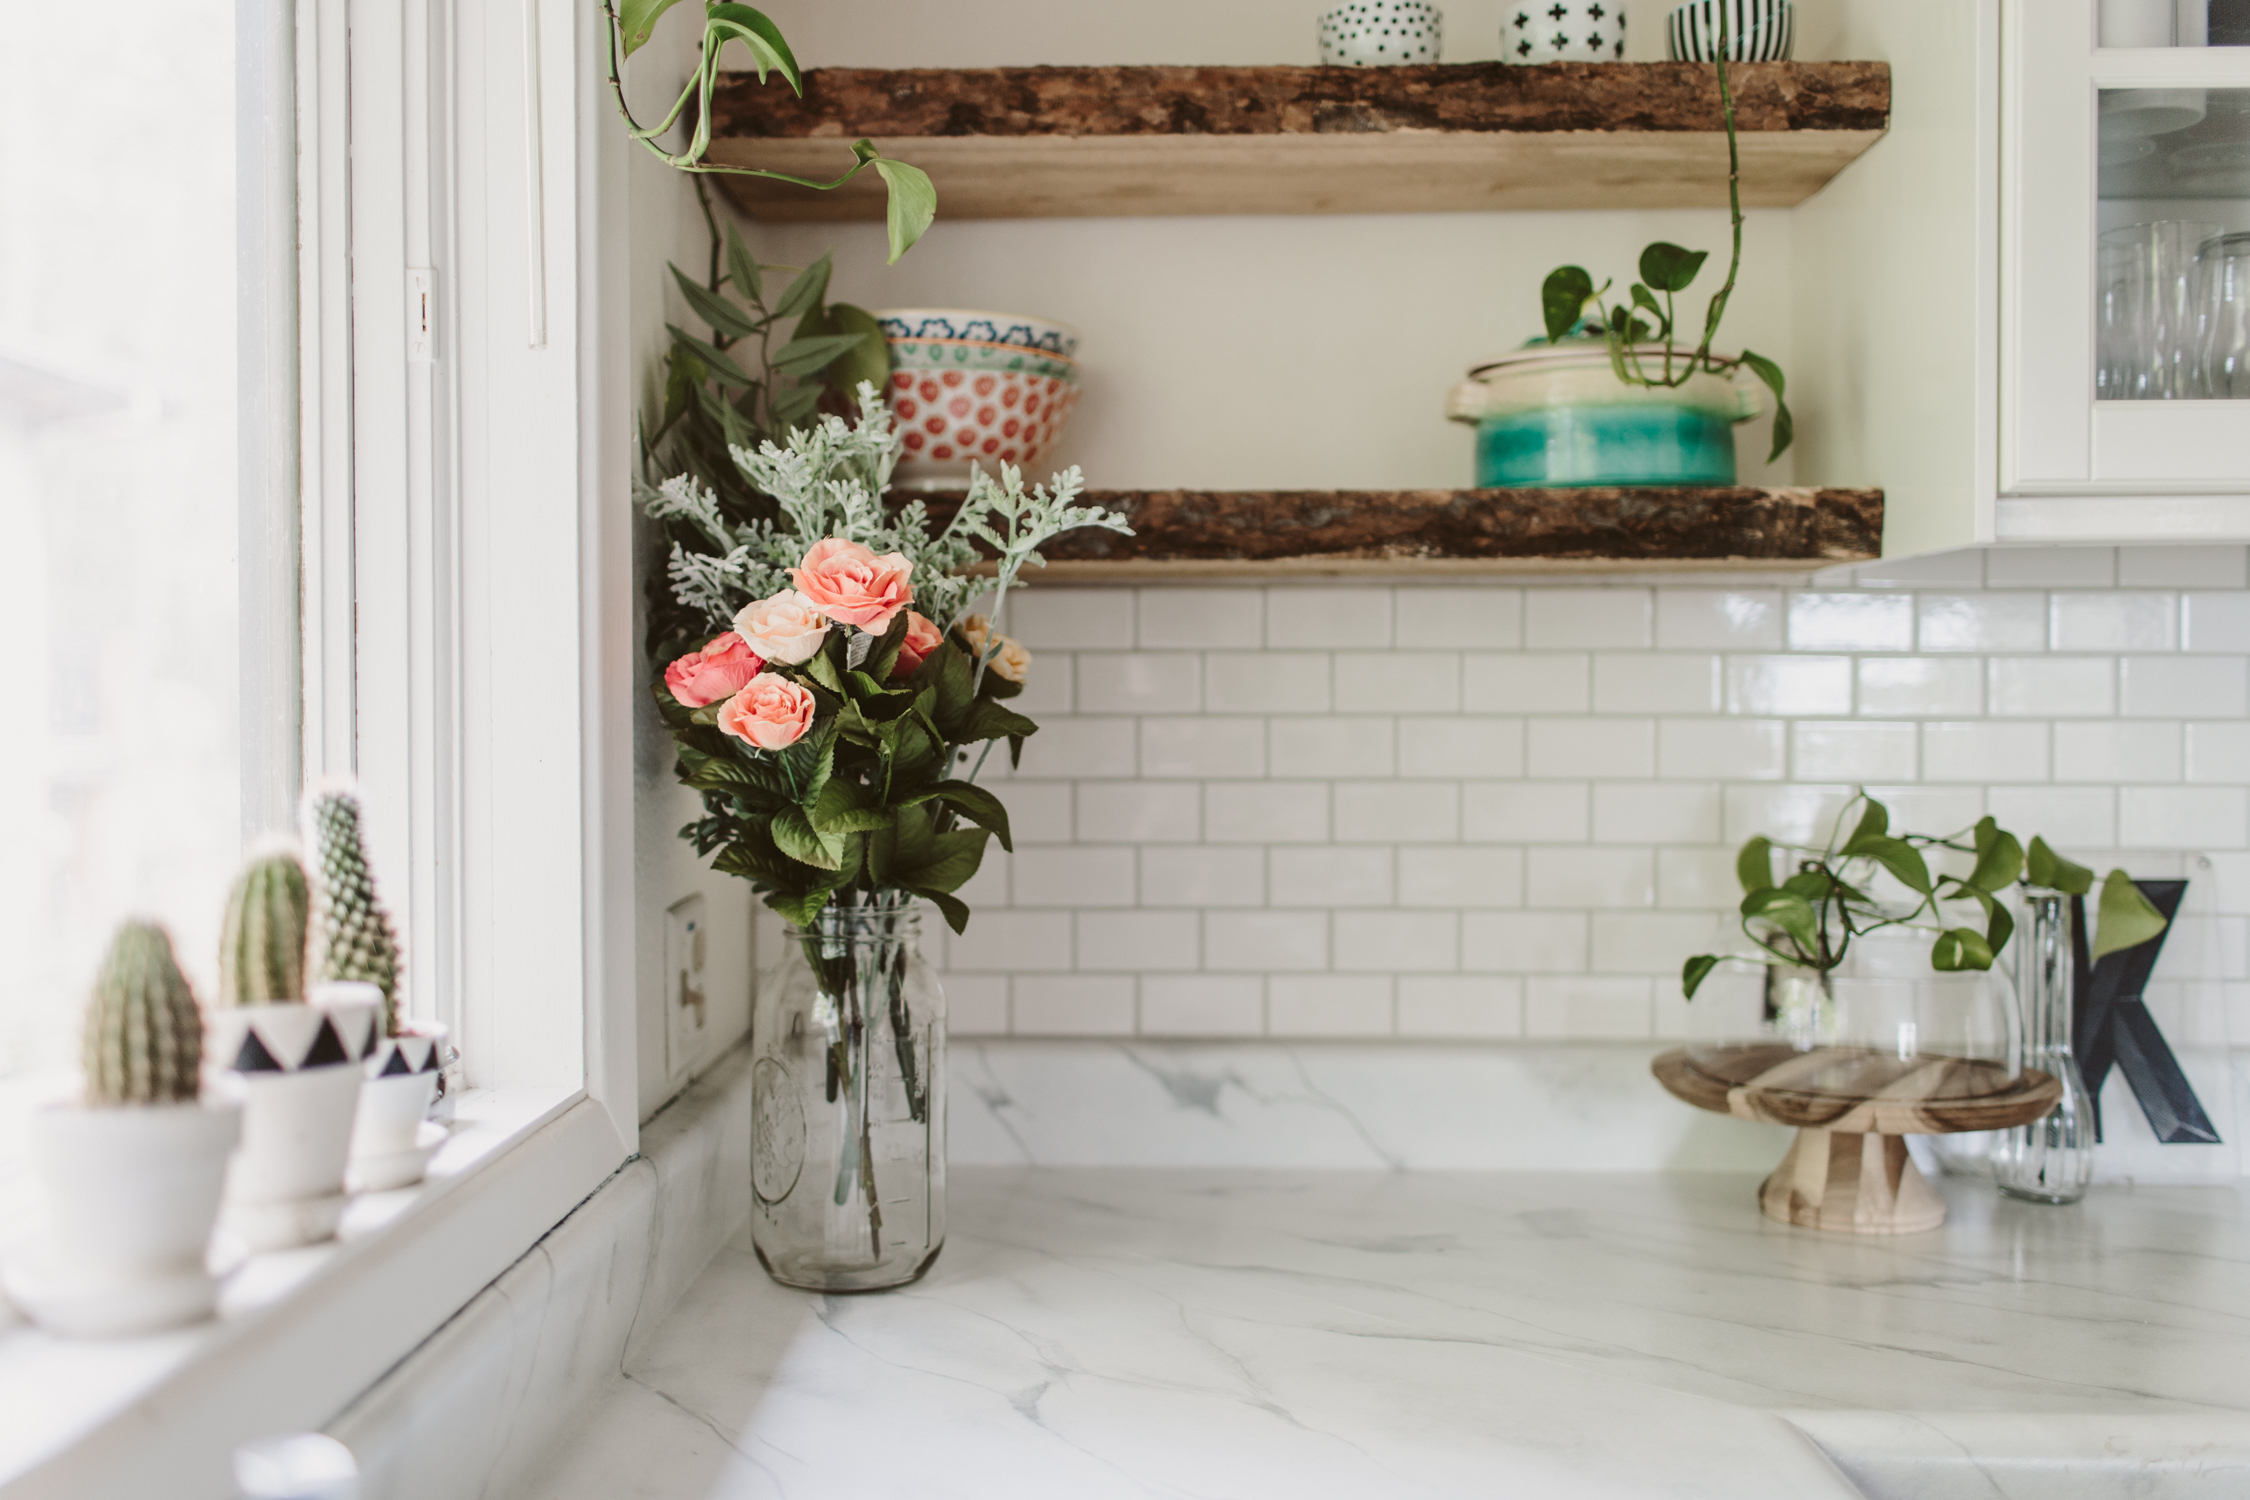
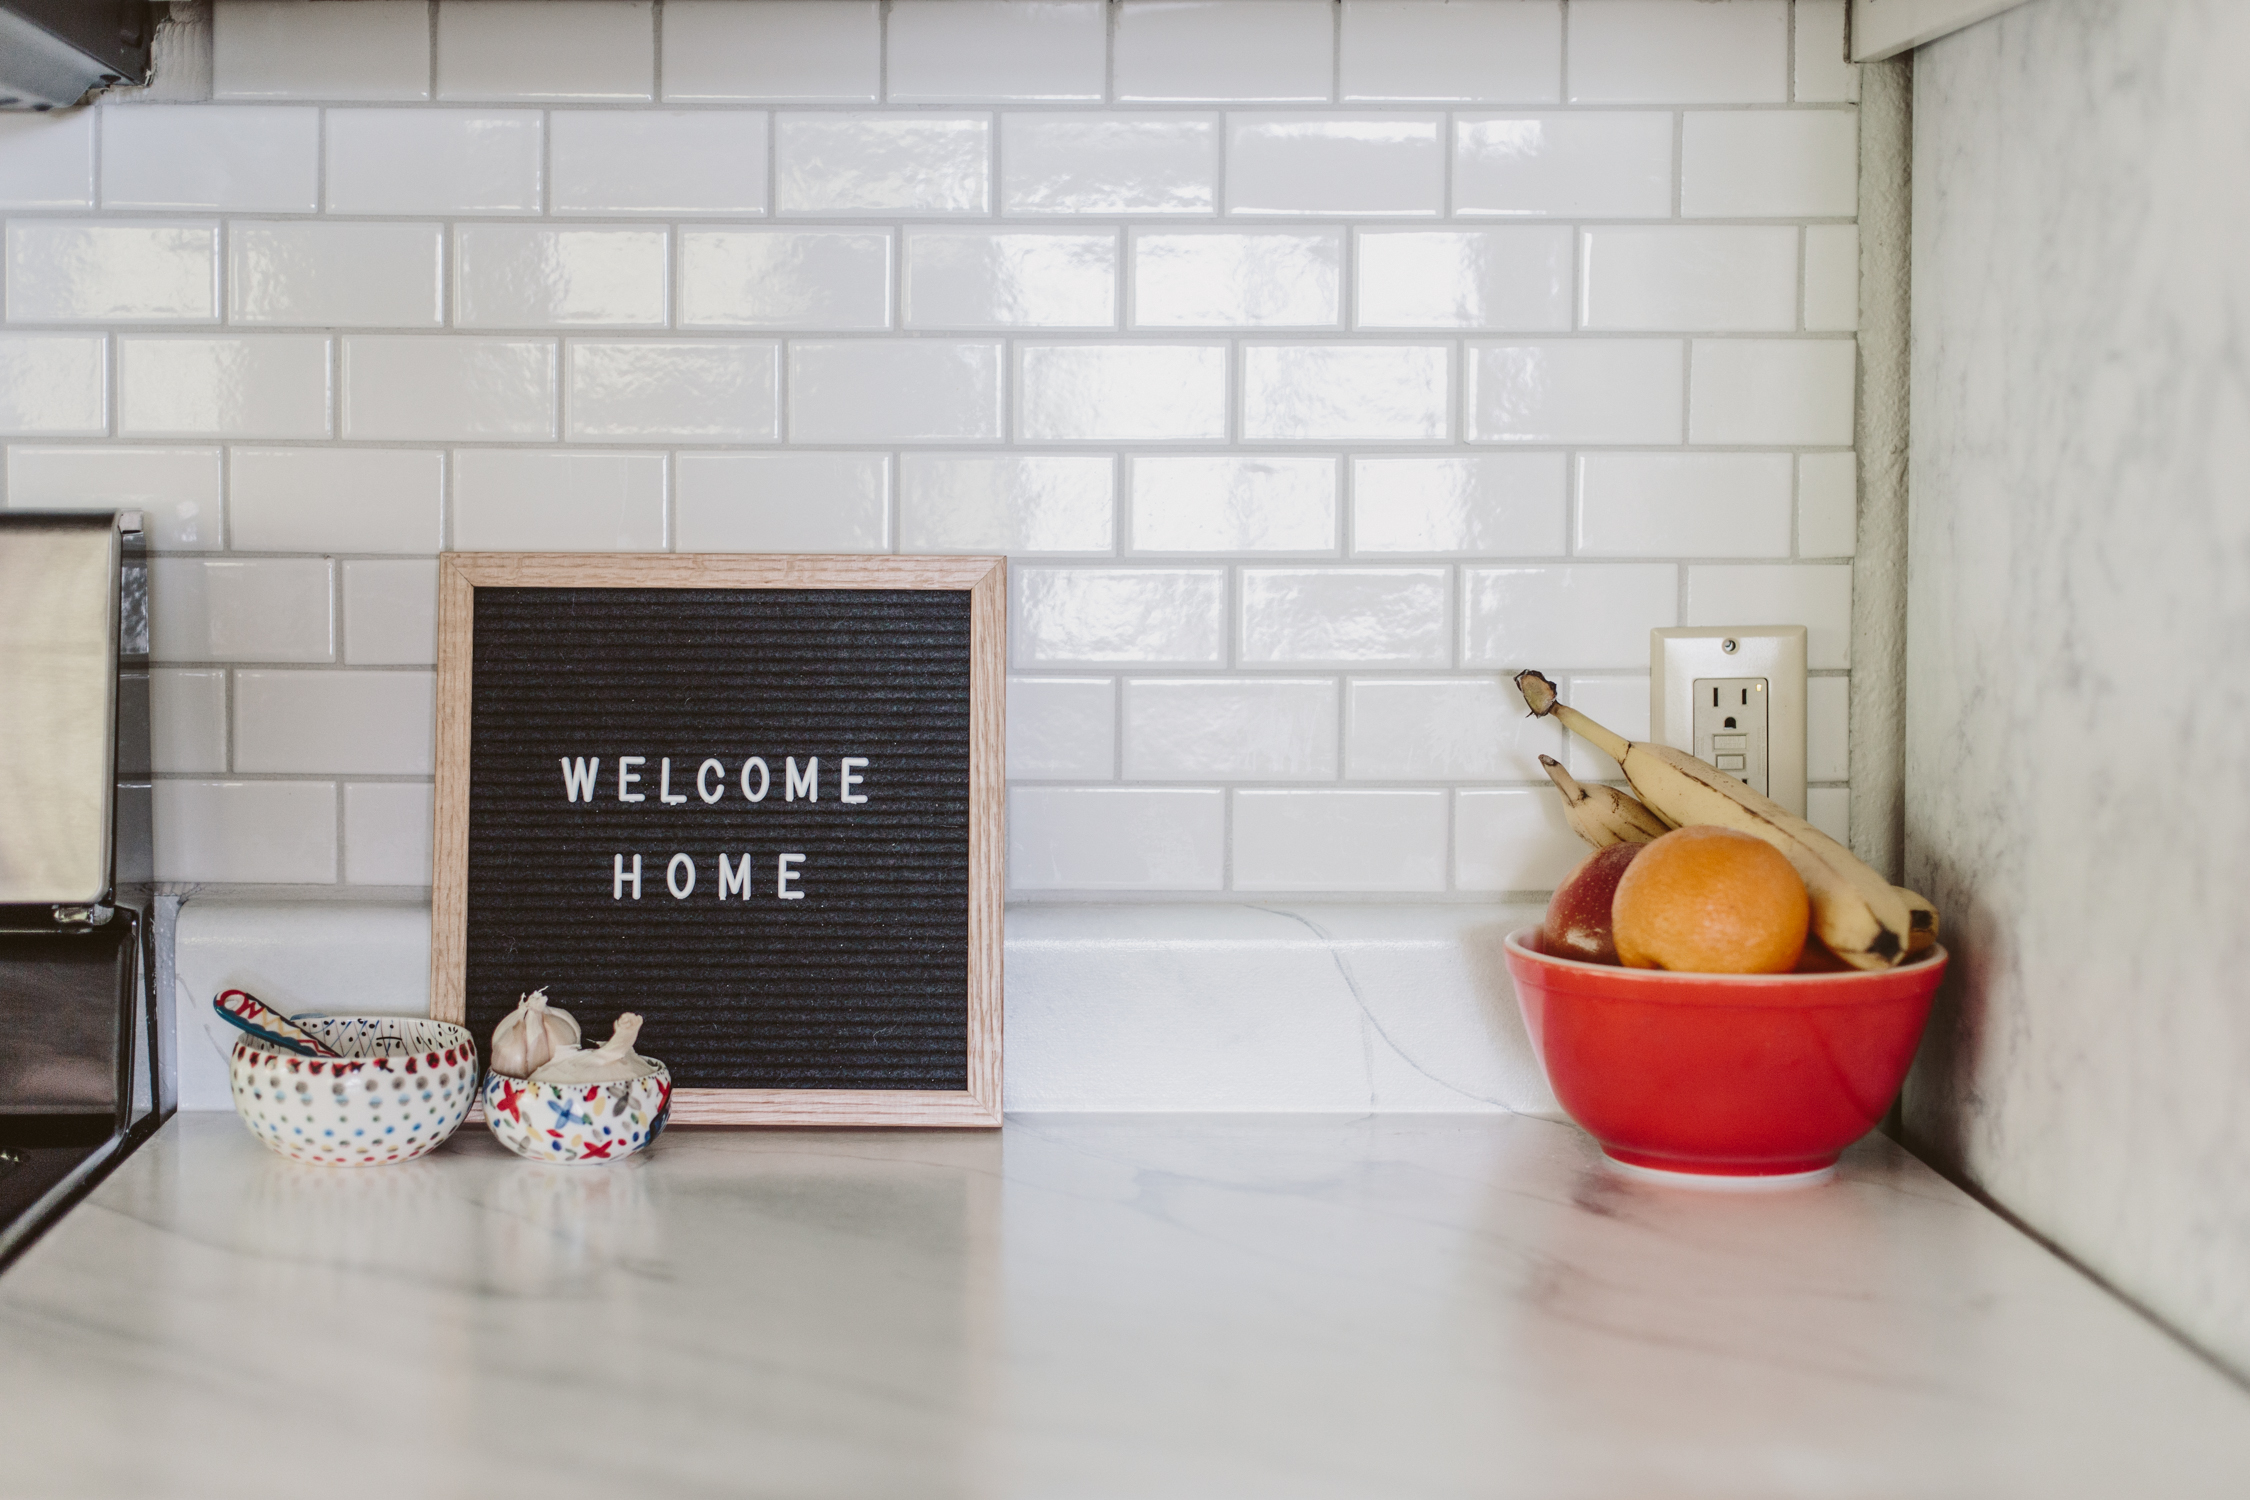
And after! Crisp, white, and fresh!:


![This print feels even more relevant today. We all joke about the dumpster fire of [insert year here], but the important message of this image to me is that *we persist* through the horrors. We stand, we fight— maybe for ourselves, maybe for oth](https://images.squarespace-cdn.com/content/v1/574dddd6d51cd4bc35c1609a/1730935170369-03GPKQ5NF73VAE65RHO6/image-asset.jpeg)


