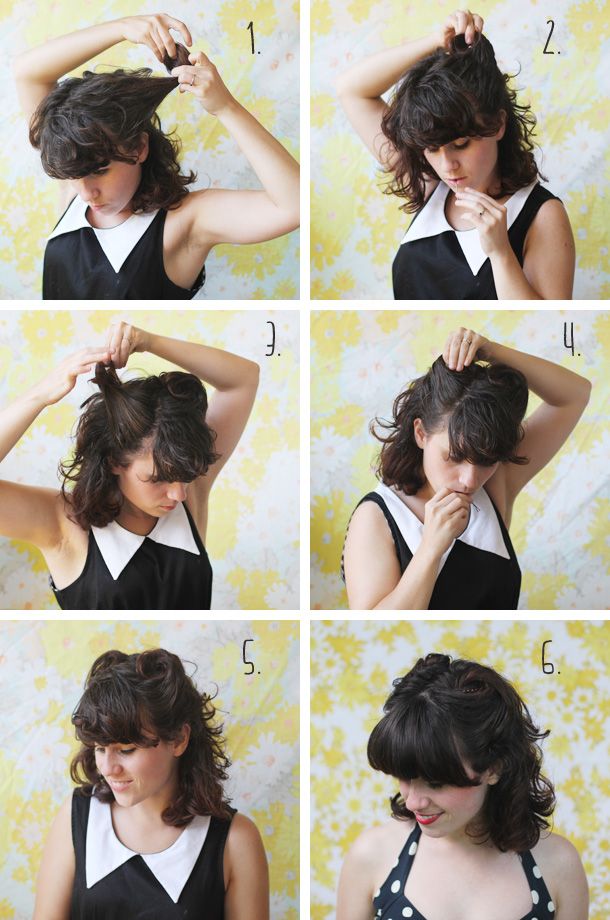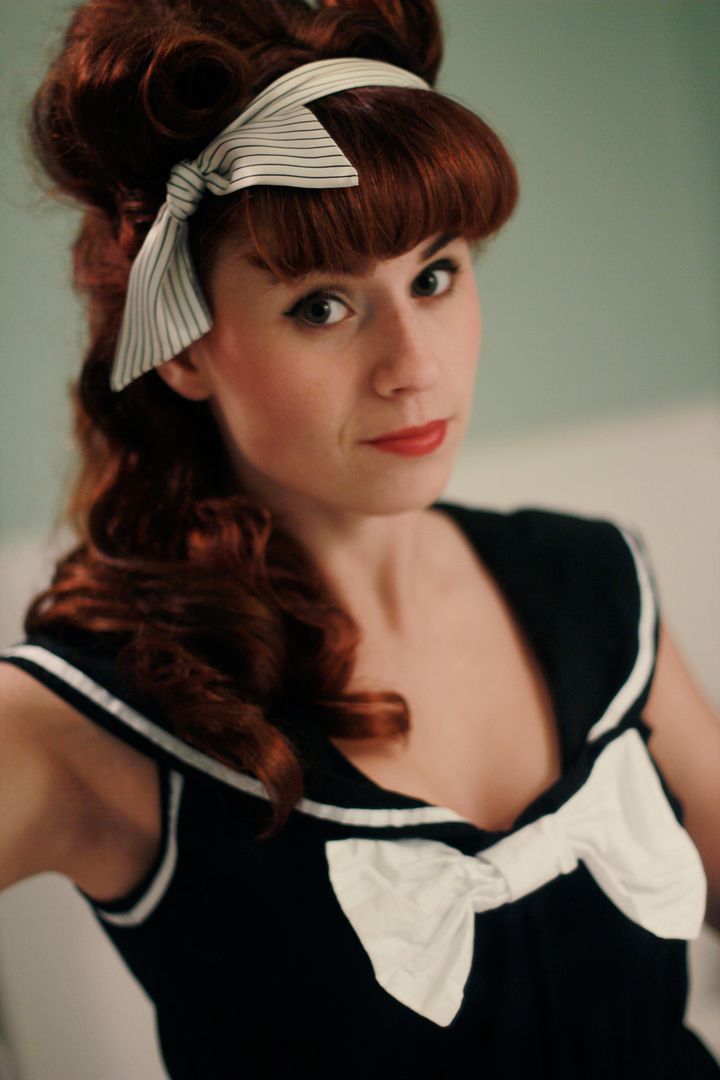
I love how easy these victory rolls are, and you can make them more or less fancy, depending on the look you're going for. For a more casual look, like the rolls in this tutorial, I don't straighten my hair or curl the rolls with a curling iron. If you want to make them more polished and pin-up-esque, you can make them stand more upright, rather than flat against the head, as in the last photo. This style is nice because it works on both long and shorter hair. I loved doing this when my hair was longer, and was excited when I realized I could do it with short hair! It's nice for those days when I just want my hair out of my face, but don't want to throw my hair in a ponytail.

1. Part your hair down the middle and separate the front 1/2 to 1/3 on one side.
2. Take the tip of your hair and roll it back on itself towards your scalp until you get to your head. Secure with a couple bobby pins.
3. Repeat on the other side and...
4. secure with a couple more bobby pins.
5. Ta-da! Super easy.
6. These ones were a tiny bit more polished, as I straightened my bangs and the hair I put into the roll, but still pinned them down against my head for a more casual look. Here's a picture of a really nice, polished, yet casual, victory roll 'do. Or if you wanna go full-on pin-up you can go for the victory rolls like below! If you want more inspiration, just google "victory rolls," tons of great vintage hair ideas!


![This print feels even more relevant today. We all joke about the dumpster fire of [insert year here], but the important message of this image to me is that *we persist* through the horrors. We stand, we fight— maybe for ourselves, maybe for oth](https://images.squarespace-cdn.com/content/v1/574dddd6d51cd4bc35c1609a/1730935170369-03GPKQ5NF73VAE65RHO6/image-asset.jpeg)


